
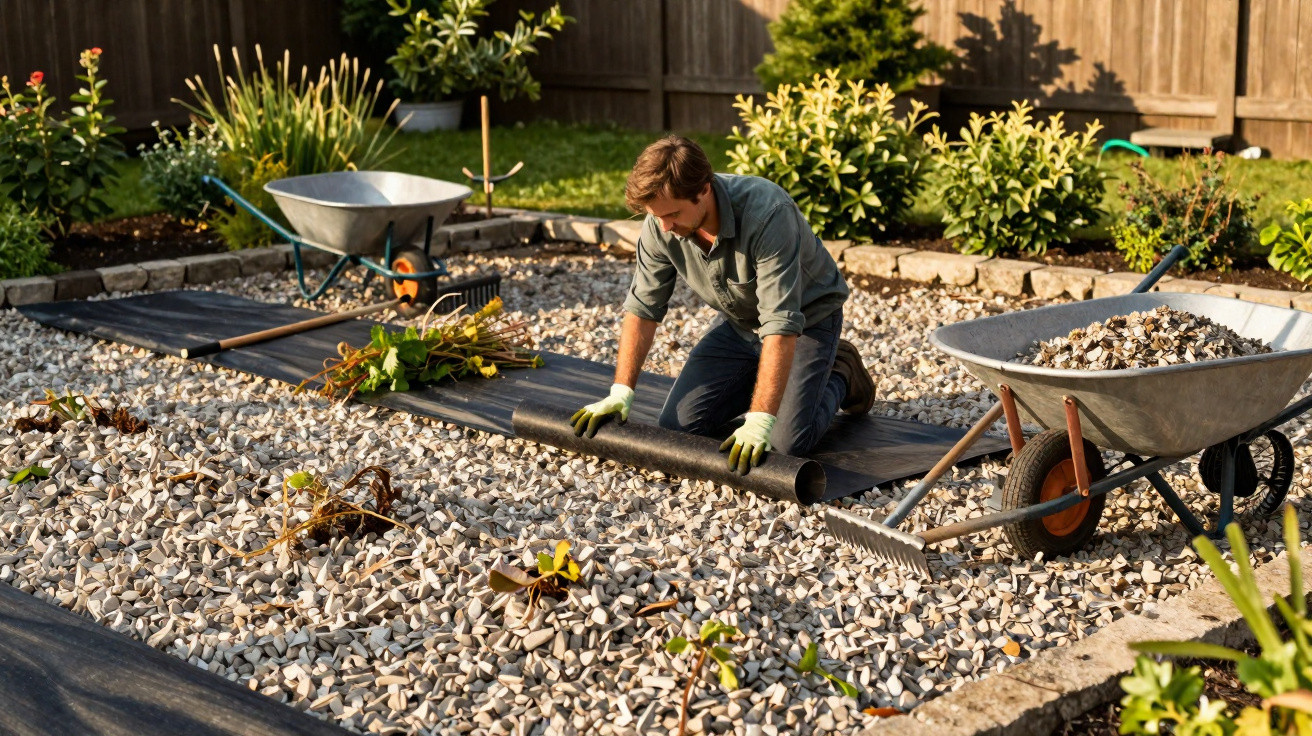
Many amateur gardeners despair over weeds in gravel, but a straightforward professional technique from landscape gardening promises lasting relief.
A well-kept gravel path looks elegant, contemporary and tidy. Yet after only a few weeks, greenery starts pushing up between the stones again, and the frustration returns. Rather than constantly weeding or reaching for chemical weedkillers, landscape gardeners have long relied on a solution that is rarely used consistently in home gardens.
Why so many weeds grow in gravel
At first glance, gravel appears to be a natural barrier against unwanted growth. In reality, it only works to a limited extent. What matters is both the ground beneath it and what arrives from above.
- Wind-blown seeds: Wind, birds and small animals continually carry fresh seeds into the gaps between the stones.
- Nutrient-rich soil: When loose, fertile soil sits beneath the gravel, seeds find ideal conditions for germination.
- Moisture: Gravel retains moisture and prevents the soil from drying out, creating ideal conditions for seedlings.
This creates a small, sheltered habitat. Even a deep layer of gravel may then be unable to stop plants taking hold. Growth is particularly rapid where leaves are left to collect or soil is washed in.
“Anyone who weeds only at the surface of the gravel is tackling the symptoms, not the cause below the surface.”
The professional solution: geotextile as an invisible barrier layer
For paths, driveways and terrace edging, landscape gardeners follow a clear approach: first they prepare the ground, then install geotextile, and only afterwards add gravel or chippings.
Geotextile is a man-made sheet, usually made from a fleece-like material. Water can drain through it, while plant roots are blocked. The layer acts like a filter: moisture reaches the subsoil, but vegetation cannot grow upwards.
How to rebuild a gravel area correctly
Anyone wanting to thoroughly restore the area should work through the process step by step. It involves some effort, but avoids years of frustration with a hoe.
Clear the area completely
Remove every plant, including its roots. Take away the existing gravel layer if it is heavily mixed with soil and root debris.Level and compact the ground
Smooth out uneven areas and dig out stones or root fragments. Then compact the sub-base using a hand tamper or vibrating plate, so that dips do not develop later.Lay the geotextile
Roll out the sheets with an overlap of at least 10 centimetres. Fit them neatly around edges and borders, securing them with ground staples or stones where necessary so they cannot shift.Add the gravel
Spread a layer at least 5 centimetres deep, preferably 7–8 centimetres. This keeps the geotextile securely covered and protects it from UV light.
This construction reliably prevents most shoots from emerging. Seeds that settle directly on top of the gravel can still appear occasionally, but they grow much more slowly and can be pulled out easily.
“With geotextile beneath the gravel, weeds become the exception rather than a constant problem.”
Natural methods for existing gravel areas
Those who do not want to rebuild the entire area can use simple household remedies. They do not replace a barrier layer, but can help with day-to-day maintenance.
Heat and household methods
Boiling water
Pour it directly over the plants. The heat destroys leaf and root cells. It is ideal for small areas or gaps, for example close to a terrace.Vinegar solution
Spray diluted vinegar precisely onto emerging plants. The leaves dry out and the plant dies. Keep it away from ornamental plants, as they react in the same way.Salt in minimal amounts
A little salt in isolated problem spots can weaken plants. Great restraint is needed, however, otherwise the soil may suffer in the long term.
These methods are suitable for targeted use rather than large areas. Anyone who has to repeat the work every week rarely saves time. In that case, the professional solution using geotextile is even more worthwhile.
Maintenance mistakes that encourage weeds in gravel
Certain habits make it especially easy for unwanted greenery to establish itself. Many are well intentioned, but cause problems over time.
Leaving fallen leaves in place
Autumn leaves gradually form a layer of humus. Seeds germinate even more quickly in this nutrient-rich mat.Using gravel as a storage area
Leaving prunings, old compost or root balls on the gravel, even briefly, can turn a path into a flower bed.Raking too rarely
If gravel is never disturbed, seedlings are left undisturbed. A quick pass with a rake disrupts young plants at an early stage.
“Regularly loosening the gravel works like a miniature hoe and stops many plants while they are still young.”
Keeping a new gravel area tidy over the long term
Once an area has been professionally constructed, only a manageable amount of maintenance is needed to keep it looking neat permanently.
Check it briefly once a week
Pull out individual shoots as soon as they appear, while they are still small. Five minutes of checking prevents a larger task later.Remove leaves and debris promptly
Clear leaves with a broom or leaf blower before they decompose. This prevents a fresh growing medium from forming.Top up the gravel after a few years
Foot traffic and weather gradually cause the material to settle. A thin top-up layer refreshes both its appearance and function.
When plants are more worthwhile than gravel
In areas that receive little foot traffic, ground-cover plants can provide an alternative or an addition. They cover bare ground, take away light and space, and make unwanted growth more difficult.
Suitable choices include low-growing cushion perennials or hardy herbs that tolerate dry conditions. Gravel can serve as a visual border between planted sections. This creates a more lively appearance, while paths remain clean thanks to geotextile.
Practical planning guidance
Before creating a new gravel area, it is worth considering a few points:
| Aspect | Question |
|---|---|
| Use | Will the area be walked on regularly or only occasionally? |
| Sub-base | Is the ground already compacted, or does a base need to be created first? |
| Water drainage | Where should rainwater drain, and does any water collect? |
| Appearance | Fine decorative gravel or coarse aggregate, single-coloured or mixed? |
For driveways carrying vehicle loads, an additional load-bearing layer of aggregate beneath the geotextile is advisable. This improves stability and prevents the gravel from spreading into wheel tracks.
Anyone with an existing gravel area that is heavily overrun with weeds can first try rebuilding a smaller section using the professional method, with a barrier layer and fresh gravel. This makes it possible to assess the effort, effect and appearance in everyday use realistically before rebuilding the entire garden path.

Comments
No comments yet. Be the first to comment!
Leave a Comment