
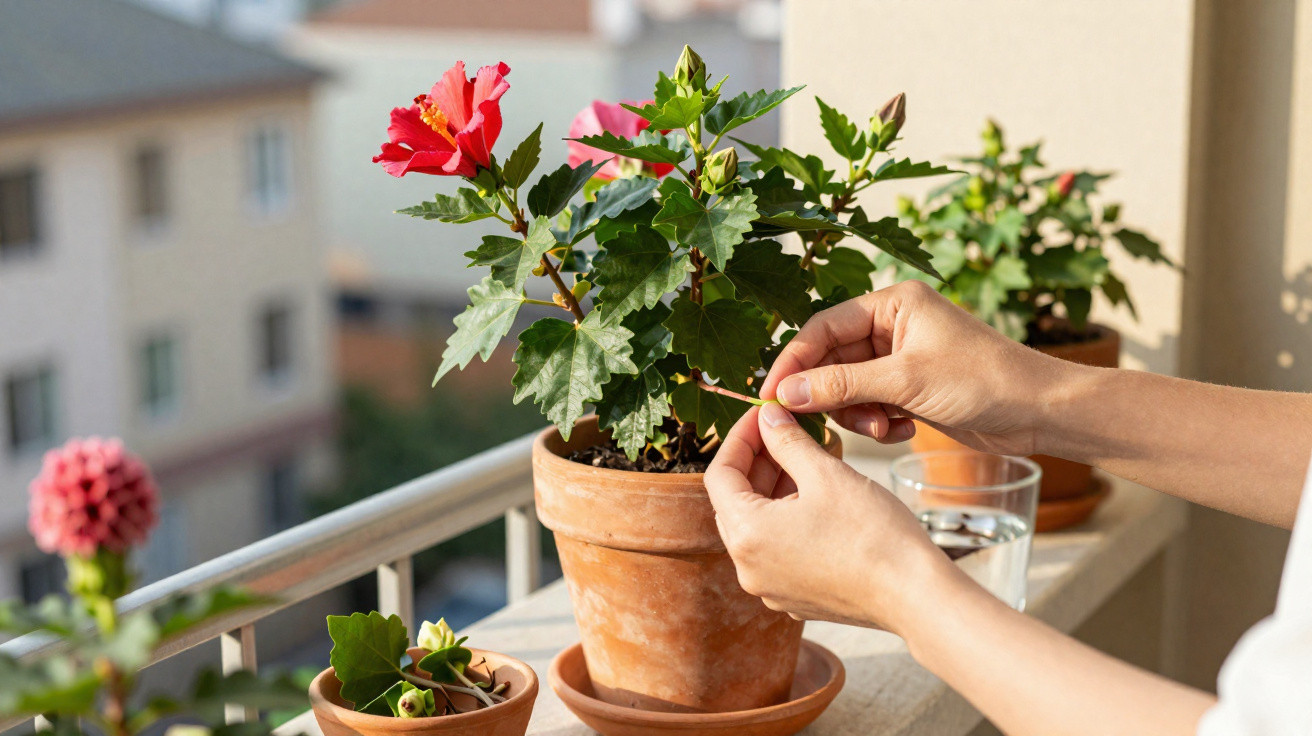
In late winter, hibiscus often looks rather forlorn: long, bare shoots and only a few flowers.
Yet one tiny task in March can completely transform it.
Many amateur gardeners will recognise the scene: the hibiscus reaches towards the window light, loses leaves near the base, and carries one or two tired-looking blooms at the top. Although it may seem like a problem plant, it is actually in the ideal condition for improvement. In early spring, a quick action at the shoot tips is enough to encourage the shrub to branch more freely – and consequently produce far more flowers.
Why March is the ideal month for hibiscus
From the beginning of March, hibiscus starts to emerge from its winter rest. Sap begins to rise, buds swell and the plant prepares for its main growing period. The sun is not yet relentlessly hot, water loss remains moderate, and the plant can seal small wounds quickly.
This transitional period is therefore perfect for carefully guiding growth. It applies to:
- Hibiscus rosa-sinensis in pots on a windowsill or in a conservatory
- Hibiscus syriacus (garden hibiscus) planted in borders or grown outdoors in large containers
- Hibiscus moscheutos, once its fresh shoots start to emerge in spring
Pruning during winter causes unnecessary stress when light levels are low, while cutting too late in summer exposes the hibiscus to heat stress. In March, it responds to pruning with vigorous, healthy new growth.
A quick pinch at the shoot tip between early March and mid-April can realistically double the number of flowering shoots.
The 3-second action: how “pinching out” works
Gardeners call this key technique “pinching out”. It simply means removing the uppermost bud from a young, flexible shoot tip.
A step-by-step route to a bushier hibiscus
- Select a young green shoot tip with 3 to 4 pairs of leaves.
- Disinfect your fingernails or scissors with 70% alcohol.
- Pinch or cut off the top bud section just above a leaf node.
- Treat every overly long, unbranched shoot that is shooting upwards in this way.
This takes only a few seconds per shoot. One important point: pinching out has little effect on very woody stems or buds that are already fully formed. In these cases, wait for fresh green growth before taking action.
Apical dominance: why this hibiscus technique works
There is a clear biological process behind the bushier effect. Hibiscus, like many woody plants, follows what is known as “apical dominance”. The bud at the very tip of a shoot releases hormonal signals, especially auxins, which suppress the side buds below it.
As long as the tip remains intact, the hibiscus directs its energy into growing taller. Once that top point is removed, the flow of auxins stops and the dormant side buds suddenly begin to grow.
When the shoot tip is removed, one shoot usually divides into two or three new side branches – and each one may later carry flowers.
In practical terms, a single upright stem can become a compact bush with considerably more potential flowering sites after just a few targeted pinches. This is particularly noticeable on plants that grow thin and drawn-out towards the light behind a large window.
A common problem: the “feather-duster hibiscus” by the window
A hibiscus positioned too much in shade, or facing the light from only one direction, will stretch towards its light source. It becomes bare at the bottom and develops a cluster of flowers at the top – an unattractive shape that is also demanding for the plant over time. Pinching out the long shoot tips encourages the plant to direct more energy back into its base.
It also helps to turn the pot slightly every few days so that the crown develops evenly. In good conditions, fresh side shoots will appear within two to three weeks after pinching out.
Make use of the removed tips: free hibiscus cuttings
The shoot tips removed during pinching out are excellent for propagation. There is no need to throw them away, as they can become new hibiscus plants with very little effort.
Cuttings in compost: greater control and quicker establishment
Tip cuttings of around 10 centimetres or longer are suitable. Prepare them as follows:
- Make a sloping cut directly below a leaf node.
- Remove all leaves from the lower section.
- Leave two to four leaves at the top; you can cut them in half to reduce water loss.
- If desired, dip the cut end in rooting powder or homemade willow water.
Place the prepared cuttings in a loose, relatively low-nutrient growing medium, such as a mixture of seed compost and a little sand. Keep the substrate consistently moist, but never waterlogged. Temperatures between 15 and 20°C are ideal, along with a bright position away from direct midday sun.
Cuttings in a glass of water: easier for beginners
Using a glass of water is even more straightforward. Put the cuttings in deeply enough for the leafless nodes to remain submerged. Change the water roughly every three days to prevent bacteria from multiplying.
In a bright, warm room, hibiscus often develops its first fine roots after around two weeks. Once a small cluster of roots is visible, carefully pot the cuttings into compost and continue caring for them there. In this way, one parent plant can gradually produce an entire hibiscus collection.
The 3-second action on the parent plant produces more flowers – and the removed tips provide new plants free of charge.
Care after pinching out: how to achieve maximum flowering
Even the best pruning will do little if the subsequent care is unsuitable. After pinching out, hibiscus chiefly needs three things: light, consistent moisture and measured feeding.
- Position: Keep it bright and warm. During summer, it can be placed outdoors in a sheltered location away from harsh midday sunshine.
- Watering: Keep the compost lightly moist and avoid waterlogging. During summer, the pot must never be allowed to dry out completely.
- Feeding: From April, apply a liquid fertiliser with a slightly higher potassium content every two to three weeks, so the plant produces flowers rather than leaves alone.
If your hibiscus forms plenty of buds but drops them shortly before they open, check both your watering routine and for draughts. Sudden dry spells or blasts of cold air can quickly cause bud drop.
Common hibiscus mistakes – and how to avoid them
Many hibiscus problems are directly linked to light, temperature and incorrect pruning. Typical pitfalls include:
- Pruning too hard in late winter: Severe cuts weaken the plant and delay flowering.
- Pinching out too late in the year: Cutting back heavily in the height of summer can lead to leaf loss and stress.
- Constantly wet compost: This results in yellow leaves and root rot.
- A dark position: The hibiscus grows long and thin, makes few buds and often produces no flowers at all.
By choosing the right moment in March and using this brief pinching action, many of these issues can be avoided. The plant is guided into the desired shape from the outset.
Why the effort is worthwhile for balconies and gardens
Hibiscus is among the ornamental shrubs capable of providing an especially long flowering season when conditions are right. Anyone who consciously shapes the plant once in spring will benefit throughout the summer.
In the garden, a hibiscus encouraged to branch through pinching out works superbly as a flowering hedge, a terrace border or a specimen plant in a container. More branches mean not only more flowers, but also a sturdier crown that withstands wind better and appears fuller.
For urban balconies, pinching out is useful for limiting height. Instead of a wobbly upright stem, the hibiscus develops into a compact, full bush that looks much more balanced in pots or balcony planters. Paired with other summer-flowering plants such as pelargoniums or fan flowers, it creates a lasting splash of colour that is hard to beat for a holiday-like feel.
Comments
No comments yet. Be the first to comment!
Leave a Comment