
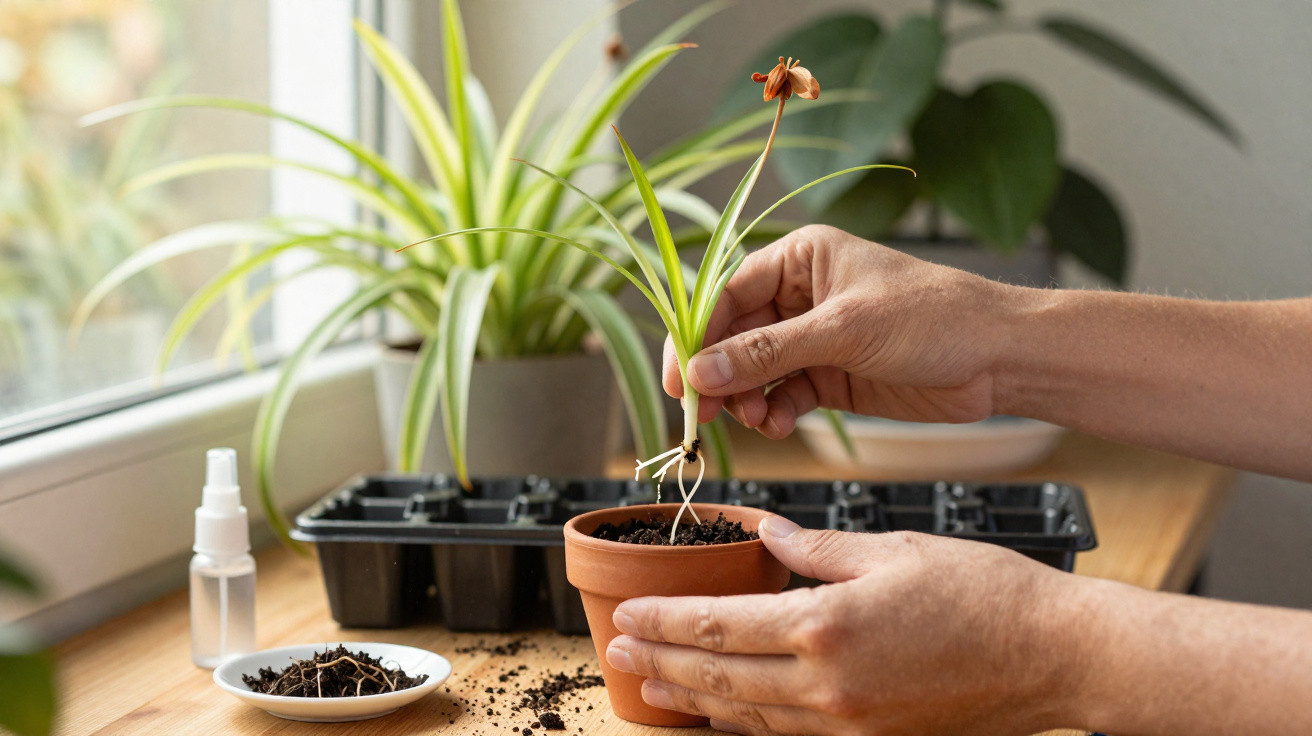
Most indoor gardeners simply snip off a spider plant’s dangling plantlets, place them in water, and call it done. Raising one from seed, however, means following the plant from its first flowers to an independent miniature specimen. It takes time and patience, but can reward you with entirely new leaf forms on your shelf.
Why growing a spider plant from seed is a project for patient people
The familiar spider plant (Chlorophytum comosum) is usually very easy to propagate. Its plantlets hang in abundance from long flowering stems, root within a few days in a glass of water, and soon fill a pot. By comparison, starting spider plants from seed feels positively unhurried.
From the first flower stem to a sturdy young plant in its own pot, the process generally takes well over two months. That is quite a long time for a houseplant. Yet for anyone who enjoys watching every stage of growth, this is precisely the appeal: an unremarkable capsule gradually becomes a new plant with its own character.
“Anyone who grows spider plants from seed gains not only new plants, but experience too – and often very different leaf shapes.”
It is also important to know that seedlings are not copies of the parent plant. Variegated varieties with cream stripes may suddenly produce wholly green leaves. Some offspring have only subtle pale markings, while others become clearly striped again. This genetic lottery is particularly appealing to collectors, as you never know exactly what will end up in the pot.
Flowers and seed capsules: encouraging your spider plant to bloom
No flowers means no seeds. Spider plants mainly flower in spring and summer, sending out long, arching stems carrying small white, star-shaped blooms. Simply watering one in partial shade and hoping for the best often leads to disappointment, as some plants can remain reluctant to flower for years.
Choosing the right position for more flowers
For plentiful flowering, the plant needs:
- Bright, indirect light near a window rather than a dark corner of the room
- A slightly snug pot, with roots allowed to fill it well
- Even watering without waterlogged compost
- Moderate fertiliser applications during the growing season
A pot in which the roots are slightly “squeezed” encourages the plant to produce more flowering stems. Many specimens also flower more readily when kept a little drier, provided they are not allowed to dry out completely.
Pollination: from bees to a cotton bud
Indoors, there is usually neither enough air movement nor insects to distribute pollen. As a result, many flowers remain sterile and form no seed capsules. There are two ways around this:
- Put the pot outdoors during the day in summer – bees and the breeze will do the work.
- Pollinate by hand with a cotton bud – collect pollen from the yellow anthers and gently dab it onto the stigma in the centre of the flower.
Around four weeks after successful pollination, the initially green capsules turn brown, dry out and shrink slightly. This is the right time to remove the small black seeds, or to let the entire tip of the flower stem finish ripening inside a paper bag.
Sowing spider plant seeds while they are fresh
Spider plant seeds do not remain viable for years. If they are forgotten in a cupboard for several months, the germination rate may be disappointingly low. It is best to sow them as soon after harvesting as possible.
Selecting compost and containers
Small pots or seed trays with drainage holes are ideal. Use a loose, well-draining houseplant compost mix. If you wish, mix in roughly one third fine expanded-clay granules or perlite to prevent the compost from compacting.
| Step | What to do |
|---|---|
| 1. Prepare the compost | Moisten the growing medium slightly and loosely fill the container. |
| 2. Scatter the seeds | Place the seeds fairly close together across the surface. |
| 3. Cover them | Add around 1 to 1.5 cm of fine compost. |
| 4. Water | Water carefully until everything is evenly moist, without leaving puddles. |
| 5. Position | Keep warm (20–24 °C), bright, but out of direct midday sun. |
Mini propagators or transparent covers help retain humidity, but they must never encourage mould. Air them briefly and regularly for this reason.
Waiting, watering and enjoying: the delicate germination stage
Many hobby gardeners give up too early because nothing seems to be happening. Spider plant seeds can easily take three weeks to germinate, and sometimes longer. Above all, this stage calls for consistency.
Keep the compost surface lightly moist at all times. Waterlogging is harmful because it encourages fungal problems and can cause the seeds to rot. A hand sprayer or watering can with a very fine rose helps avoid disturbing the delicate surface.
“Patience is not just a phrase here: anyone who does not repeatedly let the seed tray dry out will usually be rewarded with a whole carpet of tiny grass-like shoots.”
Once the first seedlings emerge, progress becomes noticeably quicker. The young plants stretch upwards, develop their first characteristic arching leaves, and start to look less like individual blades of grass.
Hardening off and pricking out spider plant seedlings
When each young plant has developed several true leaves, gradually adapt its care to that of a mature houseplant. This means:
- Letting the compost surface dry slightly between waterings
- Adding very weak liquid fertiliser to the water every two to three months
- Avoiding draughts while still ventilating the room regularly
Once several pairs of leaves have formed and the roots begin to fill the container, it is time to prick out the seedlings. Give every young plant its own small pot with fresh compost. It can then grow into a decorative spider plant that often has little in common with its parent.
What makes sowing especially appealing to collectors
Anyone who already has several spider plants on a shelf may enjoy sowing seeds as a small long-term project. Seed-grown plants often display:
- completely green leaves instead of the usual stripes
- only narrow, pale edges
- differing leaf widths and lengths
- varied growth heights and habits
Over time, this creates a small “mixed collection” developed from a single parent plant. Those sowing several varieties at once can choose their own favourites and keep creating new combinations.
Practical guidance on risks, care mistakes and combination ideas
The most common mistakes are overly wet compost, insufficient light and unrealistic expectations about timing. Permanently saturated compost causes mould and damping-off in young plants. A place on a cold windowsill slows germination further. Mild bottom heat is useful, for example on a warm shelf above a radiator.
If you already enjoy raising houseplants from seed, spider plants combine well with other tough species, such as different sansevierias or straightforward types of palm. This creates a propagation corner where something is always happening: one day seedlings emerge, and another day young plants are being pricked out.
For beginners, it is worth practising first with a few capsules from a tried-and-tested, robust spider plant. This helps you learn how moist the compost should ideally stay, what the seedlings look like, and how quickly they grow. Afterwards, handling rare varieties or special collector’s plants becomes much easier.
Comments
No comments yet. Be the first to comment!
Leave a Comment