
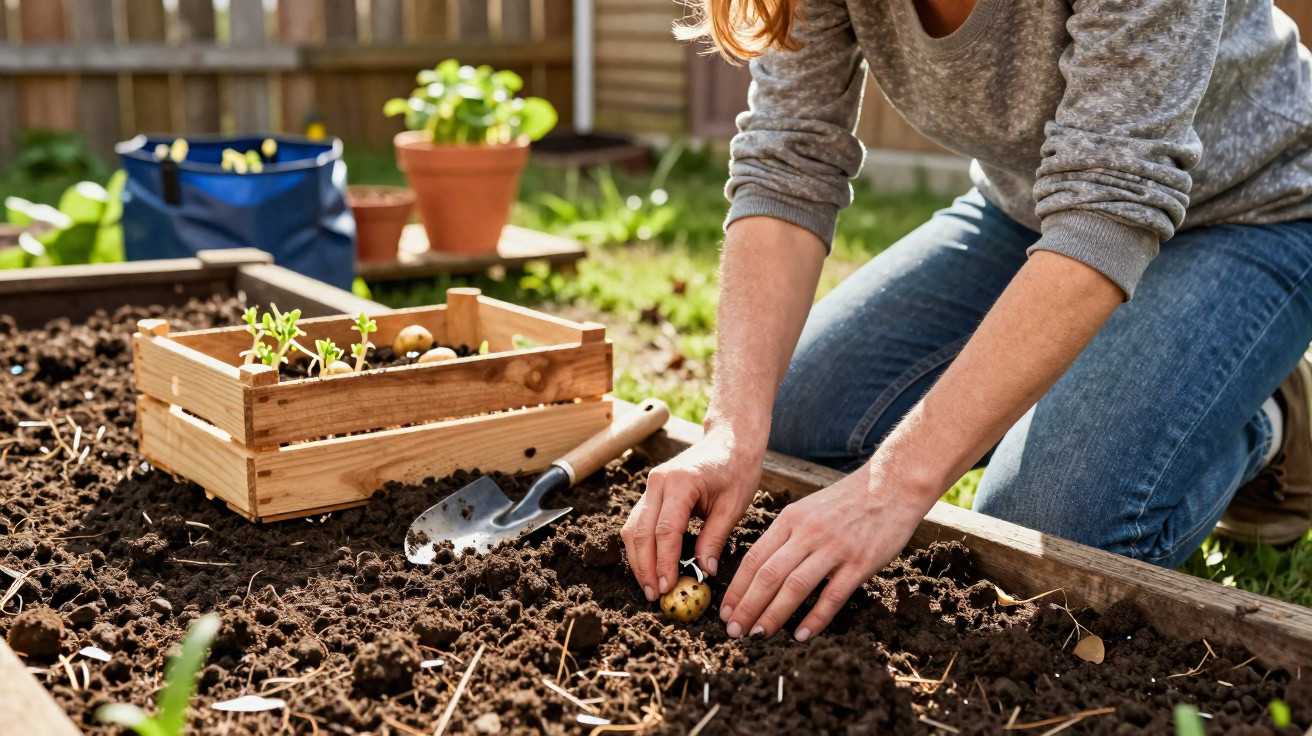
Many amateur gardeners rely on seed packets, neighbours’ advice or lunar calendars – yet still get the potato planting date wrong. An experienced grower focuses above all on the soil, the weather and the quality of the seed potatoes. Recognising these signals can noticeably improve your harvest and reliably stock your store cupboard.
The right time: soil, not the calendar, makes the decision
The most important rule for potatoes is simple: let the soil determine when you start, not the date on the calendar. Experts advise planting only once the ground has consistently warmed up sufficiently.
"A soil temperature of roughly 7 to 10 degrees at a depth of around 10 centimetres is ideal – and there should be no serious overnight frosts forecast."
Depending on the area, this usually puts planting somewhere between late March and early June. That is a wide window because climates and soil types differ considerably. Following a fixed date alone can leave plants frozen or struggling to establish.
How to measure soil temperature accurately
An inexpensive soil thermometer from a garden centre can prevent costly false starts. Push it about 10 centimetres into the ground in the morning, then check the reading after a few minutes. Repeat this over several consecutive days:
- Below 7 degrees: wait longer; the soil remains too cold.
- 7–10 degrees: early varieties and sheltered plots can be planted.
- Above 10 degrees: a suitable time for most home gardens.
If you are impatient, black plastic sheeting can help. A dark cover raises the soil temperature by around 2 to 3 degrees, often bringing the planting date forward by one to two weeks.
The "trouser-seat test": a gardener’s trick without a thermometer
Professional growers do not depend on figures alone; they also use their instincts. One particularly down-to-earth test is to sit directly on the bare soil for a few minutes.
- If you can sit comfortably without feeling chilly, conditions are likely suitable for planting.
- If you feel cold after a short time, too much chill remains in the ground.
In coastal areas and the milder west, this may work as early as late March. Further inland, the appropriate period is more often around mid-April, while colder regions or upland areas may not be ready until May. Planting a week later is always preferable to forcing tubers into icy soil.
Preparing the soil: loose, nutrient-rich and free-draining
To produce plenty of strong tubers, potatoes need open, well-drained ground. Heavy, wet clay soils slow their growth and encourage rot.
A quick test is to take a handful of soil and squeeze it together. If it forms a firm, sticky clod, it contains a high proportion of clay. Targeted soil improvement will then help:
- Work in 3–4 centimetres of mature compost in autumn.
- Loosen the soil with a little sand or fine grit.
- Avoid walking over the bed repeatedly, as this causes compaction.
Potatoes are sensitive to being grown continuously in the same place. Specialists recommend leaving at least four years before growing them again in the same plot. This significantly reduces the likelihood of diseases such as potato blight.
Nutrient supply: less manure, better balance
Many gardeners assume potatoes need as much manure as possible. However, fresh fertiliser that is high in nitrogen produces abundant leafy growth and watery tubers that store less well. Mature compost generally provides everything the plants require. On very poor soil, an organic slow-release fertiliser can be worked in before planting.
Choosing the right seed potatoes: quality beats using up leftovers
Using cheap supermarket eating potatoes is a false economy. These tubers are often treated to prevent sprouting and can introduce diseases.
"Certified seed potatoes produce healthy, true-to-type plants and considerably higher yields."
As a general guide, 1.5 kilograms of seed potatoes can produce a harvest of 10 to 20 kilograms, depending on the variety, soil and care provided.
Chitting seed potatoes for an earlier start
Gardeners wanting an early harvest should chit their seed potatoes. This gives them a head start of two to three weeks.
- Four to six weeks before the intended planting date, place the tubers in shallow trays or egg boxes.
- Position them with the "eyes" facing upwards in a cool, bright place, such as an unheated room, porch or frost-free shed.
- Wait until firm, short shoots about 1 to 2 centimetres long have developed.
Long, pale shoots are unsuitable. They break off easily and drain energy from the tuber without offering any benefit. Chit potatoes somewhere cool and bright rather than warm and dark.
Planting potatoes: how to put tubers in the ground
The position matters greatly on planting day. Potatoes enjoy full sun and cope better with dry spells than with waterlogged soil. A site with good air movement dries more quickly after rain and lowers the risk of fungal problems.
| Criterion | Recommendation |
|---|---|
| Position | Full sun, open to breezes, not in a hollow |
| Planting depth | Around 8–10 centimetres |
| Row spacing | 60–75 centimetres |
| Spacing within the row | 30–35 centimetres |
Place the tubers in prepared furrows with the shoots facing upwards, then cover them loosely with soil. The shoots should be protected without being compressed.
Earthing up: the underestimated yield booster
Once plants reach around 20 centimetres tall, carry out the first important maintenance task: earthing up. Use a hoe to draw soil towards the stems, creating small ridges.
"Earthed-up potatoes develop more tubers, stay better protected from light and have greater protection against late frosts."
A second pass is worthwhile after two to three weeks, particularly if rain has flattened the ridges again. When growing in containers or raised beds, add further layers of growing medium gradually instead, until only the upper leaves remain visible.
Potatoes in containers and on balconies
Growing potatoes in bags, barrels or large pots is becoming increasingly popular, especially in towns and cities. The principle stays the same, although a few details change:
- Choose containers holding at least 30 litres.
- Add a drainage layer of expanded clay or gravel.
- Use loose, humus-rich compost rather than ordinary garden soil from heavy ground.
- Water regularly, while still avoiding waterlogging.
The advantage is that containers can be moved against a warmer house wall and covered quickly in spring if frost is still expected. This often allows a balcony harvest to begin earlier than one from a conventional bed.
Common mistakes and how to avoid them
Many problems in a potato bed can be prevented by following a few straightforward rules:
- Planting too early: cold soil slows development and leaves shoots weak.
- Permanently wet ground: tubers rot, while wireworms and fungi can thrive.
- No crop rotation: disease-causing organisms do not decline and soil health suffers.
- Planting too closely: plants compete for light and nutrients, reducing the yield per tuber.
Knowing these pitfalls and paying attention to soil temperature, structure and planting material puts the most important factors under control.
How variety and region affect the planting date
Early varieties such as Annabelle or Sieglinde tolerate slightly cooler soil more effectively and can provide the first meals in June or July. Late varieties intended for storage need more warmth and a longer growing season. In exposed areas, it is worth focusing more strongly on early varieties and using horticultural fleece, plastic covers or cold-frame tops.
Combining several varieties with different maturity periods spreads the risk from late frosts, heatwaves or heavy rain. It also extends the harvest over several weeks rather than requiring everything to be dug up within a few days.
Why patience with the planting date pays off
With potatoes, patience and observation achieve more than blind action. Looking at the soil, checking the forecast for the next ten days and assessing the condition of the seed potatoes tells you more than any general date in a gardening calendar. Following this combination improves the chances of baskets full to the brim in late summer – and of that special moment when the first home-grown tuber emerges from the soil into the light.
Comments
No comments yet. Be the first to comment!
Leave a Comment