
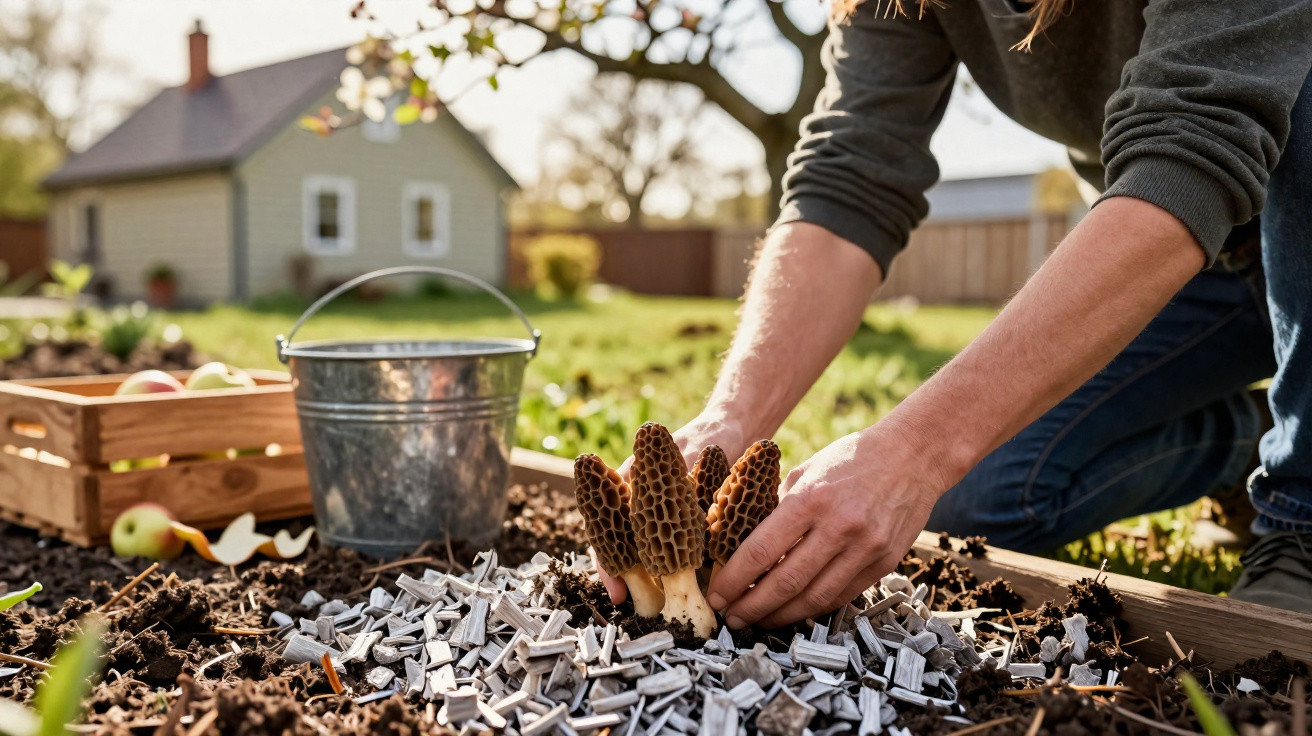
Morels are regarded as the elite of edible mushrooms: scarce, costly and difficult to track down. Anyone walking through woodland in spring often returns with an empty basket. Yet cultivating this delicacy in your own garden can seem almost magical. In reality, the secret is a very down-to-earth combination of soil chemistry, patience and a household by-product that is often simply thrown away.
Why morels are so rare – and what they actually need
Morels are not simply a whim of nature; they are specialists. They emerge only when several conditions align. Many attempts fail because one small detail is wrong, usually involving the soil or the microclimate.
Morels require calcareous, loose soil, consistently even moisture, partial shade – and a distinct signal at the end of winter.
Four factors are central:
- Soil: high in organic matter, slightly calcareous and well drained
- Light: partial shade, such as beneath fruit or decididuous trees
- Moisture: continually lightly moist, with no waterlogging or puddles
- Seasonal cycle: a cold spell in winter followed by a burst of warmth in spring
When these conditions come together, the underground fungal network, known as mycelium, can thrive. The familiar honeycomb-shaped fruiting bodies only emerge in spring once the mycelium has built up sufficient reserves.
The garden game changer: wood ash from the fireplace
The main challenge in ordinary garden soil is its pH level. Many soils are too acidic for morels. This is where a winter by-product that is generated in large quantities becomes useful: cold wood ash from a stove or fireplace.
Wood ash raises the pH level and creates a slightly alkaline “burn bed” in which morels are especially keen to fruit.
In soil, wood ash acts rather like a natural application of lime. Spread evenly in a thin layer, it shifts the growing conditions towards slight alkalinity. Agricultural mycology measurements show that morels particularly favour a pH range of roughly 7.5 to 8. Ash moves the soil towards precisely that range.
The quality of the ash matters:
- use ash only from untreated, natural wood
- allow the ash to cool completely
- do not use charcoal remnants, barbecue lighter fluid or painted wood
In practical terms, a 2–3 cm layer over the prepared bed is sufficient. Applying more will not improve results and may make the soil excessively concentrated.
Why apple leftovers give morels a boost
The mycelium needs energy, not just favourable conditions, if it is to form reserve structures for winter. This is where kitchen waste becomes valuable, especially pressed apple pulp from a juicer or cider-making process.
Apple leftovers provide sugar and pectin – ideal food for helping morel mycelium form robust storage nodules for fruiting.
These storage nodules are called sclerotia. They survive the cold season in the soil, then push the fruiting bodies upwards in spring. The sugars and pectin in apple leftovers encourage the formation of exactly these structures.
An ideal mixture contains:
- apple pomace or finely chopped apple leftovers
- fallen leaves from fruit trees or other deciduous trees
- a little loose garden soil as a covering layer
Together, these materials form a gently decomposing layer that feeds the fungal network like a nutrient bar, without becoming rotten.
Creating your own morel patch step by step
Choose the right location
A quiet part of the garden that is not regularly walked over is best. Suitable locations include:
- mature apple, pear or plum trees
- open edges beside deciduous hedges
- slightly raised areas that do not become waterlogged
These sites provide partial shade, while falling leaves naturally create a thin humus layer. If there is no fruit tree in the garden, a small “mushroom island” can instead be made in the middle of a lawn and edged with woody or leafy plants.
Prepare the bed in autumn
The best time to create the bed is from October to November. This allows the morel’s natural annual cycle to progress:
- Loosen an area of around 1–2 square metres and remove any thick roots.
- Apply a 2–4 cm layer of apple pomace and leaves, then work it in lightly.
- Spread 2–3 cm of cold wood ash evenly over the surface.
- Incorporate it briefly with a soft broom or by hand, without thoroughly mixing everything together.
- Finish with a thin layer of leaves or fine bark mulch.
This arrangement recreates a lightly burnt, lime-rich woodland bed, like those found after a fire or beneath old traditional orchards.
Introducing the fungal network to the soil
For morels to grow, the right mycelium must already be present. Unless morels happen to be growing in the garden naturally, you will need to introduce it.
- Rinsing-water method: Rinse ripe morels that have already become slightly soft in water, then pour the water over the prepared area.
- Scattering method: Crumble over-mature morels and distribute the pieces across the bed.
- Mycelium kit: Add commercially available mycelium cultures to the soil according to the manufacturer’s instructions.
Whichever approach is used, tread on the bed as little as possible afterwards so that the developing mycelium is not crushed.
Winter does the work – the gardener waits
Very little happens visibly during winter. Beneath the leaves, sclerotia gradually develop. Consistent moisture is crucial, but the bed must not become wet. Light rain is ideal; during dry winters, occasional watering with a watering can will help.
The most delicate period is not winter but the transition into spring – this is when it is decided whether the morel emerges or remains in the soil.
On mild days in late winter or early spring, a technique recommended by mushroom researchers can be used: the so-called temperature shock. Water the bed thoroughly once with very cold water, ideally after a period when air temperatures have been around ten degrees. This imitates snowmelt, which morels recognise as a starting signal.
How long before the first morels appear?
Anyone starting the process in autumn will need patience. Even under ideal conditions, morels are not guaranteed to appear in the first year. The result often becomes visible in the second season, once the bed has settled in.
In practice, the typical sequence looks like this:
| Period | Process |
|---|---|
| Autumn | Create the bed, work in apple leftovers, apply ash and introduce mycelium |
| Winter | The mycelium spreads and forms reserve structures in the soil |
| Spring | Temperature shock; first fruiting bodies may appear |
| Second autumn | Refresh the bed with a little ash and apple leftovers |
Once several days of damp weather and mild above-freezing temperatures occur in succession during spring, inspect beneath the leaves closely. The pitted, honeycomb-like structure of the caps is easy to identify. When harvesting, cut each morel just above ground level and do not dig over the bed.
Common mistakes and risks at a glance
Many projects fail because of minor issues that are easy to avoid:
- Ash layer that is too thick: this suppresses soil life and sends the pH level too high.
- Waterlogging: morels enjoy moisture but not pools of standing water.
- Unsuitable ash: barbecue briquettes, painted wood and paper remnants can introduce pollutants.
- Frequent digging: this destroys the delicate mycelium network.
If you are uncertain when identifying a mushroom, consult a mushroom identification service before eating it. In particular, inexperienced foragers occasionally confuse morels with poisonous false morels. A mushroom guide or an expert check provides reassurance.
What morel cultivation does for the garden
This method also has several welcome side effects. Apple leftovers and wood ash are diverted from waste and improve soil structure and nutrient availability as soil amendments. The leaf layer protects the soil from drying out while supporting earthworms and micro-organisms.
Once successful, the same bed will often produce benefits for several years. A small annual top-up of apple leftovers and a very thin ash layer can keep the area active. In wildlife-friendly gardens, a morel patch visibly enriches the wider ecosystem – and, in the best case, some of the harvest ends up in the frying pan.
For hobby gardeners who already have fruit trees, a fireplace and compost, this type of mushroom cultivation is surprisingly accessible: use leftover materials, carefully adjust the soil chemistry, then leave the rest largely to the interaction between weather, mycelium and time. That combination is exactly what makes it so appealing – and why every first morel from your own garden feels a little like winning the lottery.
Comments
No comments yet. Be the first to comment!
Leave a Comment