
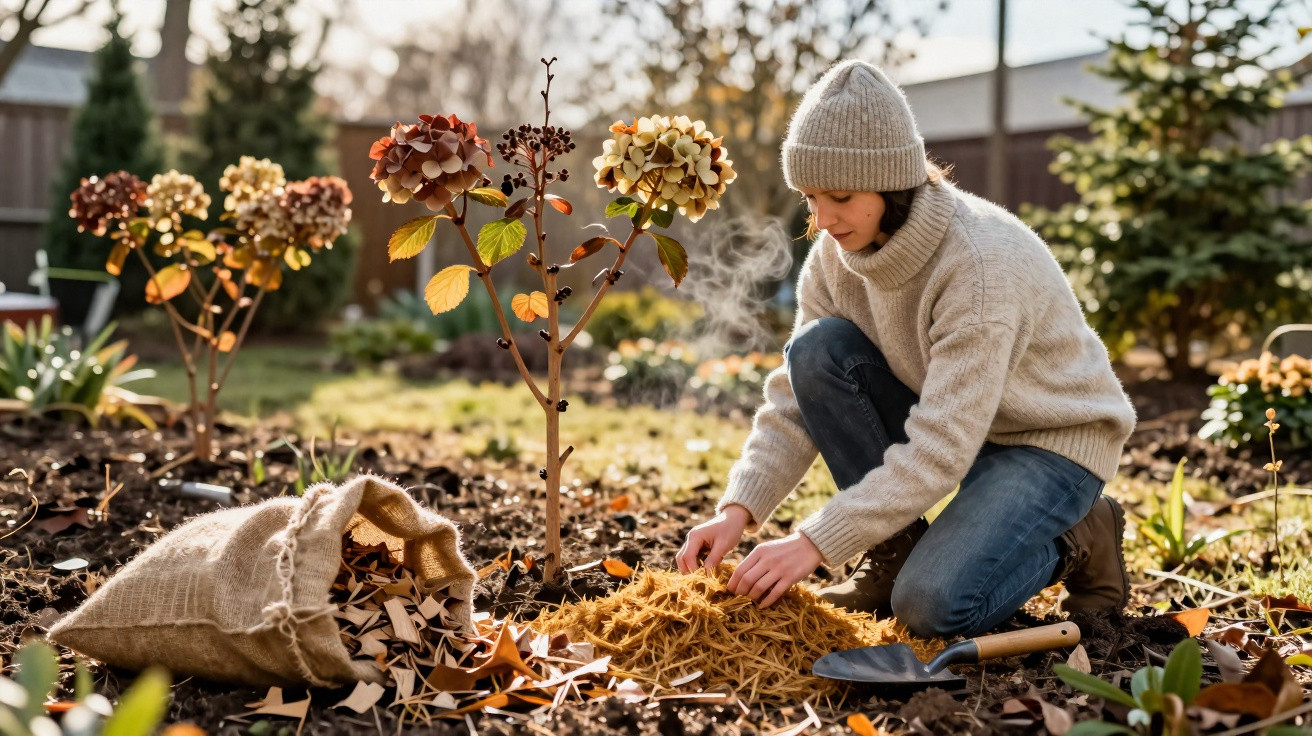
Many amateur gardeners put their feet up in January and wait for spring. For hydrangeas, that can be disastrous. It is precisely in the depths of winter, when frost takes a firm grip, that it is decided whether the shrub will produce only lacklustre leaves in summer or turn into a huge, colourful globe of flowers. The key is not pruning, but something far less noticeable at ground level – right around the base of the plant.
Why January, of all months, determines hydrangea flowers
In midwinter, hydrangeas can look like dead wood: bare, grey and with slightly bent shoots. Those who are misled by this often lose the entire flowering display for the following season. That is because the buds on last year's wood already contain the flower formation for summer.
Around the middle of January in particular, temperatures often drop very low. This cold can:
- cause flower buds to freeze before they have even begun to develop
- damage fine roots in the upper layer of soil
- force the plant to invest energy in producing new shoots in spring rather than flowers
Anyone who does nothing at this point risks disappointingly few, or even no, flowers in summer. Acting now gives the shrub a significant advantage.
“In January, the choice is made: magnificent flower heads or a green yet unremarkable shrub.”
Do not reach for the secateurs: why pruning now is the wrong reaction
Many gardeners assume that hydrangeas need a hard winter prune so that they “come back better”. This is one of the biggest mistakes that can be made with this plant.
Pruning heavily in January or February can:
- simply remove flower buds that have already formed
- expose open cuts to the cold
- destroy the natural protective layer created by old flower heads
It is better to leave the dried flower heads in place for now. They act like a small hat for the buds beneath them. Wait with the actual pruning until the harshest frosts have passed and spring is genuinely approaching.
The real trick is in the soil: a warm coat for hydrangea roots
Hydrangeas prefer fresh, humus-rich, slightly moist soil. Their fine roots sit relatively close to the surface, exactly where frost hits hardest. If the base of the plant freezes deeply, the shrub will usually survive, but it will then direct its energy towards recovery rather than flowering.
The answer is to give the root zone a thick, natural protective covering. Specialists call this winter mulch: essentially an insulating layer of organic material.
“The aim: a natural warm blanket that reliably shields the roots and the base of the buds from frost.”
The best materials for a protective layer around hydrangeas
There is no need for expensive supplies. Most of the materials will already be in the garden or can be bought cheaply from a DIY shop. The most suitable options include:
- Oak or beech leaves: slow to rot down, good insulation and free of charge.
- Pine bark: long-lasting, helps to maintain slightly acidic soil and can intensify the blue flower colour of some varieties.
- Straw or hemp bedding: very airy materials with a strong insulating effect against sharp temperature drops.
- Dry fern fronds: water-repellent and stable, making them ideal for windy or damp sites.
All of these materials create a kind of natural armour against cold, wind and major temperature fluctuations.
How thick the layer really needs to be
Many people mulch too sparingly and then wonder why it has little effect. Use the following as a guide:
| Material | Recommended layer thickness |
|---|---|
| Leaves | 15 cm |
| Pine bark | 10–12 cm |
| Straw / hemp | 15–20 cm |
| Fern fronds | 10–15 cm |
Anything less often fails to provide sufficient insulation, particularly in exposed areas or around freestanding shrubs.
Step by step: how to apply winter mulch correctly
This protective layer takes only a few minutes to put in place if you work methodically:
- Tidy gently: Carefully remove weeds and old, soggy leaves around the shrub without scratching deeply into the soil.
- Prepare the material: Gather leaves, bark, straw or fern, and remove any large branches.
- Build up the layer: Spread the material around the base of the plant, extending at least as far as the outer tips of the shoots.
- Check the depth: Measure with your hand – there should be at least 10 to 15 centimetres.
- Leave an air gap: Keep a small ring of around 1–2 centimetres clear directly around the stems.
This small gap stops moisture from sitting permanently against the shoots, where it could cause rot.
Why mulch becomes a secret fertiliser in spring
Winter protection does more than ward off cold. As temperatures rise, the material will slowly begin to decompose, creating humus-rich soil that improves the ground around your hydrangeas.
The benefits during spring and summer include:
- soil remains looser and holds water more effectively
- earthworms and other soil organisms multiply, improving nutrient availability
- weed growth is noticeably reduced
- watering intervals become longer because the soil dries out less quickly
“Fifteen minutes of work in January save you countless watering cans in summer and deliver visibly stronger flowers.”
Common hydrangea winter protection mistakes – and how to avoid them
Many well-intentioned measures cause more harm than good. The usual mistakes include:
- Pruning too early: flower buds end up with the garden waste.
- Mulch that is too thin: the soil still freezes deeply.
- Burying the shoots: damp, trapped warmth directly against the wood can lead to rot.
- Plastic covers without ventilation: condensation, mould and heat build-up on mild days.
An airy organic covering is always preferable to plastic sheeting or closely fitted fleece covers. Hydrangeas need air circulation; otherwise, they become more susceptible to fungal diseases.
Which hydrangeas benefit most from this winter trick
Not every hydrangea responds in the same way. The following benefit particularly strongly:
- mophead hydrangeas with large, rounded flower heads
- varieties in pots or containers, as their root balls freeze more quickly
- young plants during their first two to three years after planting
- shrubs in windy, exposed positions without shelter from a house or hedge
A tip for container plants: place the pot on an insulating base, such as a piece of wood or a polystyrene board, then wrap the outside of the pot with leaves or straw as well.
When to remove the protection – and what to do next
Once the hardest frosts are over and the first delicate green tips appear on the shoots, loosen the mulch slightly. There is no need to remove it entirely. Part of the layer can remain as a permanent covering and rot down gradually.
This is also the time for gentle shaping: remove only old flower heads, cut out dead shoots and leave everything else undisturbed. This preserves most of the flower buds.
An added benefit: better flower colour and less stress for plants
Those who love hydrangeas with intense flower colour benefit twice over. Pine bark and similar materials can make the soil slightly more acidic. Alongside the right fertiliser, this can deepen the blue or purple tones of flowers in certain varieties.
At the same time, mulch greatly reduces plant stress: fewer temperature swings, less drying out and fewer nutrient losses. The result is visible in June and July without any specialist knowledge: strong shoots, rich colours and dense flower heads – and hardly anyone will believe that one simple task in the middle of winter was enough.
Comments
No comments yet. Be the first to comment!
Leave a Comment