
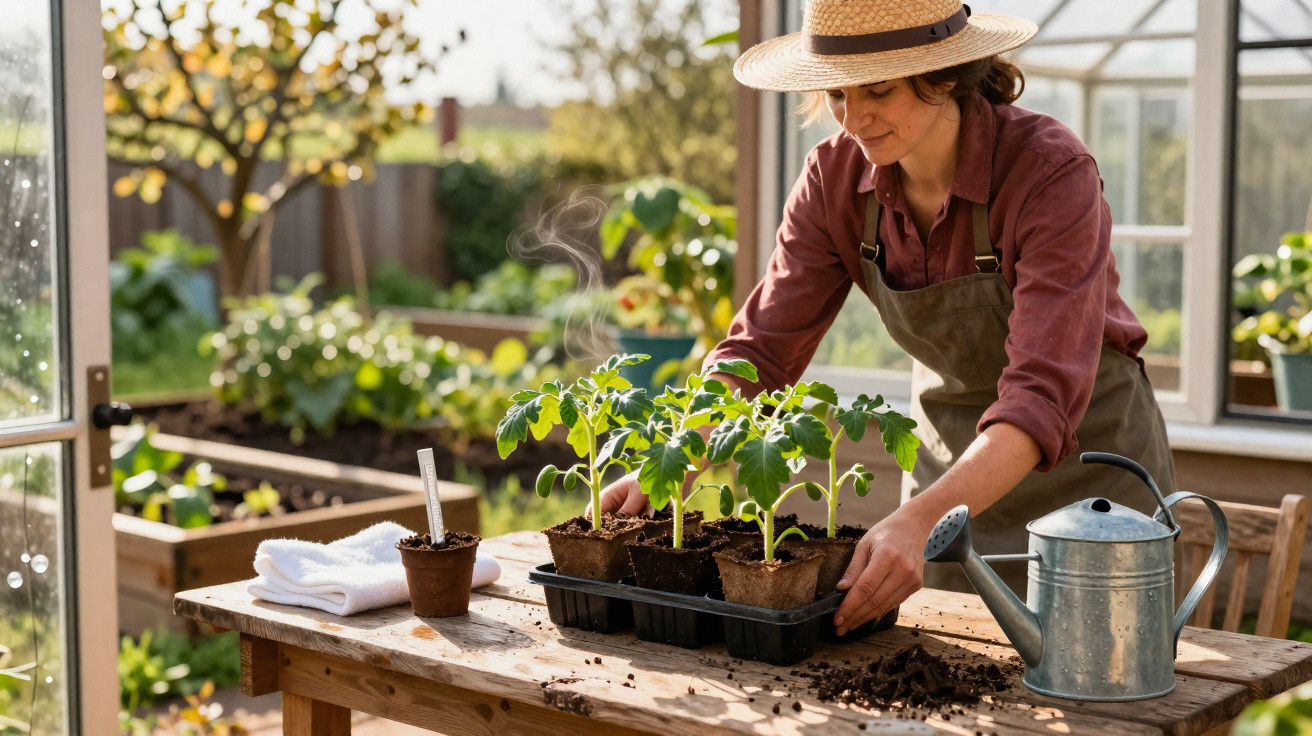
Many amateur gardeners are poised to get started in spring, buy young plants from the garden centre and eagerly put them straight into the bed. A few weeks later, disappointment often follows: limp stems, scorched leaves and stunted plants. The difference between these and the lush beds of professional growers is rarely the variety; it is usually one simple preparation step carried out consistently.
Why tomatoes suddenly collapse in the bed
The temperature shock after a cosy windowsill
Young tomato plants are generally raised in warmth: on a windowsill, in a conservatory or in a well-protected greenhouse. Conditions there are often close to 20°C, with little variation in temperature and no overnight frost. This is what the plants become accustomed to.
If they are moved straight outdoors on a sunny spring day, the evening brings a harsher reality: nights at 5 to 6°C, cold wind and damp air. This sudden change causes a severe temperature shock. Growth stops, stress weakens the entire plant and diseases can take hold easily.
The biggest mistake: putting tomatoes from the living room straight into open ground without preparation.
Stems stay too soft when they have never felt a breath of wind
The second issue is often immediately visible: long, thin, watery stems. Anyone raising tomatoes in the living room unintentionally protects them from everything that would make them strong outdoors, especially wind.
Without movement, the plant forms hardly any robust fibres in its stem. Once it is placed on the balcony or in a bed and encounters its first strong gust, it may bend over or snap just above ground level. This is precisely what professional vegetable growers aim to prevent with a set routine they repeat every year.
The professional technique: hardening off tomatoes gradually
A short spell outdoors every day: the young plants' training programme
The crucial step is called hardening off. It means gradually acclimatising tomatoes to genuine outdoor conditions. The principle is simple: rather than an “all or nothing” approach, use a kind of training plan.
- Days 1–3: Put tomatoes outdoors at midday for 1–2 hours, sheltered from wind and away from strong direct sun.
- Days 4–6: Increase their time outside to 3–4 hours; a light breeze is welcome.
- From day 7: Leave them outdoors for progressively longer, bringing them back into warmth only in the evening.
These brief yet regular exposures encourage the plant to produce more lignin, the tough plant fibre. Within only a few days, the stem becomes visibly sturdier and the whole plant more compact. The lanky “indoor child” turns into a stocky, resilient young plant.
Hardened-off tomatoes can be recognised by thick, firm stems and darker, stronger foliage.
Acclimatise them gently to real sunlight or the foliage will burn
Many people underestimate the sun rather than the temperature. Light through glass is gentle, filtered and considerably weaker. Outdoors, the plant faces intense direct rays. If sensitive tomatoes are placed in midday sun on a clear day, their leaves can literally burn.
The correct approach is to keep them in bright shade or beneath a light horticultural fleece for the first few days. Then allow a few minutes of direct sunshine at a time, increasing it slightly each day. After a week, the plants will generally tolerate full midday sun much better.
The other spring risk: late frost in the orchard
Check fruit blossom every morning
Those growing a few tomatoes often have fruit trees in the garden as well. While vegetable plants are being trained outdoors, apple, cherry and plum trees begin to flower. This short period is extremely vulnerable. Just one frosty night can cost a large part of the harvest.
Experienced gardeners therefore inspect the blossoms closely early each morning. If they look glassy, brownish or mushy, frost has already struck. The response then needs to be quick: arrange protection for the following nights.
Identify late frost early and protect the trees
Clear skies, still air and forecasts only just above zero are warning signs of critical nights. If in doubt, place a thermometer close to the ground. Should temperatures drop sharply, use protective covers, horticultural fleece or old bed sheets to wrap the trees during the darkest hours.
Inside the blossom, a black or dark brown centre indicates that the flower has been lost. Making such observations sharpens awareness of future cold snaps and helps gardeners act earlier next time.
How gardeners manage the critical spring transition
Simple protection for cold nights
Hardening off makes sense in theory, but it can soon become tiresome in daily life: pots out, pots in, every single day. To make things easier, create a temporary shelter for young plants.
This could be a simple wooden frame with a transparent cover, a small cold frame or an improvised box lined with plastic sheeting. Keep it open during the day so the young plants can adapt to wind and fluctuating temperatures. Close it in the evening to retain the day's residual warmth and keep frost at bay.
An improvised cold frame saves constant carrying and protects tomatoes during their most sensitive stage.
Consistency over two weeks pays off
Anyone taking the process seriously should allow around ten to fifteen days for hardening off. During this period, place plants out in the light during the day and return them to sheltered quarters or beneath their cover at night. Plant them permanently only once overnight frosts are no longer forecast and the soil has warmed noticeably.
The traditional Ice Saints in mid-May are used by many people as a rough guide. Depending on the region, however, the actual risk of frost may occur a little before or after this time. Checking the local weather pattern and trusting your own judgement are often more reliable than calendar dates.
How to recognise the ideal planting time
Combine signals from plant, soil and weather
Experienced gardeners do not rely on a single indicator. They look at all of the following together:
- Plant appearance: compact, vigorous tomatoes with firm stems.
- Soil temperature: the earth no longer feels clammy and cold, but pleasantly hand-warm.
- Weather trend: no more forecast nights around freezing point.
When these conditions coincide, it is likely to be the right moment: dig the planting hole, work in compost and plant tomatoes deeply so they can develop additional roots.
Start the season with confidence
Preparing tomatoes in this way makes planting them later far less stressful. The plants will already have encountered wind, temperature changes and real sunlight. They begin the season with stable stems, more stress-resistant foliage and an efficient root system.
Rather than being frustrated by bent shoots and scorched leaves, you can focus on what is genuinely enjoyable: pinching out side shoots, watering regularly, feeding now and then, and ultimately harvesting baskets full of aromatic fruit.
Practical additions for a lush tomato season
Common terms explained briefly
The term “hardening off” does not refer only to getting plants used to cold. It covers the whole package: temperature, light, wind and humidity. Outdoors, all of these factors affect the plant more strongly than indoors, and together they encourage it to become more resilient.
“Lignin” refers to the hard components in plant cells that provide strength. The more of it is deposited in the stem, the less likely the plant is to bend in the wind or under the weight of its fruit.
Further measures that strengthen the effect
Anyone wanting to make their tomatoes even tougher can pay attention to a few small details while hardening them off:
- Water only from below, so the leaves stay dry and fungal diseases have fewer opportunities.
- Occasionally brush the plants lightly with your hand; this also encourages stronger stems.
- Do not feed heavily straight away; feed moderately so plants do not grow “soft and greedy”.
Together, these steps create a clear advantage: tomatoes that do not merely survive, but crop vigorously throughout the summer. Anyone who follows this small preparatory ritual consistently once will naturally plan for it again next season.
Comments
No comments yet. Be the first to comment!
Leave a Comment