
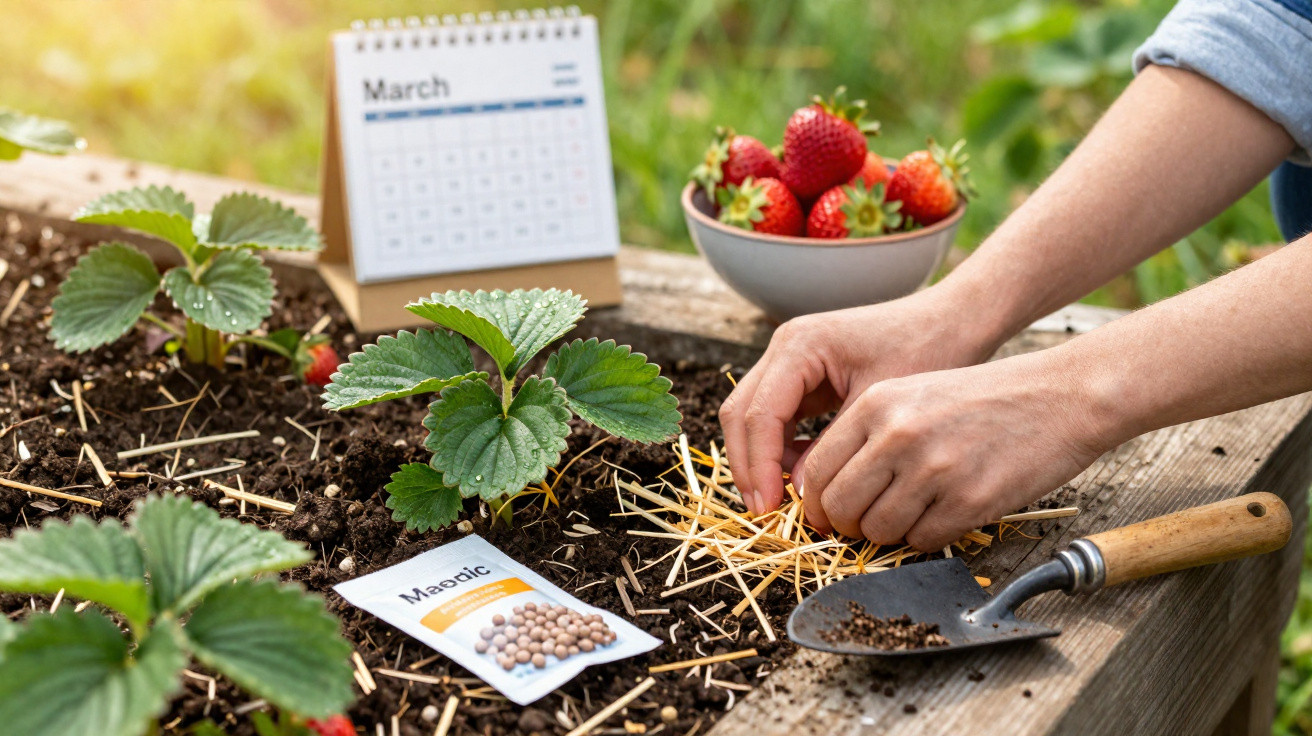
As the days lengthen and the sun gradually returns, many amateur gardeners start longing for sweet strawberries. What is often underestimated is that the foundation for a bumper summer crop is not laid in June, but right now, at the end of winter. A brief job in the strawberry bed is enough to turn your plants into genuine fruit-producing machines.
Why late March determines your strawberry harvest
Strawberry plants emerge from their winter rest early. Beneath the surface, which may still look bare, delicate new green growth begins to push through the soil. The plants are building strength and preparing to flower. At this stage, if left untouched, they often direct their energy towards old, unproductive plant material.
That is precisely the issue: when plants are left entirely to their own devices, their energy becomes scattered. They put their resources into old foliage and overcrowded shoots rather than producing large, juicy berries. The result is often strawberries that are smaller, fewer in number and less flavoursome.
Anyone who gives their strawberry plants targeted attention by the end of March directly influences the size, quantity and flavour of the summer fruit.
Spotting the ideal time window
The timing is straightforward: start as soon as fresh, light-green leaves appear from the centre of the plant and the soil is no longer frozen. In many areas, this falls in the second half of March, although it can be slightly earlier in mild regions.
- The soil is frost-free but still moist
- The first tender new leaves are visible
- Old foliage appears brown, spotted or leathery
If you miss this window, you can still encourage the plants later, but you will usually forgo part of the potential yield.
The key cut: remove old strawberry foliage thoroughly
Spring tidy-up with secateurs
The central trick for an XXL harvest is remarkably simple: give your strawberry bed a thorough clean-up. All you need is clean, sharp secateurs or a small knife.
Work through the plants one by one, cutting every old leaf away at its base. This includes:
- brown or yellowing leaves
- spotted, fungal or torn leaves
- withered stems and dried runner remains
Leave only a compact centre of young, glossy green leaves in the middle of each plant. This is where the flowers and fruit will develop later.
More light, more air, fewer diseases
Taking away the old foliage quite literally opens up the plant’s centre. Sunlight can reach the middle again, while air can circulate between the leaves. This significantly reduces fungal diseases such as grey mould.
Well-ventilated strawberry plants with an exposed centre are less likely to suffer from grey mould and usually produce healthier, unblemished fruit.
Anyone who has regularly had problems with mouldy strawberries should be especially meticulous at this stage. The fewer damp, dead plant remains left hanging in the crown, the more stable the microclimate around the plant remains.
Feed, do not starve: strawberries need energy now
Applying organic fertiliser correctly
After the “haircut”, the second key to monster fruit is feeding. Strawberries are among the more nutrient-hungry berry crops. They need nutrients before flowering to form strong flower buds and, later, large fruit.
The best choices are organic fertilisers, such as:
- mature, dark compost
- well-rotted farmyard manure, for example from horses or cattle
- shop-bought organic specialist fertilisers for soft fruit
Spread a small handful of fertiliser around each plant. Do not work it in deeply; lightly incorporate it into the surface only. Strawberry roots are very shallow, so deeper hoeing can easily damage them.
Loosen the soil gently
To help water and nutrients reach the root zone effectively, it is worth giving the soil a gentle loosen. Use a small hand cultivator or claw and scratch the surface to a depth of only 1–2 centimetres.
The benefits are:
- The surface becomes more crumbly and absorbs water more effectively
- Emerging weed seedlings are disrupted immediately
- Nutrients can be incorporated more easily
Stop as soon as you see roots. It is better to work a little too shallowly than too deeply.
Add a protective layer: mulch properly for XXL fruit
Why a mulch layer helps twice over
Fertilising and loosening are followed by the third step in the March routine: placing a protective covering over the soil. A mulch layer offers several benefits at once:
- Soil dries out more slowly
- The ground stays looser and takes longer to cool down
- Competition from weeds is reduced
- Fruit stays cleaner and drier later on
Suitable materials include:
- straw, the classic choice for a strawberry bed
- chopped flax straw or hemp
- finely chipped bark or wood in a thin layer
Spread the mulch loosely between the plants, rather than directly over their crowns. The ripening fruit will later rest on this layer and have as little contact as possible with damp soil, reducing rot and blemishes.
Natural barriers against slugs and more
As the first tender shoots appear, familiar enemies are ready to return: slugs and other molluscs. The rough, dry surface of many mulching materials already makes their route unpleasant.
In vulnerable locations, you can also scatter a narrow ring of coarsely crushed eggshells or a little wood ash around each plant. Both can act like barbed wire for many slugs, which often avoid these areas consistently.
Combining rough mulch material with a ring of eggshells greatly improves the chances that you, rather than the slugs, will collect the harvest.
Your strawberry plan in four straightforward steps
Put your plants on course for XXL strawberries now
| Step | Action | Effect |
|---|---|---|
| 1 | Remove old foliage | More energy for the crown, fewer diseases |
| 2 | Lightly loosen the topsoil | Better water and nutrient uptake |
| 3 | Apply organic fertiliser | Vigorous growth, large fruit |
| 4 | Add a mulch layer | Clean fruit, fewer weeds and slugs |
In an average home garden, these four tasks often take no more than half an hour. Their impact, however, lasts throughout the entire season, from the first white flower to the final red berry.
Practical tips for pots, beds and raised beds
Treating strawberries in pots correctly
Even without a garden, you can use the same March trick in a container. Carefully remove old foliage, loosen the surface using a wooden stick, and add a small amount of organic liquid fertiliser to the watering can.
Suitable mulch materials for pots include:
- fine wood wool
- untreated straw bedding for small animals
- small pieces of bark in a thin layer
Important: avoid waterlogging at all costs, as strawberries are sensitive to roots that remain wet for long periods.
When a complete replacement is worthwhile
If the fruit keeps becoming smaller despite good care, the age of the plants may be responsible. After three to four years in the same bed, many varieties become less productive. In that case, it is worth planting runners from the strongest plants into fresh soil and re-establishing the old bed after the season.
What produces large strawberries
Large, sweet strawberries are not a matter of chance, but the result of genetic potential, nutrient supply, water balance and plant health working together. The March intervention supports all of these factors at once: it directs energy into young growth, prevents disease, improves feeding and optimises the microclimate at soil level.
Those who follow this routine every year will soon develop a feel for the ideal amount of fertiliser, the right mulch layer and the appropriate cut. Once the first heavy, glossy berries practically fall into the basket on their own, it becomes clear how strongly this one brief spring task influences the entire harvest.


Comments
No comments yet. Be the first to comment!
Leave a Comment