
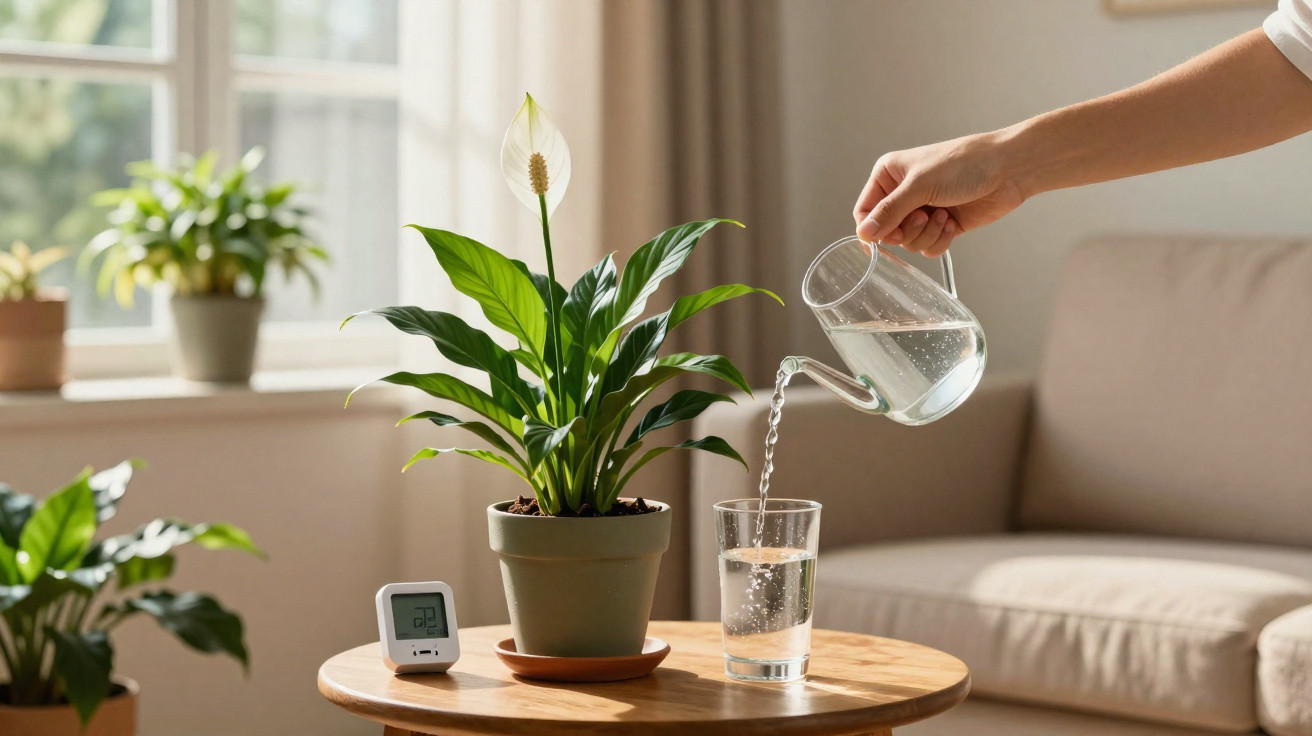
The peace lily is widely regarded as a tough, low-maintenance houseplant, yet in many homes it remains little more than a leafy clump. The cause is often neither fertiliser nor light, but a simple watering habit. Change one small detail and your peace lily will often produce noticeably more blooms within just a few weeks.
Why the peace lily reacts so strongly to incorrect watering
Peace lilies originate in shady tropical forests. There, they grow in soil that is gently moist but never waterlogged, sheltered from harsh sunlight. They need much the same conditions on a windowsill, and this is where many amateur gardeners struggle.
Rather than being lightly moist, the root ball is often left sitting in water all the time or allowed to dry out completely. Both situations put the plant under stress. It may survive, but it remains in “survival mode” and conserves energy by not flowering.
“Leaves can forgive a great deal – but for abundant blooms, the peace lily needs steady, gentle moisture around its roots.”
A fixed routine such as “water every Wednesday and Sunday” is only of limited use. In a warm, dry flat, the compost may be dust-dry after three days, while in a cool bedroom it can remain moist for days. Watering to a schedule can therefore quickly result in either waterlogging or drought stress.
The simple finger test: finding the right time to water
Rather than automatically reaching for the watering can, push a finger two to three centimetres into the compost:
- The compost feels slightly damp but not soggy: water it a little now.
- The surface is dry but it is still damp underneath: wait another day.
- It is dry and slightly crumbly even deeper down: it urgently needs water.
A peace lily copes well with one to two centimetres of dry compost at the surface. This brief “dry buffer” helps prevent root rot and encourages you to water consciously instead of out of habit.
The professional trick: watering from below rather than above
The real game changer for flowering is the watering method. Many professionals do not pour water into the pot from above, but water consistently from below instead.
How the saucer or soaking method works for peace lilies
For bottom watering, all you need is a saucer or a sink:
- Place the pot in a saucer or in a sink filled with water.
- Add water until the base of the pot is properly in the water, without submerging the entire pot.
- Leave it for 10 to 15 minutes so that the compost can soak up the moisture.
- Remove the pot, allow it to drain thoroughly and discard any excess water.
The main benefit is that the roots absorb exactly as much water as they genuinely need. The surface stays comparatively dry, while leaves and flowers do not get wet, and waterlogging around the upper roots occurs far less often.
“Letting the peace lily drink from below once or twice a week creates ideal conditions for strong roots and sturdy flower stems.”
Why watering from above often causes problems
With conventional top watering using a can, water often lands directly on the leaves. This can quickly lead to:
- uneven moisture distribution through the root ball;
- water running down the edge of the pot and draining away unused;
- a risk of rot if water remains in the leaf axils.
The plant can then appear contradictory: the compost is still damp on top, yet the leaves are drooping and some roots may already be damaged. Switching to the saucer or soaking method will usually break this cycle within a few weeks.
The right water quality: soft, rested and never ice-cold
Many peace lilies suffer not only because of the amount of water they receive, but also because of its quality. Hard tap water containing plenty of limescale can cause problems. Typical warning signs include brown leaf tips or yellow leaves despite apparently correct care.
Better options include:
- rainwater, provided it has been collected cleanly;
- filtered water;
- tap water left in a watering can for 24 hours, allowing chlorine to dissipate and limescale to settle.
The water should be at room temperature. Ice-cold water straight from the tap shocks tropical roots and noticeably slows growth.
Seasonal watering tips: adjusting to temperature and light
Spring and summer: peak season for leaves and blooms
When the peace lily stands in bright but indirect light and temperatures are between 18 and 29°C, it grows particularly actively. During this period, plenty of water evaporates and the roots are working at full capacity.
Typical signs during the warmer months include:
- Leaves droop slightly: the plant is thirsty. A brief soak is usually enough, and the leaves will often become firm again within a few hours.
- A new leaf appears but blooms do not: this usually means too little light or repeated waterlogging. Bottom watering and a brighter position can help.
Autumn and winter: less water, more patience
In cooler rooms, the root ball dries much more slowly. Anyone who continues watering at the same rhythm as in summer can quickly drown a peace lily. The plant grows more slowly, needs less water and copes well with longer dry periods at the surface.
From October onwards, it is therefore worth paying more attention to the compost and less to the calendar. The finger test becomes the most important check. If the leaves remain firm and deep green, everything is fine – even if you reach for the watering can much less often.
What leaves and tips reveal about care
A peace lily gives very clear signals when something is wrong. Reading them allows you to correct problems before flowering stops altogether.
| Symptom | Possible cause | Watering adjustment |
|---|---|---|
| Limp, drooping leaves | Drought | Water from below immediately and respond earlier in future |
| Brown leaf tips | Water that is too hard or salt build-up | Switch to rainwater or filtered water |
| Yellow leaves, soft stems | Too much water; root rot may be developing | Increase the interval between watering and allow the pot to dry out completely |
| Lots of leaves, hardly any flowers | Too dark; uneven moisture | Move it to a brighter position and water regularly from below |
How the right watering routine can genuinely encourage flowering
Anyone who waters a peace lily randomly for months will often end up with a loose, slightly tired-looking canopy of leaves. With bottom watering combined with the finger test and soft water, the picture usually changes significantly: the plant develops stronger roots, produces denser foliage and sends up sturdier flower stems.
“Many amateur gardeners report that switching to bottom watering was the turning point – from an evergreen plant to a true flowering star in the living room.”
Its position naturally matters too. Without sufficiently bright, indirect light, any watering trick will have limited results. Even in a moderately bright spot, however, a considered watering ritual can determine whether only a few isolated bracts appear or whether the peace lily produces fresh white spathes regularly over several months.
A few practical details that many people overlook
After soaking, never leave water standing in the decorative outer pot. What seems like an “extra reserve” can turn into a breeding ground for root rot within just a few days. It is better to pour away all water once the pot has drained.
If the peace lily is growing in very compact, old compost, you may eventually notice that the root ball barely absorbs water during soaking. In that case, repotting into fresh, loose compost is worthwhile. Only then can bottom watering work to its full potential.
One further small trick is to wipe the leaves regularly with a slightly damp cloth. This helps the plant breathe more effectively, evaporate moisture more evenly and respond more steadily to its watering rhythm. Many people underestimate how much dust can disrupt its water balance.
By following these few points – the finger test, watering from below, soft water and no permanent standing water in the outer pot – you give your peace lily the conditions it knows from the tropical understorey. In return, it will generally reward you not only with richer green foliage, but finally with the elegant white flowers for which it was originally bought.


Comments
No comments yet. Be the first to comment!
Leave a Comment