
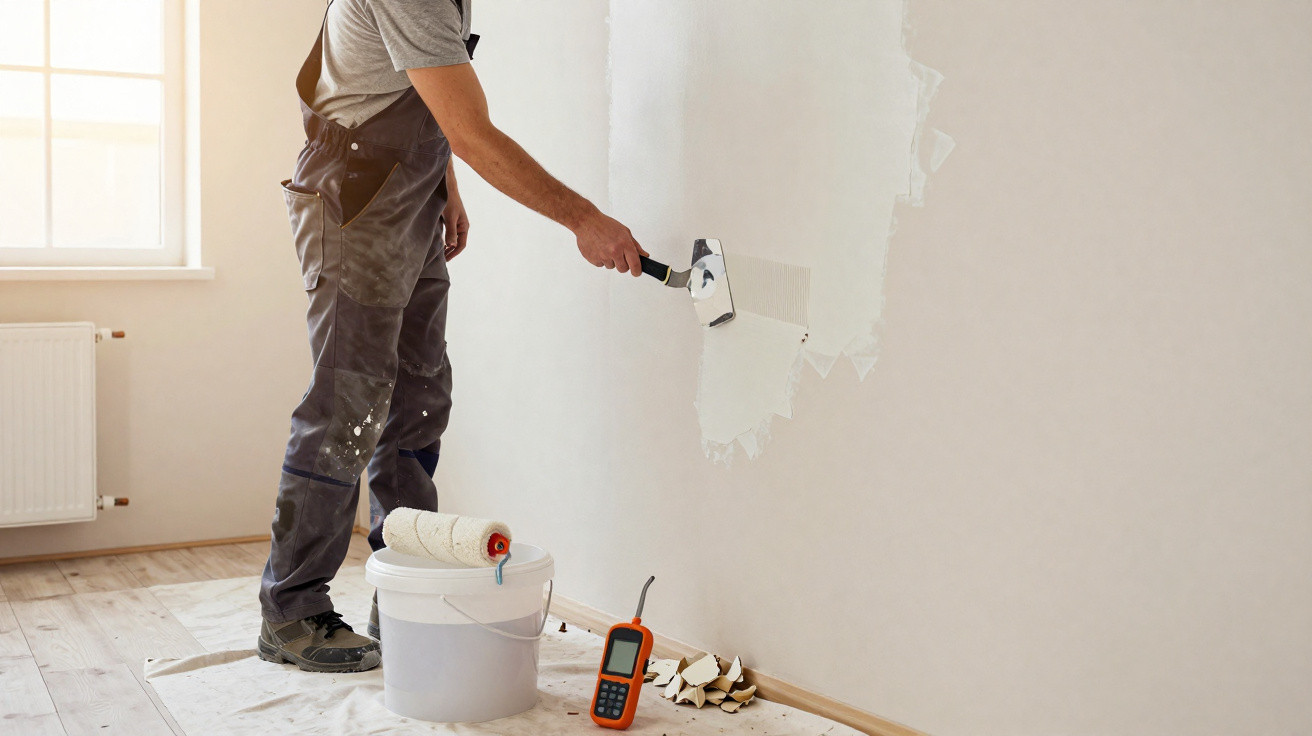
A damp-affected wall should not be filled and painted as soon as the stain has faded. According to interior designer Abel de González, repairs should begin only once the leak or water ingress has been dealt with and the surface has dried out fully. The first job is to “make good” the wall: use a scraper to remove every loose paint layer and all damaged material before reinstating the finish.
What does it mean to make good a damp wall?
Making good means working back to a sound surface. Using a scraper, remove flaking paint, weak sections of the wall finish and crumbly edges around the damaged section. There is no need to strip back the entire wall indiscriminately: the aim is to take away anything that has lost its bond while retaining material that is still firm.
- Allow the wall to dry completely.
- Check that the source of the water ingress has already been fixed.
- Scrape away blistered paint or paint that is no longer bonded.
- Remove loose render and crumbling sections.
- Clear away dust before applying any new product.
Why is it pointless to repair the wall before fixing the leak?
Fresh paint cannot stop a leak that is still occurring behind it. If water continues to penetrate through an external wall, pipework, roof covering or window junction, the surface will remain vulnerable to staining, blistering and loss of adhesion. For this reason, Abel de González’s method starts with one essential requirement: the cause of the damp must be resolved before any cosmetic repair is carried out.
The substrate must also be given sufficient time to dry. Applying filler, sealer and paint over a wall that remains damp can trap water beneath the new layers and damage the final finish. The drying period will depend on the scale of the issue, the wall material, ventilation and how much water has been absorbed.
What should be applied after all damaged material has been removed?
Once the surface has been scraped and cleaned, González advises using a primer or sealer to stabilise the base and prepare the area for the next repairs. Any holes and recesses should then be filled with a repair filler suitable for the substrate, built up in layers to prevent an overly thick and uneven patch.
- Remove all dust produced by scraping.
- Apply a primer or sealer that is compatible with the wall.
- Fill gaps and indentations with a suitable filler.
- Let the first layer dry.
- Sand it level, then remove all dust again.
- Apply a second repair layer wherever uneven areas remain.
Do two layers of filler really improve the finish?
Yes, particularly if the deteriorated area has left deep recesses. In the interior designer’s process, the first layer fills the larger voids; once dry, it is sanded and cleaned. A second layer then addresses minor differences in level, producing a more even surface before it is prepared for painting.
Trying to fill a deep hole with one very thick application makes levelling the wall harder and may lengthen drying time. Following the final sanding, the surface should be dust-free and treated with an appropriate preparatory coating or stabilising sealer before the finishing coats are applied.
What is the complete sequence for preparing a wall for painting?
The order of work is what separates a long-lasting repair from simply concealing a stain: first fix the water source, allow the wall to dry, scrape off compromised material, clean the surface, apply the specified preparation product, repair uneven areas with filler, sand, and prepare the surface once more. Only then should the paint coats be applied, observing the drying interval stated by the manufacturer. González’s method uses two finishing coats, with an inspection between them to correct any small flaws that are still visible.
If the stain returns after this process, the issue is probably not confined to the paintwork. Hidden leaks, water penetration, rising damp or condensation must be investigated before the finish is repeated. Making good the wall deals with deteriorated material; stopping the water ingress is what prevents the filler, sealer and paint from coming loose again in the same area.



Comments
No comments yet. Be the first to comment!
Leave a Comment