
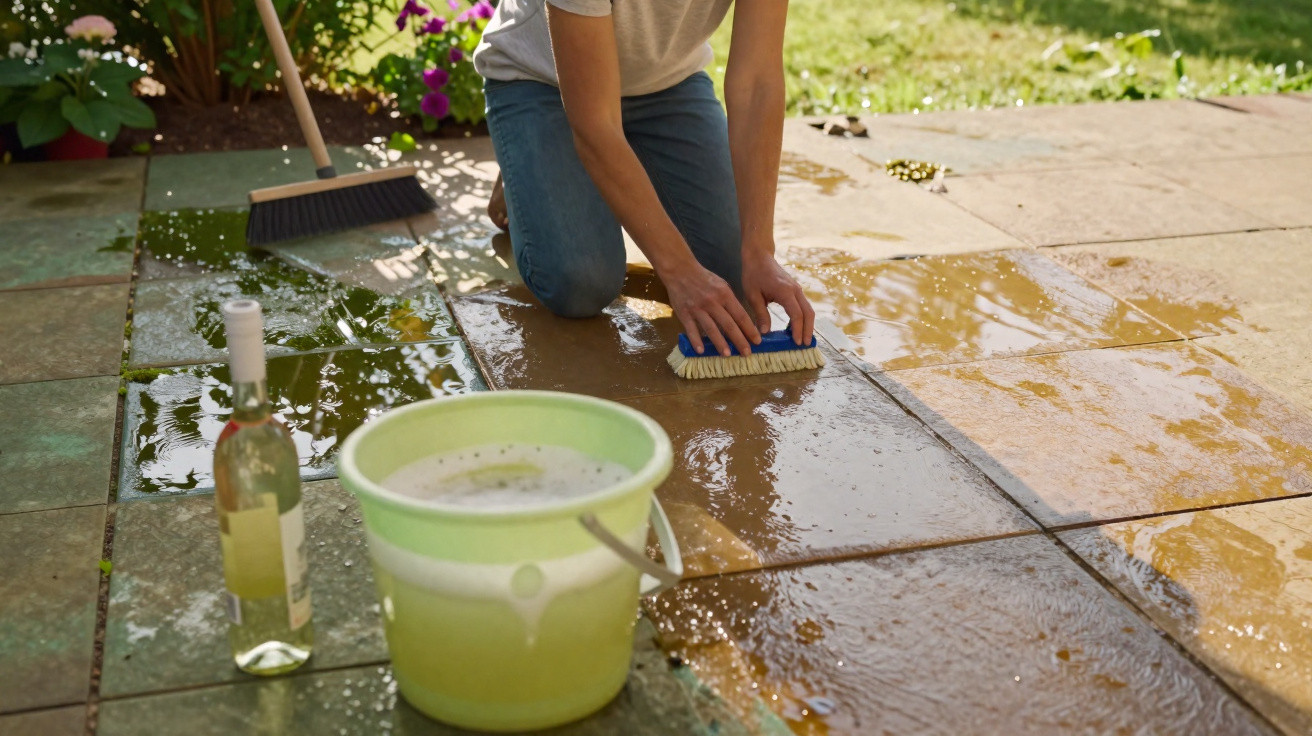
Many homeowners keep putting off cleaning the patio because they picture heavy equipment, pricey specialist cleaners and losing half of Saturday to the job. Yet an inexpensive cupboard staple, costing just a few pence, is often enough to substantially reduce moss, algae and dirt.
Why a green film develops on so many patios after winter
Following long, wet months, stone surfaces often remain damp for extended periods. Standing water, limited sunlight and porous materials create ideal conditions for moss and algae. The areas most commonly affected include:
- concrete slabs with a rough finish
- joints between paving stones
- spots beneath and behind plant pots
- shaded corners beside walls and fences
The result does not merely look untidy. This greenish layer can make steps and slabs slippery. Anyone with children, elderly relatives, or who is unsteady on their feet will recognise the uneasy feeling when the patio starts to resemble an ice rink.
Many people immediately reach for a pressure washer. Although it removes dirt quickly, it can also blast material from the joints, spray grime as far as the house wall, and use both electricity and water. Others buy powerful chemicals from the DIY shop, complete with prominent label warnings and a frequently harsh smell.
The surprisingly simple solution: ordinary white wine vinegar
A British gardening expert has used a much simpler approach for years: plain, clear table vinegar, available in supermarkets for only a few pence per bottle. In the UK, she pays around 30p and uses roughly half a bottle for an average patio, meaning the cleaning session costs only a few pence in total.
“This vinegar contains acetic acid, which weakens moss and algae on the surface while also tackling small weeds in the joints.”
Unlike many specialist cleaners, it does not come with lengthy ingredient lists. Used correctly, it can noticeably brighten a patio in around an hour, without a pressure washer or acrid fumes in the garden.
Step by step: how to clean your patio with white wine vinegar
No professional gardening knowledge is required for this method. Anyone with a bucket, a broom and a little time can get started straight away.
1. Clear and sweep the area thoroughly
First, move chairs, the table, barbecue and plant pots to one side or onto the lawn. The clearer the surface, the more effectively the solution can reach every area. Then use a stiff-bristled broom. Remove leaves, loose dirt and small twigs so that the vinegar reaches the paving itself rather than simply soaking the debris.
2. Mix the vinegar solution
For cleaning, a one-to-one ratio will generally do the job:
- one part clear table vinegar
- one part water, either cool or lukewarm rather than boiling hot
Pour the mixture into a bucket or watering can. Those with sensitive hands may wish to wear gloves, not because it is extremely hazardous but because acetic acid can mildly irritate skin.
3. Apply the solution and leave it to work
Distribute the mixture generously across the patio. Give particularly stubborn marks and joints an extra pour. The surface should be visibly damp, but not so saturated that the liquid immediately runs away.
“In many cases, allowing around an hour for it to work is enough to loosen the green growth noticeably and cause small weeds to wilt.”
Use that time for other tasks: wipe down the garden furniture, prepare the barbecue or take a break indoors. Direct sunshine is not ideal, as it makes the liquid evaporate too quickly.
4. Scrub with a stiff broom
Once the waiting time is over, the physical part begins. Use the same broom again, this time with more force. Scrubbing lifts away moss remnants, layers of algae and films of dirt. Many patio owners say they can see the difference as they scrub: the slabs appear lighter and the joints cleaner.
If desired, rinse the patio with clean water afterwards; a garden hose is sufficient. This removes loosened dirt and remaining vinegar from the surface.
Which patio surfaces suit vinegar – and where care is needed
Vinegar works because its acetic acid attacks the cell structure of moss and algae. Occasional use is usually unproblematic on durable concrete slabs or basic paving. Delicate natural stone, however, is a different matter.
These materials in particular can react badly to acidic cleaners:
- sandstone
- limestone
- marble
- old, crumbling joint mortar
On these surfaces, vinegar may encourage discolouration, dull patches or flaking. If in doubt, test it first on a tiny, inconspicuous area. If the stone remains unchanged, careful use may be considered. Stop the test at once if any whitening, surface roughening or other changes appear.
Take care around flower beds and lawns
The mixture may kill small weeds in paving joints, but it cannot distinguish between “weeds” and treasured garden plants. If the solution runs into neighbouring beds or onto the lawn, leaves there may also yellow or plants may die.
Where the patio edge meets a perennial bed, it is best to direct run-off into a corner where it cannot cause damage. Alternatively, gentler options may be more suitable for sensitive areas, such as specialist biodegradable cleaners or regular brushing with water alone.
How to greatly reduce moss growth over the long term
The vinegar treatment works quickly, but it does not address every cause. To keep the green film under control in the longer term, it helps to adjust a few habits.
- More light: Shaded areas where hedge foliage hangs densely over the paving encourage dampness. Pruning can bring air and sunshine to the surface.
- Improved drainage: Puddles after every rainfall reveal where a slope or drainage route is missing. Even minor work on the joints or an additional drainage channel can help.
- Moveable plant containers: Do not leave pots in the same position all winter. Moving them occasionally prevents dark, permanently damp patches.
- Regular sweeping: A quick sweep once or twice a week removes much of the material that moss and algae feed on.
“Small changes to everyday routines mean the green film returns far more slowly, making the major spring clean much less arduous.”
Alternative methods: when other cleaners or a pressure washer are worthwhile
Some patio owners prefer products that avoid the issue of acid altogether. Slow-acting treatments that are applied and then left to the weather may use surfactants or specialist active ingredients to gradually break down algae and fungi. They require less scrubbing, but more patience.
A pressure washer is particularly effective for very heavy dirt or when a surface is being cleaned before renovation. However, regularly directing it at paving joints also washes away sand and jointing material. Over time, the stones can loosen, water may penetrate, and damage can occur in winter.
Practical tips for safe everyday use
A few straightforward rules make the vinegar method practical for everyday use:
- apply it only in dry weather with no rain expected
- keep pets and children away from the area while it is working
- do not use it on newly laid paving
- in built-up areas, consider neighbours who may be sensitive to the smell
The odour in particular puts some people off. It usually disappears within a few hours or by the following day. Anyone who is very sensitive should choose a breezy day so that the fumes disperse more quickly.
Why the effort is usually worthwhile after only an hour
For many households, the main attraction of this method is its combination of low cost, easy availability and a manageable timeframe. A bottle of vinegar is already in most kitchens, and the whole task fits into a Saturday morning without taking over the weekend.
Those who treat their patio this way once in spring, while keeping an eye on standing water and dirt build-up throughout the season, will need to resort to more drastic methods less often. The green, slippery winter coating becomes a short, planned task rather than an unavoidable nuisance that is postponed for months.

Comments
No comments yet. Be the first to comment!
Leave a Comment