
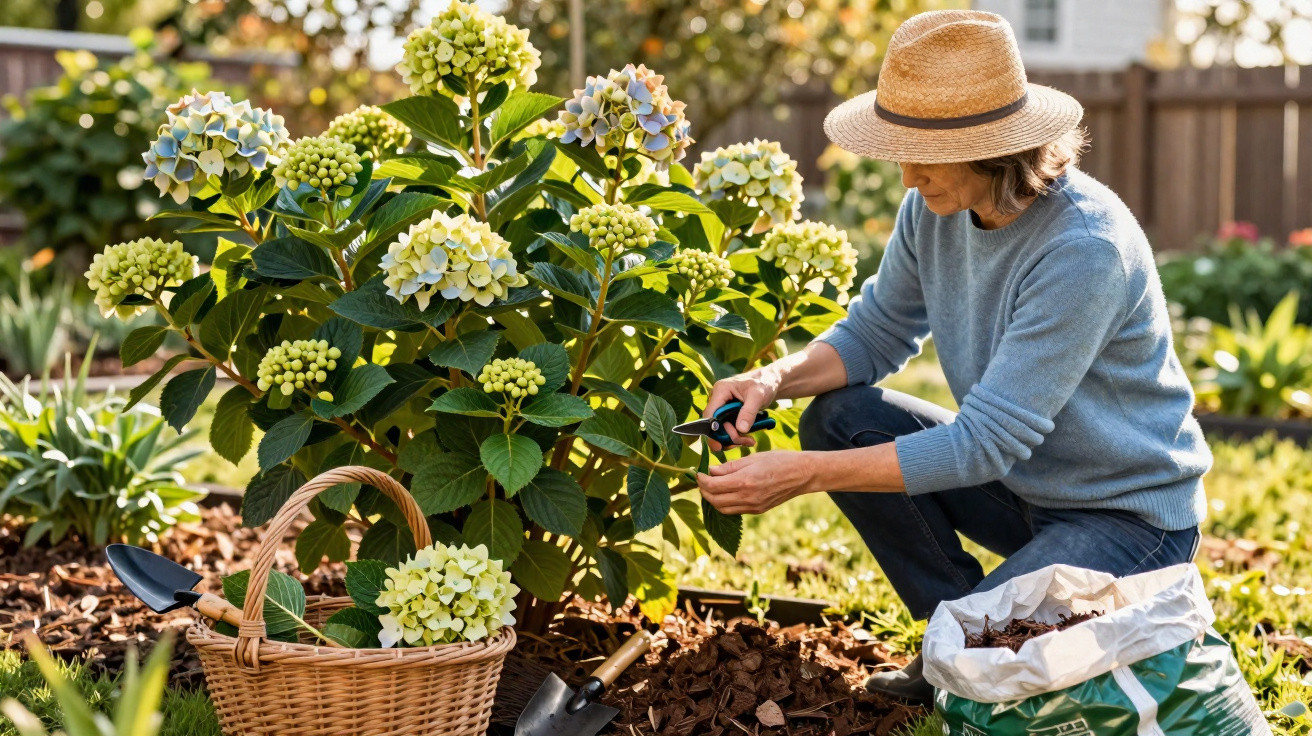
Many amateur gardeners faithfully water and feed their hydrangeas, yet still wonder why flowering becomes less impressive each year. British gardening star Monty Don relies on a straightforward March routine that is often overlooked, but can make the difference between “quite nice” and “Wow, what a shrub!”
Why March determines hydrangea flowering
Hydrangeas are considered easy-going plants: they grow in partial shade and tolerate quite a lot. Even so, they are highly sensitive to being pruned at the wrong time. Picking up the secateurs at the wrong point in the year can unknowingly remove the very flowers you hope to enjoy.
The crucial point is that many traditional mophead hydrangeas (Hydrangea macrophylla, with their familiar rounded flower heads) bloom on what is known as old wood. In other words, the buds for the following season have already formed on the stems during the previous year and remain there over winter.
Anyone who has a major tidy-up in autumn or midwinter and ruthlessly removes the old blooms will often cut just above those buds. The shrub may look neat afterwards, but it will produce only a handful of flowers in summer, if any at all.
The right time is not winter but late March, once the worst frosts have passed and the buds are visibly swelling.
This is exactly Monty Don’s approach: he leaves the dried flower heads on the plant throughout winter. Only in March does he take out the secateurs, removing precisely what genuinely needs to go.
Monty Don’s hydrangea pruning technique: gentle deadheading, not hard pruning
Monty Don makes a clear distinction between deadheading and proper pruning. Deadheading means taking off spent flowers alone, whereas pruning removes entire stems or substantial sections of them.
His key rule for mophead hydrangeas in March is:
Cut each faded flower head directly above the highest strong pair of buds – no lower.
This gets rid of the brown flower heads and any frost-damaged tips while leaving the buds beneath completely intact. Those are the buds that will later produce new shoots carrying the rounded blooms.
For anyone wanting a quick overview in spring, the method can be reduced to a simple checklist:
- Wait for mild, frost-free weather in March.
- Check whether the buds are starting to swell and can be clearly seen.
- Examine every faded flower head individually.
- Use sharp secateurs to cut just above the highest strong pair of buds.
- Remove dry, dead or exceptionally thin stems completely at their base.
- Leave strong green stems in place, as these will bear the season’s flowers.
This difference is particularly important: rather than simply cutting everything back to one height, deal with every flower head separately. It results in noticeably more blooms, as many gardeners are too severe and remove far too much.
When harder pruning is acceptable
Some hydrangeas become too large over the years or turn bare in the middle. In this situation, Monty Don advises planning more substantial work immediately after flowering in late summer, rather than in spring.
At that time, you can:
- remove some of the oldest stems close to ground level every two to three years
- reshape the shrub without cutting off the following season’s buds
By contrast, cutting plants hard back in January or February often destroys the buds that were meant to develop into summer flowers.
The overlooked helper: Monty Don’s mulch trick for strong buds
The second part of Monty Don’s hydrangea routine takes place not in March, but in the middle of winter. When the shrub is reduced to bare branches, he turns his attention to the root area and applies a thick layer of mulch.
He consistently uses well-rotted organic material, such as:
- mature homemade garden compost
- mushroom compost
- bark mulch, preferably pine, which makes the soil slightly more acidic
Apply a mulch layer around every hydrangea that is roughly five to ten centimetres thick – substantial enough to have an effect.
How and when the mulch is applied matters:
- Choose the timing: Pick a mild day in January or early March, when the ground is neither frozen nor completely waterlogged.
- Remove weeds: Thoroughly clear weeds from the area surrounding the shrub.
- Keep the crown clear: Do not cover the base of the stems with mulch, so that rot does not develop.
- Spread the mulch: Apply it five to ten centimetres deep in a radius of around 30–50 centimetres around the plant.
The benefits are twofold. The mulch protects shallow roots from sharp temperature changes and drying out, while the material gradually works into the soil and improves its structure.
What to avoid when mulching hydrangeas
One common mistake is piling fresh material against the stems, such as uncomposted woodchips or grass cuttings. This can lead to rot, nitrogen lock-up in the soil and weakened plants.
Building up mulch directly around the shoots is also harmful. Moisture gathers there, the bark softens and fungal diseases can take hold easily. Mulch should always be spread with a little space left around the plant crown.
Common mistakes that cost hydrangea flowers
Many cases of poor hydrangea flowering can be traced back to a small number of familiar errors. Knowing them makes it possible to take targeted action:
| Mistake | Consequence |
|---|---|
| Hard pruning in winter | Flower buds are removed, resulting in very few summer flowers |
| Unsuitable mulch material or too much placed directly against the stem | Rot, fungal infection, weakened plant |
| Pruning too late in spring | Buds that have already started growing are damaged |
| Waterlogging around the roots | Root damage, smaller flowers, yellow leaves |
| Full sun without sufficient moisture | Drooping leaves, scorched flower edges |
Which hydrangea types need different treatment
The March method of gentle deadheading is chiefly suitable for hydrangeas that bloom on old wood, particularly classic mophead hydrangeas and many lacecap hydrangeas.
However, some varieties behave differently, including:
- panicle hydrangeas (Hydrangea paniculata)
- smooth hydrangeas (Hydrangea arborescens, such as ‘Annabelle’)
These types produce most of their flowers on fresh, new wood. With these, you can be more confident with the secateurs in late winter. Many gardeners cut panicle and smooth hydrangeas back much more firmly in February or early March to encourage strong new shoots with large flower panicles.
Before pruning, it is therefore worth checking the plant label or researching the variety. Once you know whether your hydrangea flowers on old or new wood, pruning becomes far more straightforward.
Practical tips for everyday gardening
For busy amateur gardeners who do not want to stand beside the border with a calendar all the time, Monty Don’s approach can become a simple annual ritual:
- Set aside a mulching day in January and work through all shrubs one by one.
- On a mild weekend in March, inspect the hydrangeas specifically and remove only the spent heads above the buds.
- If you are unsure about the variety, prune too little rather than too much.
Anyone who follows this consistently for two or three years will often see the shrub become denser, sturdier and more free-flowering. Some people even report that formerly “sulking” hydrangeas suddenly begin flowering reliably every year again.
Why the extra effort is worthwhile
Hydrangeas may be sensitive to being pruned at the wrong time, but they forgive a surprising amount when they are otherwise properly cared for. Once you understand the combination of careful March pruning and well-timed mulching, you can avoid costly replacement plants and needless experiments with specialist fertilisers.
The small amount of additional work in late winter and early spring pays off several times over during the main season: with long flowering periods, sturdy rounded blooms that do not collapse after the first downpour, and shrubs that bring reliable pleasure in the same spot for many years.


Comments
No comments yet. Be the first to comment!
Leave a Comment