
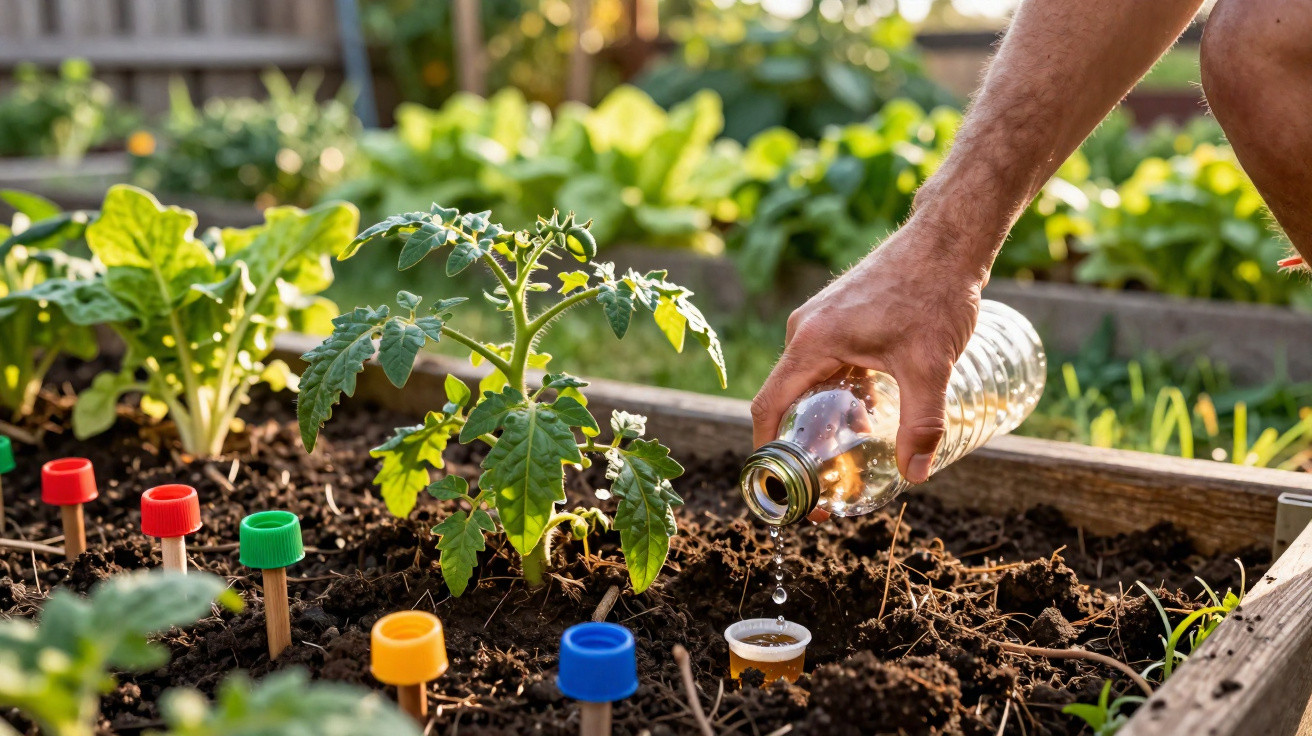
A few old bottles and matching caps can make watering a garden bed far easier, without any expensive equipment. Rather than constantly reaching for the watering can, repurposed household waste provides steady moisture, healthier plants and lower water use.
Why plastic bottle caps are suddenly so valuable in the garden bed
At home, the routine is automatic: empty a bottle, rinse it briefly, put the cap on or take it off, then toss it into the recycling. That is exactly where the mistake begins. These small, sturdy plastic caps are remarkably weather-resistant and hold their shape well – ideal qualities for long-term use in the garden.
Disposable plastic becomes a proven tool for water-efficient watering and clever pest control.
Anyone who waters regularly will know the issue: much of the water stays on the surface, evaporates in the sun or runs away before the roots receive any of it. The result is drooping plants despite what feels like endless watering. A modified bottle cap tackles this problem by delivering moisture precisely where it is needed – deeper in the soil.
Turn the bottle upside down: watering that takes care of itself
What you actually need for the bottle watering system
This irrigation system requires only items that are already found in most homes:
- empty plastic bottles (1.5-litre bottles are ideal)
- matching caps
- a sturdy needle, thin nail or small awl
- a sharp craft knife
That is all it takes to turn a bottle into a quiet, slow-drip water supply that can keep a garden bed watered for days.
Creating the perfect drip: piercing the cap correctly
The hole in the cap is the crucial detail. It determines how much water will later seep into the soil. Make the hole too quickly or too large, and the bottle may be empty within an hour.
Follow these steps:
- Warm the metal tip of the needle, nail or awl briefly with a lighter.
- Carefully push the heated tip through the centre of the cap.
- Screw the cap back onto the bottle and fill the bottle with water.
- Test the rate at which the water emerges over the sink.
As a guide, the hole is the right size if one drop appears roughly every two to three seconds. If it runs out in a thin stream, the opening is too large. In that case, it is better to use a new cap and start again rather than trying to repair the problem.
Next comes the second important cut: use the craft knife to remove the base of the bottle cleanly. This upward-facing opening will later be used for refilling – otherwise, the bottle would need to be dug up every time.
Installing the upside-down bottle in the garden bed as a water reservoir
Fit it without disturbing the roots
Ideally, install the system when planting out young plants. Tomatoes, peppers, cucumbers and courgettes all benefit noticeably from a consistent water supply.
Proceed as follows in a garden bed or planter:
- dig a hole around 10–15 centimetres deep beside the plant
- take care not to tear or damage roots
- place the bottle upside down in the hole, with the cap pointing downwards
- firm the soil around the sides so that it stands securely without moving
Only the cut-off base of the bottle should remain above the soil. Water can then be topped up easily through this opening without disturbing anything.
How often the bottle needs refilling
In spring, topping up once a week is usually enough, particularly while the soil still holds residual moisture. As temperatures rise, the schedule changes: on hot summer days, refilling approximately every three days has proved effective.
Through natural capillary action, the soil draws exactly the amount of water the roots require.
The surface remains relatively dry, which significantly reduces fungal diseases on leaves and fruit. Once you have seen how steadily tomatoes grow with a well-moistened but not waterlogged root zone, you will not want to return to irregular ‘far too much or no watering at all’.
More than irrigation: other uses for bottle caps in the garden
Simple traps for slimy leaf-eating pests
Slugs can cause real devastation in many gardens overnight. Colourful caps work well as small dishes placed in the bed between lettuce, kohlrabi plants or young perennials.
Here is how the method works:
- press caps or shallow lids into the soil with the opening facing upwards
- fill them with a small amount of beer or sweet syrup
- arrange several traps at short intervals around vulnerable beds
The smell attracts slugs, which end up in the liquid. This noticeably relieves pressure on the plants without scattering toxic products.
Soften sharp plant supports and protect your eyes
Tomato canes, bamboo poles and metal rods in a garden bed are useful, but can be a hazard to the eyes and face, especially in tight spaces. A cap pushed onto the end creates a highly visible, rounded cover.
Simply clean the ends of the supports a little and press the cap on firmly. Potentially dangerous points are then easy to spot, and it is less likely that you will painfully walk into one.
How the vegetable garden changes noticeably
Targeted moisture, stronger plants and fewer diseases
Many amateur gardeners report that plants grow noticeably more vigorously when they receive constant moisture from below. Tomatoes split less often because the soil no longer swings constantly between bone dry and soaking wet. Leaves stay dry, making life more difficult for fungi such as powdery mildew and blight.
Anyone who waters directly around the roots rather than superficially strengthens the entire soil structure.
Earthworms and other soil organisms also respond positively to even moisture levels. The soil retains a looser structure, nutrients are more readily available and roots can spread more widely.
Less waste, lower costs and a better harvest
This technique is ideal for a resource-conscious style of gardening. Every plastic bottle and cap that continues working in a garden bed for a few more seasons does not immediately enter the waste stream. At the same time, water use drops noticeably, especially during dry summers.
Placing several bottles around each plant creates a small network of quiet water reservoirs. Before going away, a thorough refill is often enough to keep the beds going for a few days without relying on neighbours to water them.
Practical advice, risks and effective combinations
Points to consider when using the system
A few details need attention to ensure the system works over the long term:
- use clean water only, so the small holes do not become clogged with slime
- check caps regularly for blockages and clear them with a needle when necessary
- remove bottles again before severe frost in late autumn so the plastic does not become brittle
- make sure children in the garden understand that the bottles are not toys
Anyone gardening in an area with many voles should check whether the animals interfere with the bottles. In most cases, however, they leave them alone because they contain no food.
Plants that benefit most and ways to increase the effect
Thirsty crops in particular get a great deal from this system: tomatoes, peppers, cucumbers, melons, squash and aubergines. Herbs such as rosemary and thyme generally need less water; a standard watering routine without continuous irrigation is often sufficient for them.
The method becomes especially effective when combined with mulch. Covering the surface of the bed around the bottles with grass clippings, straw or shredded leaves slows evaporation even further. The drip bottles supply regular moisture beneath the mulch, while the soil stays cool and loose for longer.
In this way, a pile of supposed plastic waste becomes a considered system of water reservoirs, slug traps and safety covers – and the vegetable garden gradually becomes less dependent on stressful watering routines and summer heat.
Comments
No comments yet. Be the first to comment!
Leave a Comment