
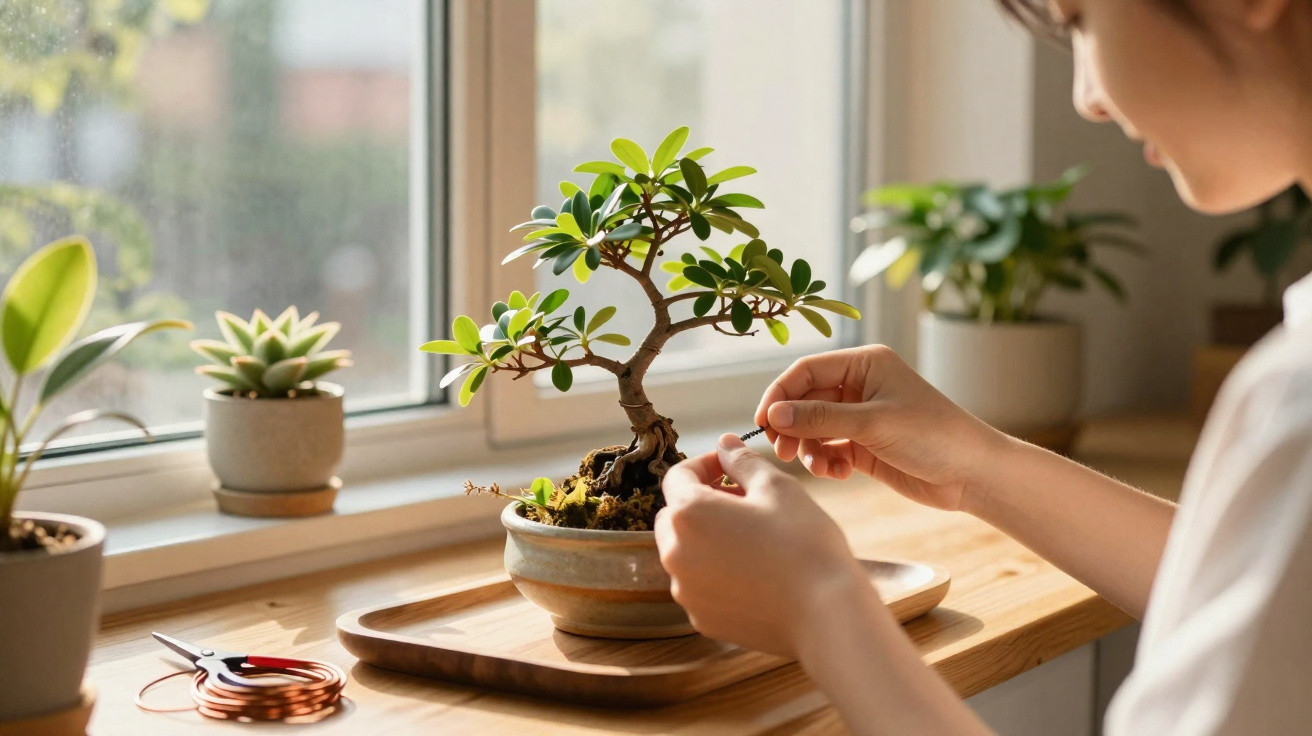
Many amateur gardeners would love to own a bonsai, yet are put off by the years of patience and demanding care usually involved. However, countless living rooms already contain a plant that can be turned into a striking “indoor bonsai” with very little effort: Chlorophytum comosum, commonly known as the spider plant. By working selectively with its roots and choosing the right pot, you can create a real statement piece for a windowsill, desk or coffee table within just a few months.
The modest spider plant as a bonsai star
Spider plants are usually seen hanging rather inconspicuously in baskets or growing in pots, where they produce long trailing shoots covered in plantlets. Botanically, they are hardy houseplants with thick, white storage roots. These particular roots are what make them so interesting for a bonsai project.
“The swollen roots of a spider plant can resemble a small trunk, while its leaves form the crown of a miniature tree.”
Unlike traditional bonsai species such as ficus or pine, a spider plant can be shaped much more quickly. It tolerates care mistakes, grows rapidly and is non-toxic to cats and dogs. This makes it an ideal “beginner bonsai” for the living room or home office.
The right position and suitable compost
Before shaping begins, the plant needs the best possible starting conditions. A weakened spider plant, or one that is repeatedly allowed to dry out, will not develop into an attractive miniature tree.
- Light: Bright conditions without direct midday sun, such as a north- or east-facing window.
- Compost: Loose, nutrient-rich houseplant compost with good drainage.
- Drainage: A layer of expanded clay pebbles or gravel at the base of the pot prevents waterlogging.
- Watering: Roughly once a week in summer and less often in winter; allow the surface to dry slightly between waterings.
As long as the young leaves in the centre of the plant remain upright, it will generally have sufficient water. If they droop limply, it is time to water it.
Exposing the roots for the bonsai effect
The key to achieving a bonsai appearance is to reveal the storage roots gradually. In time, they should stand above the compost like a small, sculptural trunk.
Shaping the “trunk” while repotting
When roots emerge from the drainage holes or the compost is visibly being pushed upwards in the pot, it is time to repot. This is precisely when the transformation starts.
Method:
- Carefully remove the plant from its pot and brush loose compost away from the side roots.
- Place the spider plant in its new pot a few centimetres higher than before.
- Add compost only around and beneath the roots, deliberately leaving the upper thick roots exposed to the air.
- Water thoroughly so that the fresh compost settles, while preventing waterlogging through drainage holes.
With each subsequent repotting, further sections of root can be exposed until the parts that were originally hidden create a clearly defined “base”. Over time, light and oxygen make the root surface appear firmer and more textured, rather like a miniature trunk.
A shallow bonsai pot and mineral topping
A shallow, preferably wide container is best for the classic bonsai look. It should have several drainage holes so excess water can run away quickly. The compost can then be covered with fine gravel or small dark stones. This naturally draws attention to the exposed roots and the dense tuft of foliage above them.
“A shallow, wide pot topped with gravel visually transforms the spider plant from a potted houseplant into a living sculpture.”
To enhance the impression of a small tree, it is worth removing some of the long runners and young plantlets. The plant can then direct more energy towards its roots and leaf base: the “trunk” appears stronger and the overall shape more compact.
The bottle method for a straight root trunk
Anyone aiming for a particularly straight, column-like root trunk can use a simple trick: a cut plastic bottle as a root guide.
Step-by-step instructions
For this technique, use a spider plant plantlet growing on a long runner. Here is how it works:
- Take a transparent plastic bottle and cut off both the top and bottom to create an open cylinder.
- Position this cylinder in the centre of a pot, filling only the inside with loose, slightly damp compost.
- Plant a young spider plant shoot inside the cylinder so that it stands centrally.
- The roots are then forced to grow straight downwards in search of moisture.
After around four to six weeks, check how the roots have developed. Either carefully cut and remove the bottle to expose the white root trunk, or leave it in place for a while longer if the trunk still appears too thin.
Later, transfer the finished root cylinder into a shallow bonsai pot. Leave the upper section of roots visible and conceal the compost with gravel again. A dense leafy crown forms at the top, while the pale “trunk” stands beneath it: an impressive effect achieved with very simple materials.
Caring for a spider plant mini bonsai
Once the desired shape has been achieved, its care routine changes slightly. The shallow pot and smaller amount of compost mean that the growing medium dries out more quickly.
- Moisture: Check regularly with a finger; water once the top two centimetres feel dry.
- Water: Always allow excess water to drain away and never leave water standing in the saucer.
- Temperature: 15 to 24 degrees is ideal; do not position it directly beside a radiator.
- Light: Keep it bright but away from harsh sunlight, which could scorch the leaves.
- Fertiliser: In spring and summer, give a little liquid houseplant fertiliser every few weeks, using only half the stated dose.
Longer leaves can be trimmed regularly with clean scissors to keep the proportions between crown and root trunk balanced. Always cut at a slight angle, as this gives the leaf tip a more natural appearance.
Risks, common mistakes and how to avoid them
Converting a spider plant into bonsai form is usually straightforward, although there are a few potential pitfalls. Knowing them in advance helps prevent frustration and yellow leaves.
- Too much water: Waterlogging can quickly cause root rot. Drainage holes are essential.
- Direct sunshine: Leaf tips can easily turn brown, especially at south-facing windows.
- Exposing roots too quickly: Revealing too many roots at once may leave the plant looking limp. Work in stages instead.
- Compost that is too low in nutrients: Without adequate nutrients, the root trunk remains thin and the crown sparse.
By proceeding carefully and watching the plant after every stage, you can make adjustments in good time: add a little more compost around the exposed roots, move it to a slightly shadier position or give it a drink of water, and the spider plant will usually recover quickly.
Why this project is worthwhile for beginners
Traditional bonsai cultivation requires years of experience, specialist tools and a great deal of patience. The spider plant makes the subject far less daunting: it grows quickly, forgives pruning errors and responds visibly to changes. It is therefore possible to learn directly from a living plant how roots, pot shape, light and pruning influence the overall effect.
At the same time, the care involved remains manageable. Anyone who already waters houseplants regularly needs to give the mini bonsai only a little extra attention. The reward is an object that looks far more like art than a “normal potted plant”, while being created from simple household materials.
It becomes particularly interesting when several variations are displayed side by side: one plant with a low, broad root base, another with a slim bottle-shaped trunk, and one with an almost spherical form and a dense crown. This creates a small collection of living sculptures on the windowsill, showing just how much potential lies within an apparently ordinary houseplant.
Comments
No comments yet. Be the first to comment!
Leave a Comment