
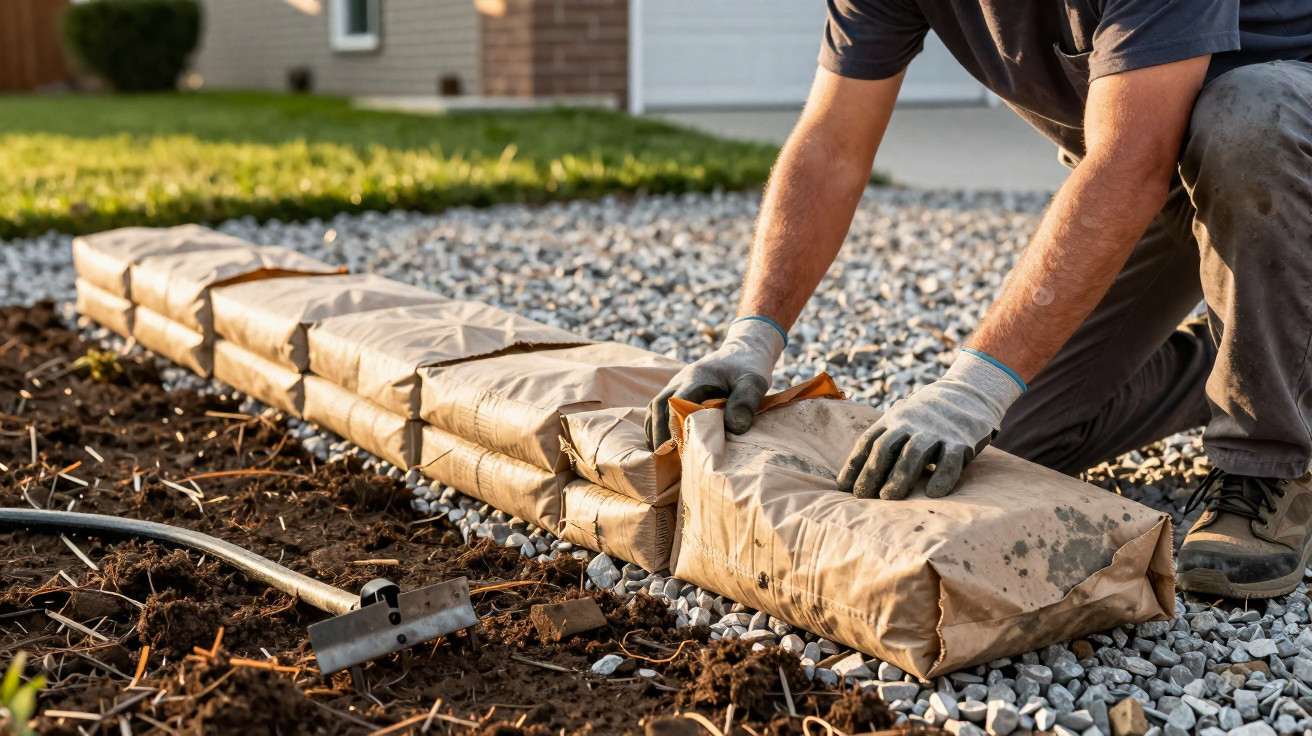
Many homeowners know the frustration: driveways and paths on Instagram look as though they belong in a catalogue, while at home every blast from a leaf blower sends gravel spilling into the lawn. A neat, solid edging would solve it, but usually costs a great deal of money and effort. One surprisingly simple trick from the DIY world tackles precisely this issue: unopened bags of concrete are repurposed as kerb edging.
Why concrete bags can enhance the appearance of your driveway
Concrete bags would normally sit in a DIY shop until they are mixed in a mortar tub. Some inventive DIYers have taken a different approach: they leave the bags sealed, lay them directly into the ground and turn them into a substantial border.
The method: position bags of ready-mix concrete along the driveway, add water – and each whole bag hardens into a block that resembles a row of large natural stones.
The result catches many people by surprise. What was previously a gravel area that spread outwards suddenly gains a defined line. It guides the eye and gives the driveway a tidier, more premium appearance. At the same time, the concrete edge performs several useful functions:
- It reliably keeps gravel and chippings within the path area.
- It prevents the lawn from creeping into the driveway.
- It limits erosion during heavy rain.
- It makes driving and manoeuvring at the edge easier.
Price is another benefit. A ready-mix concrete bag weighing around 25 kg generally costs only a few pounds. A standard driveway needs a manageable number of bags, often making this less expensive than paving blocks or concrete angle kerbs. It also avoids much of the conventional work: no mixing in a tub, no elaborate formwork and no complicated laying of stones.
The most common misunderstanding about driveway edges
When creating gravel paths, most gardeners make the same mistake: the path simply fades softly into the lawn or flowerbed, often with nothing more than a shallow bank of soil. It may look acceptable at first, but after the first autumn the problems become clear. Leaf blowers, lawnmowers and rain repeatedly shift the gravel, leaving frayed, untidy edges.
The concrete bag method addresses exactly this weak point. Instead of an invisible, soft boundary, it creates a visible and hard-wearing edge. It may seem inconspicuous in daily use, but it has significant benefits: less remedial work, a cleaner appearance, and greater convenience when mowing or clearing snow.
Choosing the right concrete bags
This trick only works with suitable materials. Three things matter: the type of concrete, bag size and packaging.
Which concrete mix is suitable
Use bags of ready-mix concrete: dry mixes that already contain cement, sand and aggregate. Cement alone is not enough, as it lacks the particles needed for strength and long-term durability.
DIY shops commonly stock 25-kg and 30-kg bags. Both options work, provided they offer sufficient strength. Products intended for foundations, fence posts or smaller concrete jobs are usually particularly suitable.
Why paper packaging is essential
The bag itself plays a surprisingly important role. Bags made entirely from paper, without an internal plastic layer, are ideal. Water needs to penetrate the packaging during soaking so that the concrete inside can cure. Afterwards, the paper should slowly decompose or be removable with a pressure washer.
If coated or plastic-reinforced bags are used, an unattractive covering that is difficult to remove will remain around the edge. Before buying, check briefly: plain paper, no film and no impermeable plastic layer.
Preparing the base correctly
The base determines whether the kerb edging lasts for years or starts to tip after its first winter. A little preparation is worthwhile.
- Mark out the route: Use a taut string line or garden hose to mark the planned edge. Gentle curves are possible, but it is best to avoid very tight radii.
- Excavate the ground: Dig a narrow trench a few centimetres deep along the line – deep enough for the bags to sit slightly within the ground rather than resting on top of it.
- Compact the base: Firm down the soil with a hand tamper or the back of a spade.
- Add a drainage layer: A thin layer of gravel or chippings improves drainage and helps reduce frost damage.
Taking care at this stage prevents the concrete bags from sinking or tilting later because the soil beneath them gives way.
Laying, watering and curing concrete bag driveway edging
Positioning the bags correctly
When placing the bags, it is worth considering which side was underneath during storage: finer particles settle towards the bottom of the bag. If this “former underside” is placed facing upwards, the finished surface will be slightly more uneven and stony. Using the other side as the top produces a noticeably more consistent look.
Set the bags tightly together along the trench, align them neatly and press them in slightly. Minor misalignments can be corrected with your foot or a wooden batten. The aim is to form as continuous a line as possible, with no visible “steps” between individual blocks.
Watering without creating a mess
To allow water to reach the concrete, make several small holes in the top of each bag using a craft knife or screwdriver. Then comes the most important stage:
- Water gently with a garden hose until the entire bag appears thoroughly saturated.
- Do not flood it so heavily that concrete slurry escapes and dirties the lawn.
- Press the bags down lightly with your foot between watering to level their height.
After several hours, the concrete will begin to harden visibly, and after one day the blocks will already feel firm. They reach their full load-bearing strength only after a good four weeks. During that period, car tyres should not run directly over the fresh edge.
Maintenance, appearance and possible adjustments
The paper layer will detach naturally over time, provided it contains no impermeable plastic barriers. If you want a cleaner result sooner, wait until the concrete has fully cured and remove the remaining paper with a pressure washer. This leaves pale concrete blocks with a gently rounded shape.
Anyone who finds raw concrete too plain can add a more creative finish:
- Mineral paint or stain can make individual blocks resemble “natural stone”.
- Brushing on a lightly pigmented slurry creates rustic, irregular effects.
- Gravel or decorative aggregate scattered at the sides disguises transitions and minor imperfections.
If a block shifts or you no longer like the layout, replacing it with a spade and some physical effort is laborious but possible. Compared with poured concrete foundations, this solution remains relatively flexible.
Limitations, risks and useful additions
The method is best suited to driveways and paths subject to moderate use. Heavy lorries, tight manoeuvres or sloping access roads can place more strain on the blocks than they can handle. In these situations, conventional kerbs or concrete angle kerbs are often more robust.
Frost and standing water are another consideration. In areas with severe frost, the sub-base should drain particularly well, so that no pockets of water form beneath the bags and exert pressure on the edge when they freeze. Where the soil is very wet, the gravel layer can be made somewhat deeper.
A narrow lawn edge is often a useful addition, such as a metal strip or a low stone mowing edge. The lawnmower can then run neatly alongside the concrete border without damaging it. A membrane beneath the gravel surface is equally worthwhile, preventing weeds from growing through the newly neat and clearly defined driveway.
Once you understand how concrete bags work, it is easy to spot other uses for them: as a quick foundation for a timber shelter, a low step leading to a patio, or a temporary boundary for a parking space. The driveway is an ideal testing ground: visible, yet easy to keep under control.




Comments
No comments yet. Be the first to comment!
Leave a Comment