
Anyone planning to fix new tiles to a bathroom or kitchen wall will often encounter the same issue: shortly after they are fitted, the attractive ceramic tiles start slipping. Instead of the satisfying before-and-after result, the outcome can be frustration, uneven grout lines and crooked rows. However, choosing the right materials, using a simple timber batten and applying adhesive properly can prevent this reliably, even for non-professionals.
Why wall tiles start to slip
Too thin, too thick, too wet: adhesive is usually to blame
In most cases, the tiles themselves are not the cause of the problem; it is the tile adhesive. Many people mix powdered adhesive “a little more runny” because it seems easier to spread. Although this may sound convenient, it is a serious mistake. When the adhesive layer is too thin, it has very little initial grab and the tile effectively floats on the wall.
Applying an excessively thick layer is equally troublesome. It creates a slippery bed beneath the tile, allowing every tile to settle slowly downwards under its own weight and gravity. The grout lines then quickly lose their alignment.
The ideal consistency of tile adhesive resembles a mouldable, stable filler: soft but not flowing, and able to hold its shape on the trowel.
Mixing the adhesive precisely as specified by the manufacturer already resolves much of the issue. It should not “pull away” from the trowel, but remain standing on it. A small test patch on the wall will quickly reveal whether the mixture is right.
The right adhesive is essential for every wall
Another aspect that is often overlooked is that one adhesive does not suit every wall. For vertical surfaces, a flexible or high-performance tile adhesive with strong initial grab is a sensible choice. Professionals refer to C2 performance-class mortar with extended open time.
DIYers should look for the following when buying adhesive:
- A statement that it is suitable for wall tiles, along with high bond strength
- Extended open time, with at least 20 minutes of working time
- Explicit approval for use in bathrooms, showers or kitchens
- Suitability for the substrate, whether plaster, plasterboard or existing tiles
Advice in a DIY shop can be useful, but the technical information printed on the bag is the dependable source. Reading it twice can save repeated pressing and later adjustments.
The timber batten that stops tiles slipping
Why beginning with the second row avoids so many problems
Many people instinctively begin with the lowest row, directly above the floor, shower tray or worktop. In practice, this is exactly what creates difficulties. Floors are rarely perfectly level, while old silicone joints or minor variations in the screed transfer relentlessly upwards. Every imperfection can make the entire tiled area run out of line.
Professionals avoid this by not starting at the bottom, but with the second row. Their simple aid is a straight timber batten screwed horizontally to the wall.
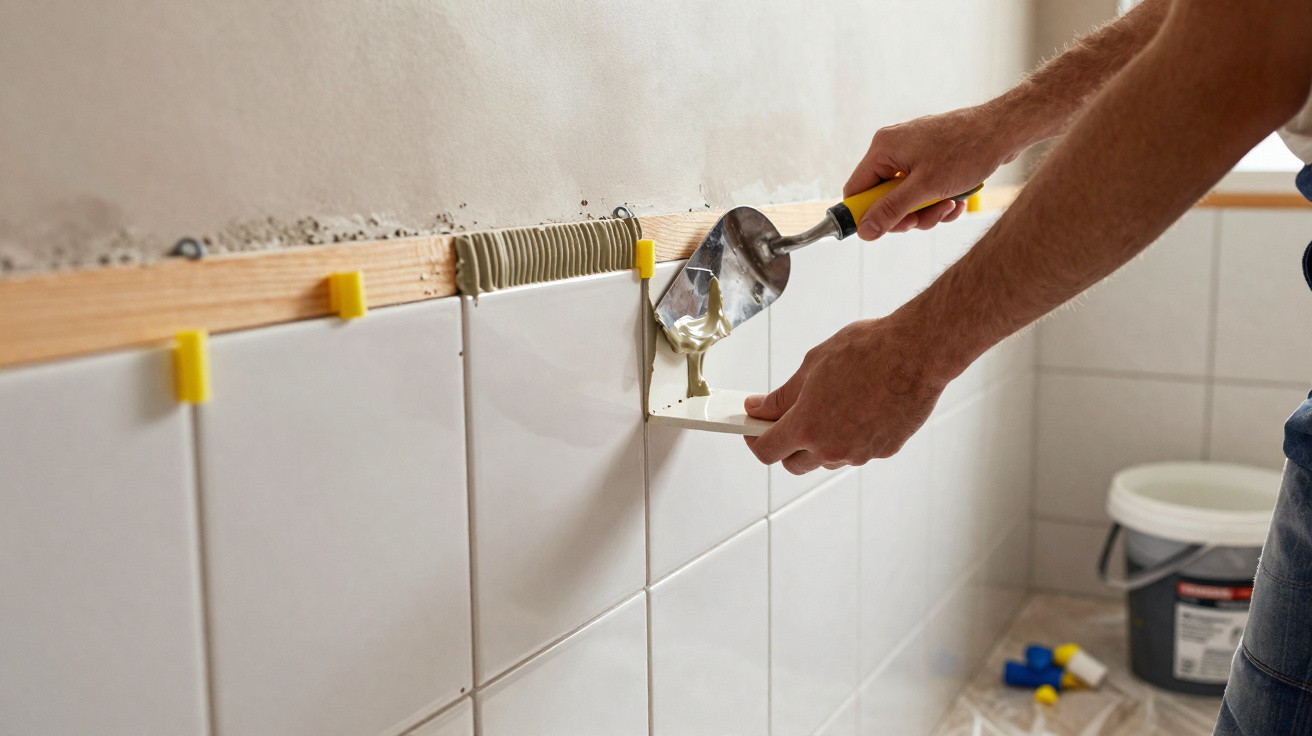
The temporary timber batten provides an absolutely level reference line – and supports all tiles until the adhesive has cured.
The method works as follows:
- Use a spirit level to mark a horizontal line at the required height for the second tile row.
- Secure a straight timber length or sturdy batten along this line with screws.
- Make sure it cannot bow; it is better to choose slightly more substantial timber.
- The first tiled row can then rest on top of the batten rather than on an uneven floor.
The batten carries the weight and prevents any downward movement. The bottom row is fitted only after all rows above it have been laid and the adhesive has fully hardened.
Tiles held firmly in place: the effect of double buttering
The application method itself provides the second major safeguard against slipping tiles. Professionals call it “double buttering”: adhesive is applied not only to the wall but also to the back of the tile.
A notched trowel with the correct notch size is important, usually 6 millimetres for standard tile formats. Comb the adhesive across both the wall and tile in clean, consistent ridges.
The crucial point is that the ridges must cross each other.
- Wall: comb the ridges horizontally
- Tile: comb the ridges vertically
When the tile is pressed firmly into place, the adhesive ridges interlock, air is expelled and suction develops. This makes the tile sit against the wall almost as though held by a suction cup, greatly reducing movement, particularly with large-format tiles.
Spacers and clips: even grout lines without the stress
Why spacers are more than a DIY gimmick
Working purely by eye soon produces grout joints of varying widths. This looks untidy and makes even slight tile movement more obvious. Traditional plastic cross spacers or modern levelling systems with wedges or clips provide the solution.
These systems perform two tasks at once:
- They maintain consistent grout-joint widths between every tile.
- They stop individual tiles from dropping slightly and creating lippage.
Tiny differences are immediately noticeable on kitchen walls or in brightly lit showers. Spending a few pounds on spacers produces a noticeably more visually “calm” finish.
Patience pays off: why 24 hours of rest is essential
Let the adhesive cure before fitting the bottom row
Once the area above the timber batten has been tiled, many people are eager to continue straight away. This is where some DIYers undo their work at the final stage. Removing the batten too soon can allow the full weight of the still-soft tiled section to pull downwards unexpectedly.
At least one day of waiting – the support should only come off once the adhesive has fully cured.
Most adhesives take around 24 hours to achieve their final strength. Only then should the timber batten be carefully unscrewed. The exposed section of wall is now ready for the bottom row, which will usually require more complicated cuts.
This final row is often the most demanding, especially above baths, shower trays or worktops. Small variations in floor level, slopes and uneven edges can be concealed with accurately cut tiles here. Leaving this step until last allows millimetre-precise work without putting the completed rows at risk.
Practical extra tips for a wall finish worthy of a tiler
Substrate, planning and safety: what DIYers often overlook
Before the first dab of mortar reaches the wall, the substrate needs attention. Loose paint, grease, dust and crumbling plaster are all detrimental to adhesion and durability. A bonding primer or stabilising primer creates a sound, uniform surface.
A brief check beforehand is useful:
- Tap the wall and repair any areas that sound hollow if necessary.
- Use a long straightedge or levelling rule to identify bulges and hollows.
- Plan the grout lines: where will the tiled section begin, where will cut tiles fall, and where are the light lines?
One further consideration often goes unnoticed: large tiles are heavy. Work gloves, knee pads and safety glasses when cutting or grinding tiles help prevent injuries. Tile cutters and wet-cutting machines should be set up securely and used correctly.
Where the timber batten technique is useful
The combination of a timber batten, double buttering and spacers is not restricted to bathrooms. It also benefits these projects:
- A kitchen splashback between the worktop and wall cabinets
- Tiled walls in a utility room
- Half-height tiled sections behind a basin or WC
- Feature walls with decorative tiles in living areas
In kitchens especially, the batten ensures that the bottom tile row can later follow a slightly uneven worktop precisely. Minor ripples or slopes can therefore disappear within the cuts, while the visible grout joints remain in a clean line.
Following these few but crucial rules turns tiling from a test of patience into a genuinely satisfying project. The wall remains as intended: straight, calm and durable, without tiles gradually making their way towards the floor.




Comments
No comments yet. Be the first to comment!
Leave a Comment