
More and more amateur gardeners are turning to a remarkably simple household trick.
Anyone wanting to start their first seeds indoors in spring soon discovers that pots, seed trays and windowsill space are all in short supply. This is where a method currently gaining rapid popularity on gardening forums comes in – and it requires only items already found around the home.
Snail sowing: how it works
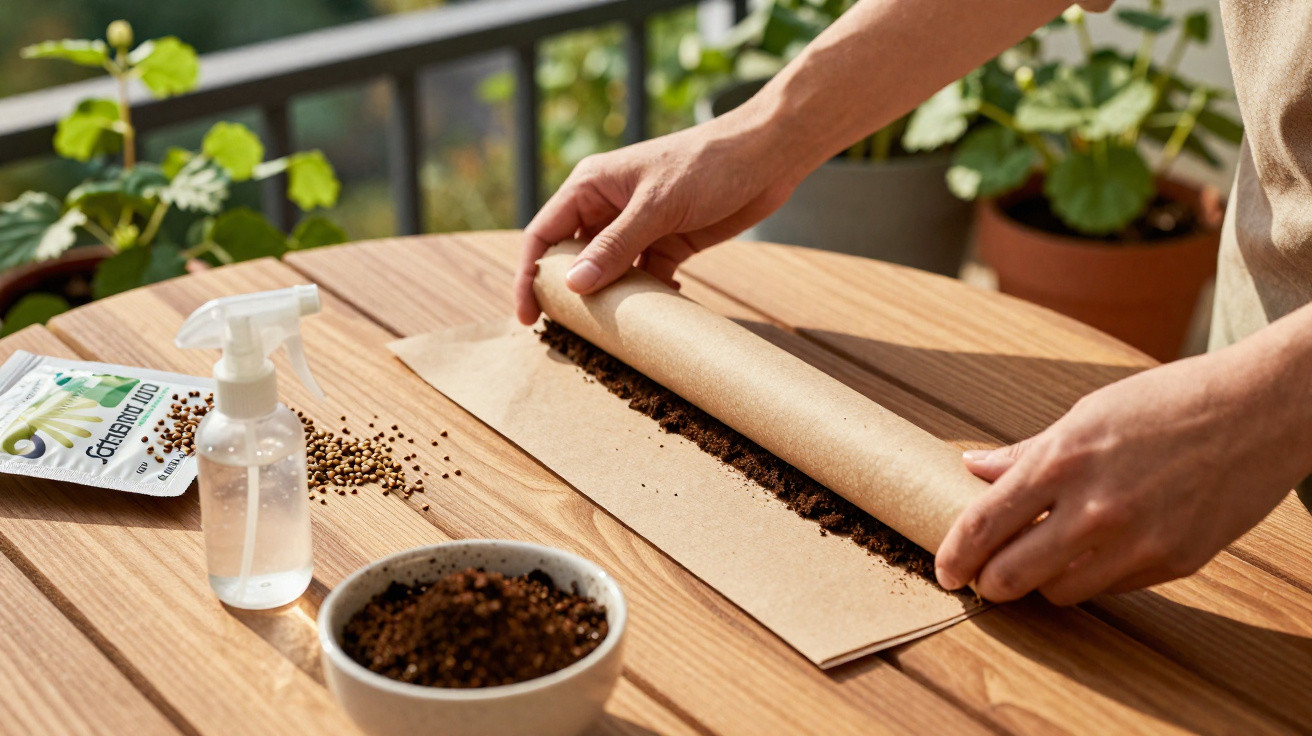
Known as snail sowing, this technique places seeds not in individual pots but along a rolled strip of flexible material. The strip is lined with paper and seed compost, then rolled up tightly with the seeds inside.
The result is a compact “snail seedling shell” where dozens of seedlings can begin growing in very little space.
The roll is stood upright in a tray, with its upper edge facing upwards. This creates a small, space-saving miniature garden that fits on any windowsill and needs hardly any newly bought materials.
Why gardeners are switching to snail sowing
Many amateur gardeners want methods that save money, reduce waste and still work reliably. The snail method meets several needs at once:
- Takes up less space: Rather than arranging numerous individual pots, only one compact roll sits in a tray.
- Reuse instead of buying new: Old plastic bags, newspaper and leftover plastic sheeting are given a second use.
- Gentler pricking out: When the roll is carefully unrolled, each young plant is revealed separately, without causing major root damage.
- Easy monitoring: Seedlings grow close together, making it quick to see which varieties are getting off to a strong start.
- Lower cost: Seed compost and seeds are usually the only items that genuinely need to be purchased.
Household materials that work well
No professional kit is needed for snail sowing. A look through the kitchen and recycling is often enough.
Suitable base materials
- Thin plastic bags or bin liners, cut open
- Strips of newspaper
- Leftover decorator’s sheeting or other soft plastic
These need a layer that retains water without immediately falling apart:
- Kitchen roll
- Thin fabric, such as an old cotton T-shirt or muslin cloth
You will also need:
- Fine seed compost or sieved potting compost
- The seeds you want to grow, such as tomatoes, peppers, lettuce or flowers
- A shallow tray or saucer to keep the roll upright
Step by step: successful snail sowing
1. Prepare the strips
Spread the plastic or paper base on a table and cut it into long strips around 10 to 15 centimetres wide. It is better to make them slightly too long than too short: the longer the strip, the more seeds it will hold.
2. Add a moisture-retaining layer
Lay a strip of kitchen roll or fabric over the base. It should run along the entire length without hanging over the edges. This layer will later hold water and help keep the compost in place.
3. Spread the compost
Next, add a thin layer of lightly moistened seed compost. It should be damp rather than wet. Pressing it down gently by hand is enough to stop it shifting.
The compost can be quite thin – what matters is an even, fine layer that gives the seeds good contact.
4. Sow the seeds
Place the seeds along the length of the compost. Leave a few centimetres between them so the young roots do not become too tangled later. Small seeds, such as lettuce, need less room than larger ones, including tomatoes and beans.
5. Roll it into a “snail”
Now comes the key stage: carefully roll up the strip from one end. Keep it as firm as possible without squeezing the compost out of the strip. It should form a compact roll resembling a small snail shell.
Stand the completed roll upright in a tray. The seeds will now sit in a spiral around the roll.
6. Position and care
Pour a little water into the tray so that the bottom edge of the snail sits lightly in the water. The paper will slowly draw up the moisture and keep the compost damp.
- Position: Bright, but out of strong midday sun for the first few days
- Temperature: Usually between 18 and 22 °C, depending on the crop
- Checking: The compost should remain lightly moist at all times, but never dripping wet
Caring for snail-sown seedlings
After a few days, the first green shoots will appear along the top of the roll. From this point, light and the correct amount of water are particularly important.
- Light: Put the roll as close to a window as possible. If necessary, use a grow light to prevent seedlings becoming “leggy” and producing long, thin stems.
- Water: Check every day that the paper is still moist. If the edge has dried out, carefully add a little water to the tray.
- Air: Trapped moisture encourages mould. The roll should not be kept in a closed box without air circulation.
When young plants should be moved
The seedlings should be moved at the latest when their first true leaves appear after the seed leaves. Depending on the variety, this generally happens after two to three weeks.
Open the snail carefully
Lay the roll on a table and gently unwind it section by section. Avoid moving the compost suddenly, and open only as much as is needed at that moment. Lift each plant with its small clump of compost and transfer it to a pot or directly into the bed.
Water well after transplanting, but do not soak the plants. For the first few days, young plants need some protection from harsh sun and wind so that they do not wilt.
Plants particularly suited to snail sowing
| Plant | Suitability for snail sowing |
|---|---|
| Tomatoes | Very good; germinate evenly and are easy to move into pots |
| Peppers / chillies | Well suited; save considerable windowsill space |
| Lettuce | Ideal; many plants can be grown in a small area |
| Brassicas | Also suitable, as they are robust enough for pricking out |
| Finely sown herbs | Only partly suitable, as they can become heavily intertwined |
Benefits, limitations and small risks
This method is especially useful for people with limited space, balcony gardeners and beginners on a small budget. It saves plastic, makes use of available materials and keeps the start of the sowing season organised.
Even so, there are several points to bear in mind:
- Rolls that are too wet may grow mould or cause seeds to rot.
- Very delicate varieties can sometimes cope less well with transplanting later on.
- Sowing too densely creates more work when separating the roots.
Anyone unsure can first try the snail method with an easy variety such as radish or lettuce. This makes it easier to judge the right amount of water and spacing.
Practical additions for resourceful amateur gardeners
Those who enjoy experimenting can easily adapt snail sowing. Labels written on the outer edge of the roll help separate different varieties within one snail. Small wooden sticks placed in the tray can indicate where each variety begins.
One further tip: a paper base will break down over time. If you later plan to plant directly into a raised bed or a large container, thin paper layers can even be planted along with the seedlings. This means the roots are barely disturbed during transplanting.
The method also has an added appeal for families: children can watch more green growth emerge from an unassuming roll each day. It is motivating and makes the journey from seed to plant tangible – all without expensive professional equipment.
Comments
No comments yet. Be the first to comment!
Leave a Comment