
Act wisely now and you can often pick fruit before your neighbours do.
Every year, many amateur gardeners wonder why their strawberries barely produce in June – or only start yielding once the craving for the first red berries has almost passed. The reason is rarely the variety; much more often, it comes down to four straightforward spring tasks that are underestimated or overlooked altogether.
Why spring determines your strawberry harvest
Strawberry plants are naturally hardy, long-lasting growers. They remain in the bed for several years, yet they react very sensitively to poor care in early spring. This is when they establish the foundations for flowering, fruit set and flavour.
Those who care for their strawberries purposefully in March and April can harvest noticeably earlier, more abundantly and often more sweetly from mid-June.
There are no complicated professional techniques involved, just four simple measures: thorough cleaning, considered feeding, sensible mulching and correct watering – plus a little protection from late frosts. Together, these steps can turn tired clumps back into productive strawberry plants.
Step 1: Remove old leaves for a healthy start
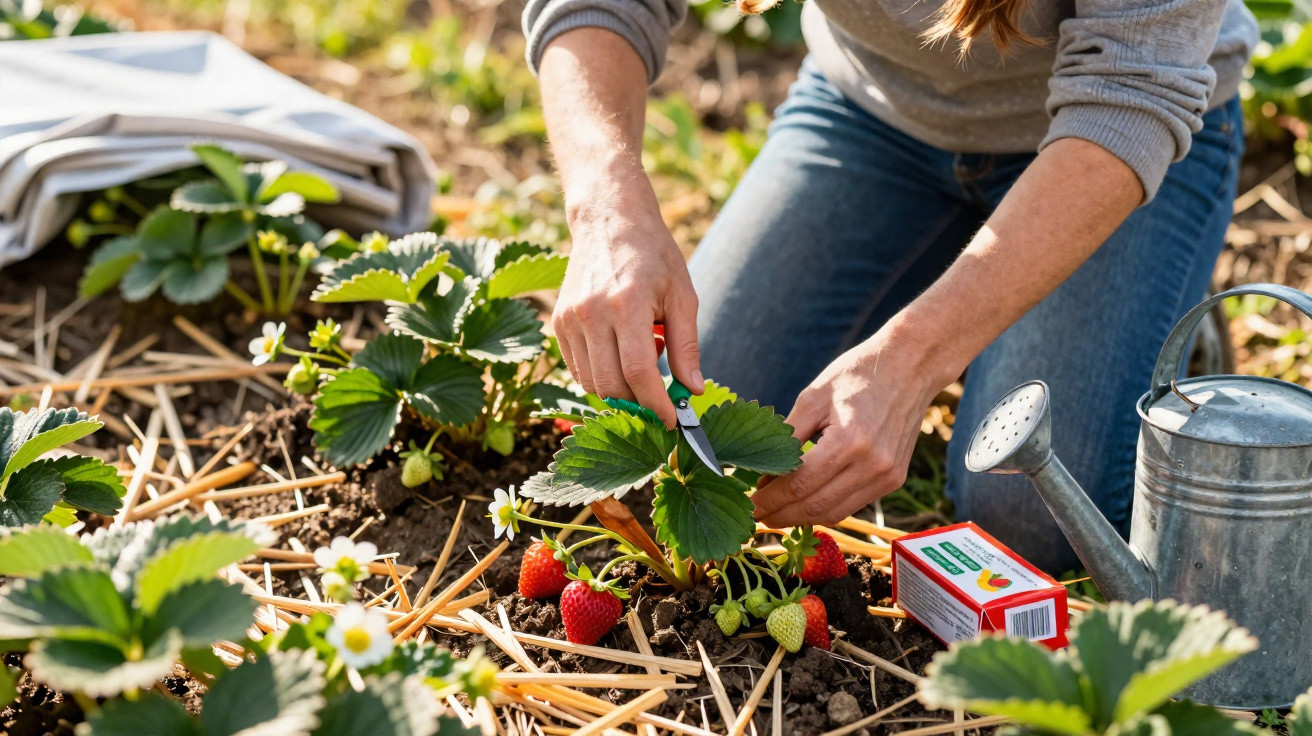
From late March or early April, it is time to give the strawberry bed its spring clean. Remove every old, brown or spotted leaf consistently. Wilted foliage often harbours fungal spores that can later infect both leaves and fruit.
- Cut away all dried or brown leaves just above the crown
- Remove rotten or soft, mushy plant material completely
- Weed around the plants
The crown – the short, thickened stem section at the centre – must not be covered with soil. It should sit just at soil level and remain uncovered. This allows the plant to warm up more quickly, start growing sooner and form flower buds earlier.
If you have several rows, take one small detail seriously: clean your tools regularly. A damp cloth with a little alcohol or hot washing-up water is enough. This helps stop fungal diseases spreading unnoticed from one plant to another.
Step 2: Feed strawberries carefully with nutrients
Once everything is clean, the plants need an energy boost. Strawberries are not heavy feeders like cabbage, but they do require a strong start to the season for good flowering. Well-rotted compost is ideal: it should no longer generate heat and should feel crumbly in your hand.
About two loose handfuls of mature compost per plant are enough to give flower production and growth a clear boost.
Spread the compost in a ring around the base of each plant rather than tipping it straight into the crown. Then use a hand cultivator or small fork to loosen only the top layer of soil very gently – no deeper than two to three centimetres, as strawberry roots grow very close to the surface.
This light cultivation breaks up any hard crust, lets air reach the roots and improves the infiltration of rainwater or irrigation water. Simply applying a mineral all-purpose fertiliser can quickly lead to excess salt in the soil and watery fruit. Organic material such as compost works more slowly but more sustainably, while also improving soil structure.
Step 3: Mulch as a shield for fruit and soil
As the plants begin producing fresh growth, it is worth applying an organic mulch. Straw, hemp shives and flax shives are traditional choices for a strawberry bed. They keep soil moisture more even and prevent ripening berries from lying directly on the ground and rotting later on.
- Apply a mulch layer of around 5–10 centimetres around the plants
- Leave a clear gap of 2–3 centimetres around the crown
- Choose material that decomposes slowly and does not go mouldy
Covering the plant crown with mulch encourages waterlogging and rot at its most vulnerable point. It is better to leave a distinct ring with the centre exposed. Later, the mulch keeps the fruit clean, reduces rain splash and therefore lowers the risk of grey mould (Botrytis).
Stones or plain gravel are of little use for strawberries. They become very hot in sunshine, dry out the soil and add no humus at all. Organic mulch, on the other hand, gradually becomes valuable organic matter for the soil.
Step 4: Water correctly and protect against late frost
Water demand increases with the first warmer days. Strawberries dislike permanently wet roots, but they also suffer if they dry out shortly before and during flowering. The best approach is to water less frequently but thoroughly.
Watering generously once or twice a week is usually sufficient, provided the soil is not extremely sandy.
Crucially, always water at soil level rather than over the leaves. Wet foliage and flowers stay damp for longer and are more easily affected by fungal disease. Drip hoses or watering cans without a rose are clearly preferable here.
Late frost remains the hidden enemy of early strawberry flowers. Cold nights around the well-known mid-May “Ice Saints” can freeze the first delicate blooms. A simple horticultural fleece, laid loosely over the rows in the evening and removed again in the morning, provides a small rise in temperature and can save many flowers.
Extra tips for more and better fruit
Limit runners and focus the plant’s energy
Strawberries produce plenty of runners, also known as stolons, throughout spring and summer. If all of them are allowed to grow, the plant puts a great deal of energy into new young plants – at the expense of fruit. Anyone mainly wanting a harvest in the current year should cut off most runners early.
Only gardeners who specifically want to propagate plants should leave a few strong runners in place, root them in small pots and use them to create new plants for the next bed.
Spot diseases early
Fungal diseases such as powdery mildew and grey mould can often be stopped at an early stage if you look closely. Warning signs include:
- dark, sunken marks on leaves
- pale green or limp leaves despite sufficient water
- fruit with grey fuzz or soft, mushy patches
Cut away affected plant parts promptly and do not put them on the compost heap; dispose of them separately or burn them. This considerably reduces disease pressure throughout the bed.
Site, soil and tips for strawberry lovers
Strawberries thrive in sunshine. A position with at least six hours of direct sun each day delivers not only more fruit, but above all more sweetness. In partial shade, berries often ripen later and remain more acidic.
The soil should be loose, free-draining and rich in humus. Waterlogging, for example in dips or in heavy clay soil without drainage, quickly causes root rot. In difficult sites, slightly raised beds or broad rows built up a little higher can help.
To improve the flavour even further, work a thin layer of mature leaf mould into the soil in spring, then water once more lightly with nettle liquid manure in May – well diluted, of course. This provides additional potassium, which promotes the development of flavour and sugars.
A sunny spot, loose soil, organic feeding and consistent spring care – this combination turns every strawberry bed into a small berry-picking oasis.
The care routine is enjoyable too: children can help remove old leaves, carry mulch or put the frost fleece over the plants in the evening. Those who maintain these habits year after year gradually build a reliable strawberry system, with their own young plants, well-established soil and dependable harvesting from mid-June.




Comments
No comments yet. Be the first to comment!
Leave a Comment