
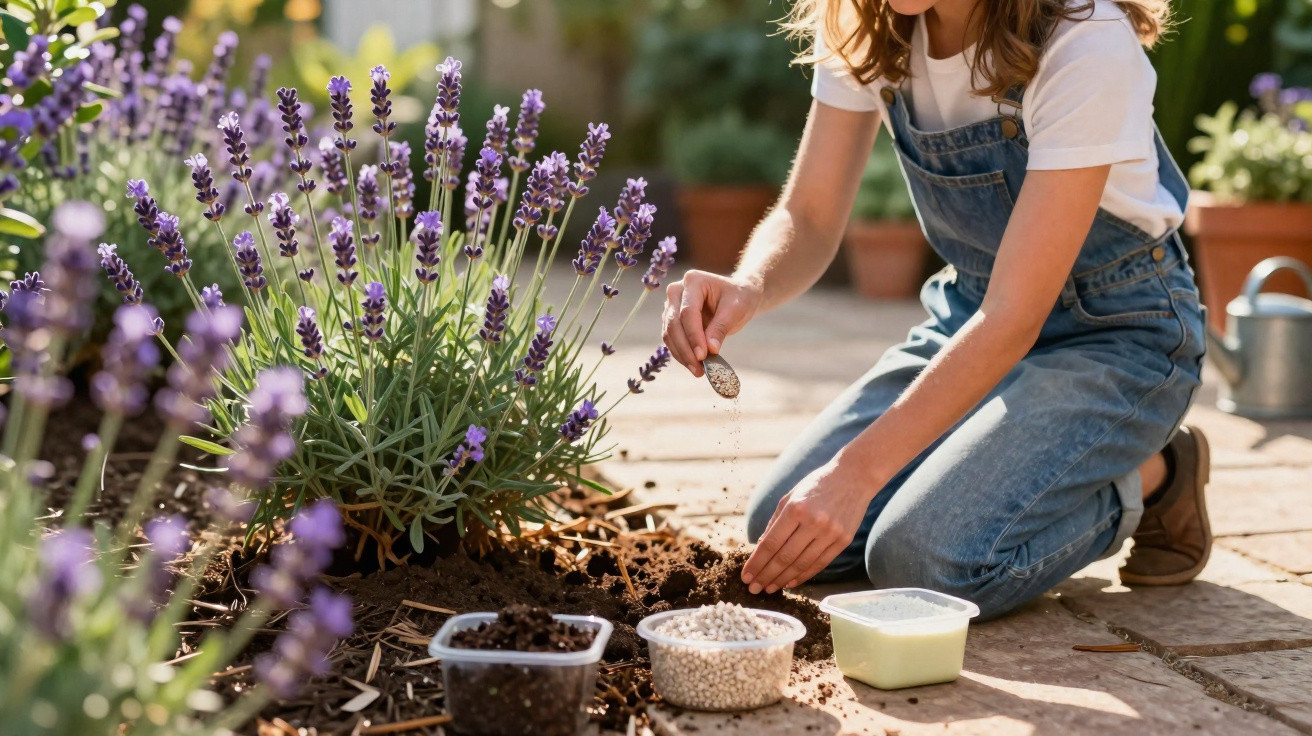
The real secret happens in the soil months beforehand.
Anyone hoping for a sea of purple flowers and an intense fragrance in the garden at the height of summer needs to act in spring. The key is not costly specialist fertiliser, but a very simple blend of three natural ingredients, applied to the shrub just once a year – and capable of producing noticeably more, stronger flowers in July.
Why lavender needs only limited but targeted spring care
Lavender originates from the sparse, stony areas of the Mediterranean. There, it grows in soil that many people would call “poor”: low in nutrients, sandy, highly free-draining and somewhat chalky. That is precisely the environment this plant prefers.
However, soil in many gardens is very different: deep, heavily fertilised and perhaps covered with bark mulch as well. Roses, hydrangeas and tomatoes may thrive with this generous treatment, but lavender is more likely to be held back by it.
Too many nutrients mainly encourage leaves and long, soft shoots, but hardly any flowers. For lavender, “less” is often “more”.
There is another consideration: repeated fertiliser applications weaken this naturally hardy herb. It becomes more susceptible to cold, rot and pest pressure. Experienced gardeners therefore recommend just one gentle feed in spring during the year, and nothing else.
The best period is between March and April. The harshest frosts have passed, the plant is beginning to grow again gradually, but it has not yet formed its flower buds for summer. This is exactly when a mild, natural fertiliser works most effectively.
The three-part mix that changes everything: compost, bone meal and lime
Rather than reaching for liquid all-purpose feed or artificial fertiliser, many experts rely on a simple homemade natural fertiliser. It contains three easy-to-source components:
- Mature compost – provides slowly available nutrients and improves soil structure.
- Bone meal – supplies plenty of phosphorus and calcium for strong roots and flower buds.
- Garden lime – raises the pH and creates conditions familiar to lavender from its native habitat.
A small bucket is sufficient for preparing the mix. Add equal amounts of each ingredient, then stir them together briefly – and the annual fertiliser for the shrub is ready.
Compost, bone meal and lime complement one another perfectly: structure for the soil, energy for the flowers, and lime for the ideal conditions.
How to apply fertiliser around lavender correctly
Do not tip the mixture straight against the stem. Instead, create a loose feeding zone in a circle around the lavender:
- Lightly loosen the soil around the plant with a hand rake, leaving roughly 20–30 centimetres from the plant.
- Scatter the fertiliser around this area in a ring.
- Work the mixture in gently, to a depth of around two to three centimetres.
- Water moderately afterwards so that the nutrients can reach the roots.
The soil should not become waterlogged; it only needs to be thoroughly moist. This allows the plant to absorb the minerals without its roots sitting in water.
How much is enough? Dosage indoors and outdoors
Lavender is more forgiving of too little fertiliser than too much. This particular plant can quickly be overindulged. In most cases, following these approximate guidelines will give the right result.
| Location | Plant size | Amount of the three-part mix |
|---|---|---|
| Bed, open ground | Young plant (up to about 30 cm) | About one small handful |
| Bed, open ground | Mature shrub | Two loose handfuls |
| Pot or container | Any size | No more than half a handful, worked in well |
In pots, any fertiliser has a stronger effect because root space is limited. Applying too much can lead to scorched roots, excessive growth and weak flowers.
The most common lavender mistakes – and how to avoid them
Many lavender problems have less to do with cold weather or “poor varieties” and more to do with unsuitable care. These are the three usual causes:
- Soil that is too nutrient-rich: Heavily fertilised beds or fresh topsoil promote leafy growth rather than flowers.
- The wrong fertiliser: Nitrogen-heavy lawn feeds, fresh manure or thick layers of bark mulch are harmful to lavender.
- Waterlogging: Impermeable soil and constantly wet roots quickly cause rot.
Anyone who treats lavender like a rose will be disappointed. Anyone who treats it like a plant from a quarry will be rewarded.
The ideal position offers full sun, at least six hours of direct light a day, and soil through which water drains quickly. Where soil is heavy, it is worth adding a drainage layer of gravel or coarse sand.
Pruning and fertiliser: a powerful pairing for lavender
Fertiliser alone will not create a dense, rounded lavender mound. Spring is also the time to use the pruning shears. Once there is no longer a risk of severe frost, cut the plant back by about one third. Do not cut into old wood; instead, trim within the area where leaves are still present.
Careful pruning combined with the three-part mix at the same time of year encourages short, sturdy shoots with plenty of flower spikes in summer. This keeps the shrub compact and prevents it from falling open.
What the three-part mix does in the soil
There is a clear effect in the soil behind these straightforward instructions. Each ingredient has a specific role:
- Compost improves the crumb structure, supports soil life and keeps nutrients available without overloading the plant.
- Bone meal supplies phosphorus slowly yet consistently – a key element in root development and flower formation.
- Garden lime raises the pH, neutralises excess acidity and makes soil more suitable for Mediterranean herbs.
Especially in areas with relatively acidic soil, such as many woodland regions, a lack of lime can visibly restrict lavender’s growth. Including lime once in spring brings the shrub much closer to its natural growing conditions.
Practical tips for balconies, front gardens and large beds
The mix works not only in a conventional garden bed, but in almost every situation where lavender is grown:
- Balcony containers: Always include a drainage layer of expanded clay or gravel. Fertilise very sparingly, and preferably add only a minimal amount again the following year.
- Front garden strips: Shingle, gravel and pale stone chippings work exceptionally well with lavender. Incorporate the three-part mix between the stones.
- Large lavender plantings: Where there are several dozen plants, it is worth mixing the ingredients in a wheelbarrow. Distribute it portion by portion using a small cup.
If you combine several varieties – for example, classic English lavender with low-growing types at the edge – the mix can be used for all of them. Cultivars generally remain a little more compact, but are similarly sensitive to overfeeding.
Risks, limitations and useful additions
Even natural fertiliser can cause problems if the growing conditions are unsuitable. In very heavy clay soils, water often remains for too long despite drainage material. In that case, a raised bed or complete replanting into loosened ground is worthwhile.
Anyone who has already applied heavy fertiliser several times should deliberately skip feeding for one year and focus only on pruning, sunshine and careful watering. Lavender needs time to readjust to lean conditions.
The three-part mix can be paired effectively with other Mediterranean plants that share similar needs: rosemary, thyme and sage also benefit from slightly chalky, free-draining soil and a modest nutrient supply. Building a bed around this approach creates not only a visually harmonious area, but also a haven for bees and butterflies.
This can turn a meagre shrub with just a few flower spikes in July into a vigorous, abundantly flowering lavender bush – with little effort, but the right boost at the right time of year.



Comments
No comments yet. Be the first to comment!
Leave a Comment