
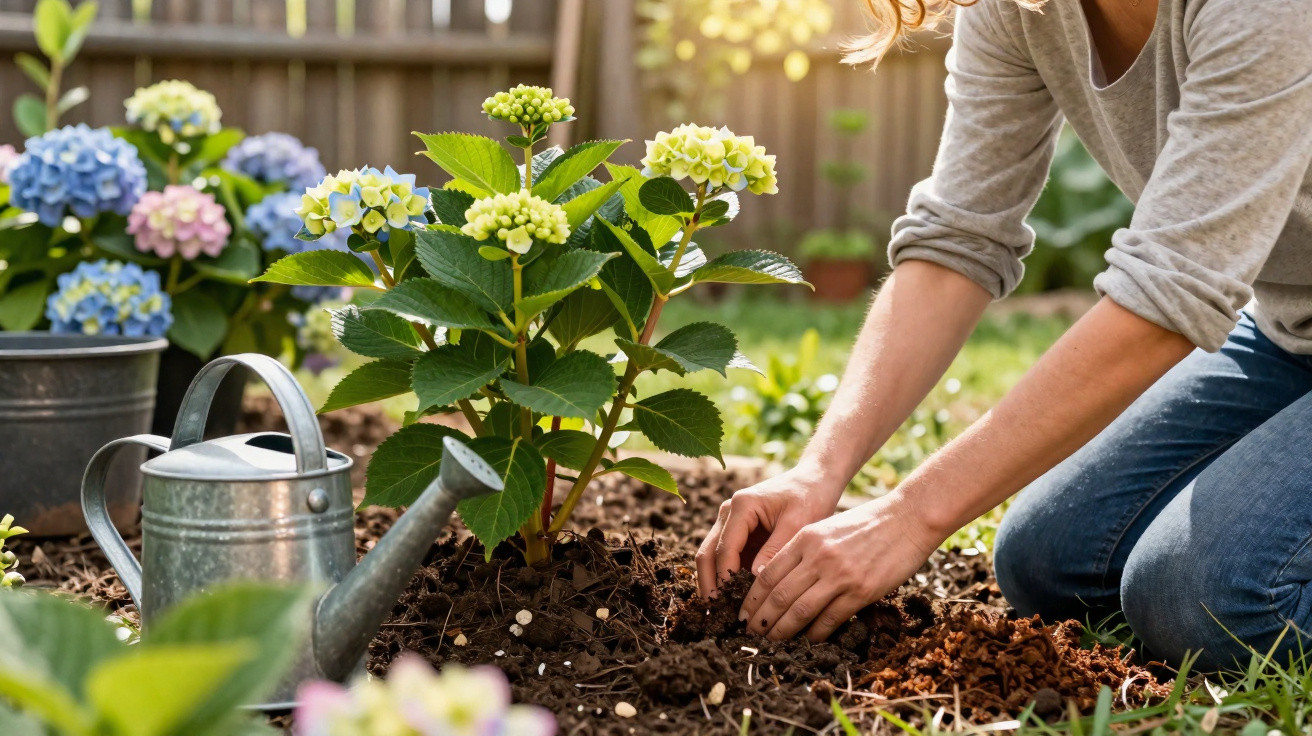
Between the cool days of spring and the first scent of summer lies a brief period in which hydrangeas are quietly set up for “giant blooms”.
Anyone hoping for metre-high flower heads on their shrubs in July and August needs to act by mid-April. Professional gardeners follow a discreet ritual at this point that takes barely ten minutes per plant, yet determines the size, colour and vigour of the flowers. It is less about costly specialist products than precise timing and a few targeted jobs at ground level.
Why mid-April is the turning point for hydrangeas
For the popular bigleaf hydrangeas (Hydrangea macrophylla), winter dormancy comes to an end around the middle of April. The buds begin to swell noticeably, sap starts rising, and the plant internally determines how many flower clusters it can carry in summer and how large they will be.
At precisely this stage, the shrub changes its “menu”: more energy needs to go into flowers rather than solely into foliage. To do this, it requires a different nutrient balance from the one needed in early spring.
“Anyone who uses this short window can push their hydrangeas from normally flowering to impressively large blooms – without resorting to harsh chemicals.”
Three factors are crucial:
- The correct timing: around 15 April, a few days earlier or later depending on the region.
- The nutrient ratio: less nitrogen, with more phosphorus and potassium.
- A suitable soil pH: slightly acidic, ideally between 5.5 and 6.5.
Within this range, hydrangeas can absorb trace elements such as iron and phosphorus effectively. In overly lime-rich soil, a high pH blocks nutrients, resulting in pale leaves and meagre flowers even where the plant is being fed and watered.
What professional gardeners actually do with hydrangeas in spring
Nurseries do not rely on a secret miracle treatment, but on a clear approach: in April, they apply a fertiliser designed primarily to support flower formation. The nitrogen content remains moderate, while phosphorus and potassium are considerably higher.
This fine adjustment avoids the familiar issue in home gardens: huge green bushes with plenty of leaves but few, or only small, flowers. It also works just as the hydrangea’s fine roots near the soil surface become active again.
There is another consideration. Many hydrangeas are planted close to house walls, patios or in front gardens where the soil is relatively lime-rich. Chlorosis is common in these spots: leaves become paler while their veins stay green, and the shrub appears lacklustre.
“In these cases, an ‘all-purpose fertiliser’ is not enough – the soil must first be acidified in a targeted way, otherwise the nutrients remain effectively locked away from the plant.”
Nursery growers carry out this correction consistently every April. They first reduce the pH slightly, followed by an organic feed that works slowly and evenly.
The 15 April hydrangea ritual in three easy steps
The good news is that this professional routine can be done in a home garden without specialist equipment. The soil should not be wet; it should only be lightly moist.
Step 1: Loosen the soil – but only at the surface
Using a small hand cultivator or rake, loosen the soil around the shrub to a depth of three to four centimetres. Work carefully, as most of the roots are positioned very close to the surface.
This allows more oxygen to reach the fine roots and helps water and nutrients penetrate more effectively. The root crown itself must not be covered over or damaged.
Step 2: Work in organic fertiliser
Next, give the plant an organic nutrient boost rich in potassium. Suitable options include:
- mature, slightly crumbly compost
- horn shavings or horn meal
- specialist organic hydrangea or rhododendron fertilisers
As a rule, two loose handfuls per shrub are sufficient. Incorporate them only into the surface rather than burying them deeply. This enables microorganisms to break down the fertiliser gradually, giving the roots a steady supply over several weeks.
Step 3: Water thoroughly – preferably with low-lime water
Finish with a deep watering of around ten litres per shrub. Rainwater is ideal, or at least low-lime tap water. The water carries nutrients to the young fine roots waiting below.
“After this watering, the soil should look noticeably darker – a sign that moisture and fertiliser have reached the active root zone.”
If desired, cover the area with a thin layer of compost or bark mulch afterwards. This retains soil moisture and shields the sensitive roots from intense sunshine.
Why rainwater, pH and coffee grounds make a strong combination
Hydrangeas in areas with hard tap water especially have to contend with excessive lime in the soil over the long term. Each watering raises the pH a little, until the plant eventually “refuses” to thrive.
A simple combination provides a remedy:
- water with rainwater as often as possible,
- acidify the soil deliberately in April,
- use coffee grounds sparingly as an addition.
Dried coffee grounds are useful as a mild pH reducer. Around 200 grams per shrub, worked in shallowly, is already enough. Over time, they release a little nitrogen and potassium, promoting rich green leaves and sturdy shoots.
Importantly, the grounds must be thoroughly dried first, otherwise they quickly develop mould. Break up any clumps, then spread the material thinly and rake it in rather than applying it as a thick layer.
Common problems: pale leaves and small flowers – what causes them?
If a hydrangea beside a sunny house wall looks wilted, has pale leaves with green veins and barely flowers, the cause is almost always the soil. Insufficient water is less often the issue than excess lime and a blocked nutrient balance.
A straightforward three-point plan around mid-April can help:
- Loosen the soil lightly in the root area.
- Use organic material together with a mildly acidic hydrangea fertiliser.
- Water mainly with rainwater in the weeks that follow.
This “spring update” restores balance to many older hydrangeas. The first signs are fresher, darker foliage, followed by much more abundant flower clusters in summer.
How often to fertilise – and when to stop
One generous application of fertiliser in April provides the foundation. Depending on soil quality, a light additional feed can be given in June, preferably organic again.
| Month | Task |
|---|---|
| Mid-April | Loosen the soil, apply organic fertiliser and water well |
| Late May / June | Add a light feed if growth is weak |
| From July | Water only; do not fertilise further |
From July onwards, stop fertilising so that shoots can ripen in good time and the plant remains winter-hardy. Feeding too late encourages soft wood that is quickly damaged by frost.
Additional advice on colour, position and care
Many gardeners are surprised when blue hydrangeas suddenly flower pink. This, too, is caused by the soil pH. To produce a strong blue colour, the plant needs acidic soil and aluminium ions, which it can absorb only at a low pH.
Anyone wishing to control the colour must therefore do more than fertilise; the soil needs long-term adjustment. Specialist blueing products can help, but they work only if the pH is suitable.
Position remains just as important: hydrangeas prefer light shade, such as on the east side of a house or beneath open-canopy trees. In full midday sun, they need a great deal of water and can quickly suffer despite perfect fertilising.
Those who use the short April window, keep an eye on soil conditions, collect rainwater and use organic aids will gradually develop a good understanding of their shrubs. The reward is summer beds in which hydrangea flower balls seem to float above the foliage like coloured lanterns.

Comments
No comments yet. Be the first to comment!
Leave a Comment