
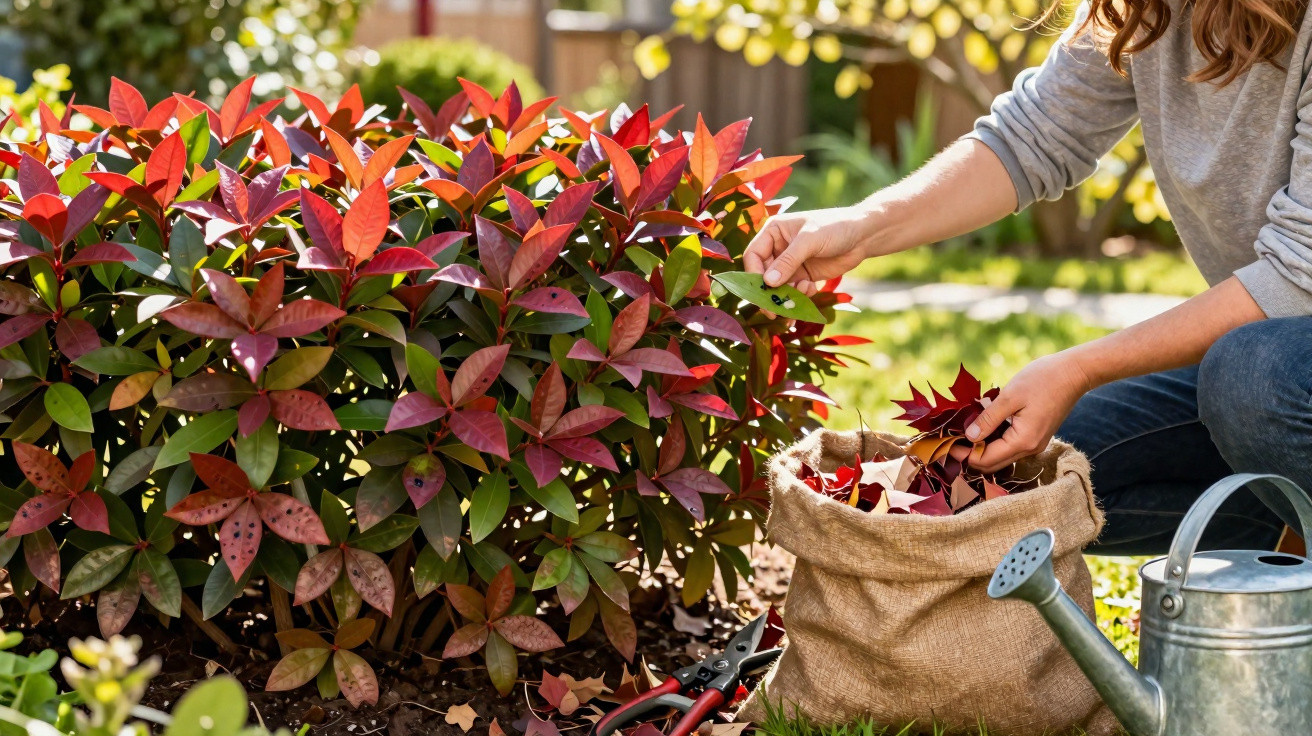
Many amateur gardeners face the same problem every year: as soon as spring approaches, an otherwise tough Photinia hedge develops blemishes, sheds leaves and appears unhealthy. In most cases, the cause is not a care mistake but a fungus that thrives in wet springs – and one simple, free task can slow it down considerably.
What really causes black spots on Photinia
The popular cultivar Photinia × fraseri ‘Red Robin’ is planted in countless front gardens. Its glossy foliage and red new growth are characteristic features. When black dots and rings develop on the leaves, one particular pathogen is usually responsible: Entomosporium leaf spot, caused by the fungus Entomosporium maculatum.
The pattern is almost always the same. Small brown or near-black specks appear first, often with a narrow reddish edge. The lesions gradually enlarge, their centres become pale grey, the leaf turns yellow and eventually drops. The disease is especially noticeable because it normally begins in the lower part of the hedge.
Round, sharply defined marks on the lower leaves, together with a real carpet of fallen foliage on the ground, are the classic warning signs of Entomosporium leaf spot.
This recognisable pattern can be distinguished fairly easily from other issues:
- Natural leaf ageing: leaves turn yellow evenly, without clearly outlined circular spots.
- Thick, crusty coatings: these are more likely to indicate other fungal problems, such as sooty mould.
- Occasional yellow leaves without spotting: this is often harmless stress, for example from drought or root damage.
However, if whole handfuls of spotted leaves are dropping from the bottom of the hedge, Entomosporium leaf spot is behind the problem in well over half of cases – particularly after very wet winters.
Why the disease surges in spring
The real trap is rarely obvious at first glance: the inconspicuous layer of old, discoloured leaves beneath the hedge. This is where the fungus spends the winter. Research shows that a large proportion of the spores survive in this dead foliage, simply waiting for the next spell of rain.
As soon as the first heavy spring showers arrive, the following happens: raindrops strike the rotting leaves, dislodge tiny fungal spores and throw them upwards – like miniature springs launching them straight into the hedge’s lower zone. This is how the infection cycle begins again every year.
The disease does not arrive through the roots; it is literally splashed upwards: every raindrop acts as a miniature catapult for spores.
The effect is particularly pronounced in dense hedges growing in heavy soil. Moisture lingers there for longer, leaf litter breaks down poorly, and even a few rainy days can allow fresh spots to spread quickly.
The simple, natural step before spring
The most effective countermeasure is also the most straightforward – and costs nothing beyond a little time and a pair of gardening gloves: remove the leaf litter thoroughly.
When to clear leaves from a Photinia hedge
Dry days from late February to early March are ideal, before buds open and fresh growth begins. At this stage, most spores are still in the old leaves, while the young shoots have not yet become vulnerable.
A step-by-step method for amateur gardeners
- Put on protective equipment: wear sturdy gloves and, if you have sensitive skin, a mask as spores may be released when the leaves are disturbed.
- Rake gently: work from the inside out with a rake, pulling out all leaves beneath the hedge, including foliage lodged deep around the base of the shrubs.
- Collect leaves carefully: place every infected leaf in bags, seal them securely and take them to a green-waste collection point.
- Never add them to compost: in a home compost heap, the fungus often remains viable and can later reach plants again.
- Aerate the soil: lightly rake the exposed area so rainwater can drain away more effectively and the base of the hedge dries faster.
Anyone who removes infected leaves before the spring rains deprives the fungus of its launch pad – this one job reduces the risk substantially.
Natural support: sprays and sensible care
Immediately after this clearing work, many gardeners turn to established plant-protection treatments. One traditional option is copper-based Bordeaux mixture, which has a preventative effect when used at a low concentration. It is sprayed over the lower section of the hedge on dry days, before fungal pressure becomes high.
Those who prefer a gentler approach can use plant liquid feeds and infusions. Common choices include:
- Horsetail tea: strengthens plant tissue and makes leaf surfaces less appealing to fungal spores.
- Nettle feed: provides nutrients and encourages vigorous, resilient new shoots.
Watering technique also remains important: water Photinia at root level rather than spraying a fine mist across the foliage. Wet leaves provide ideal conditions for fungal infections, especially when nights remain cool.
Keep the hedge airy: pruning and position as protective factors
Alongside leaf removal, the hedge’s structure matters greatly. In very dense, rarely pruned rows of Photinia, moisture becomes trapped. Light thinning in the lower area allows more air and sunlight to reach the plants.
A few carefully placed cuts with secateurs are often enough to:
- remove tangled shoots at the base;
- allow wind to pass through the hedge more freely; and
- help leaves dry faster after rain.
On heavy clay soils, it is also worthwhile improving the ground around the roots with sand or fine grit. This reduces waterlogging, so the plants are less likely to experience stress overall.
When gardeners need to act – and when calm is enough
Not every spot means a hedge is dying. Slight discolouration in the lower section, limited leaf drop and strong fresh growth are considered tolerable. Photinia can compensate for minor damage itself, provided it remains healthy overall.
Action is mainly needed when:
- entire sections of branches appear bare;
- large quantities of infected leaves occur every year; and
- new growth is already heavily spotted again in spring.
In these circumstances, consistently clearing away the leaf carpet, lightly thinning the hedge and watering sensibly will reduce infection pressure year after year. Harsh chemical treatments are then often unnecessary.
Practical advice for a consistently healthy Photinia hedge
Many problems worsen when plants are weakened generally. A Photinia suffering from drought stress or nutrient deficiency is more susceptible to fungal diseases. Balanced, moderate spring feeding with organic material, such as compost or horn shavings, supports recovery after leaf loss.
Anyone planning a new hedge can also allow slightly more space between plants. A row planted too closely may look dense quickly, but remains prone to fungal disease because air and light cannot penetrate. A few extra centimetres of spacing make maintenance easier and prevent trouble later.
Another frequently underestimated point is regular inspection. A brief check during the gardening season is enough to spot early lesions. Individual heavily affected branches can then be cut out and disposed of before the disease spreads throughout the hedge.
Making this combination of hygiene measures, light pruning and sensible watering routine usually restores a Photinia hedge to how it is meant to look: a dependable backdrop of red, glossy foliage rather than a source of worry covered in black spots.
Comments
No comments yet. Be the first to comment!
Leave a Comment