
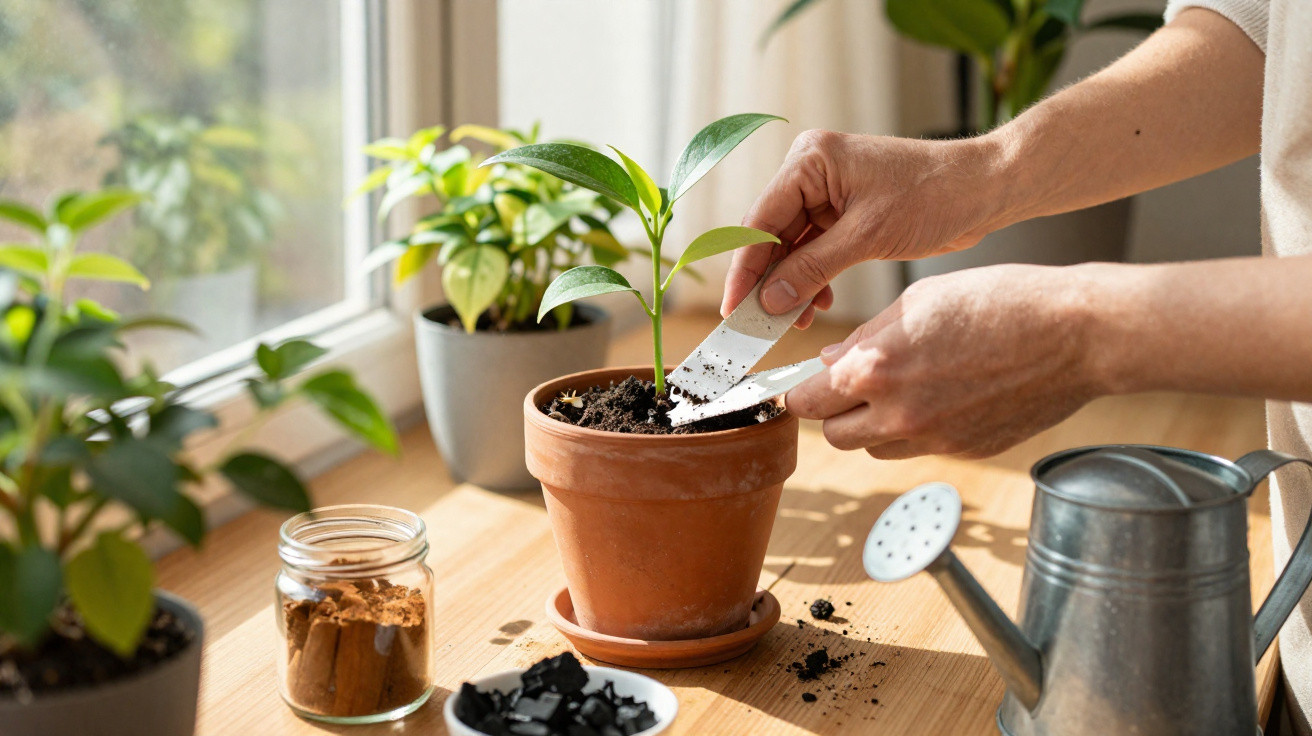
A white coating has suddenly appeared on the potting soil – and it certainly does not look harmless.
There is usually more behind this discolouration than ordinary dust.
Anyone who keeps houseplants will recognise the situation: you water your rubber plant or Monstera, absent-mindedly run a hand across the potting soil, and notice that a white layer has formed. Many people blame old compost or limescale marks. In fact, this coating is a clear sign of what is going wrong in the pot, particularly with moisture, limescale and care routines. That can determine whether the plant stays healthy in the long term or gradually declines.
What the white layer on potting soil really means
In most homes, this coating appears mainly in winter. Indoors, temperatures are warm, air circulation is limited and the heating is on, while plants are often given too much water despite receiving less light and growing more slowly.
"The white layer is not a whim of nature but a clear indication: the balance of water, nutrients and ventilation in the pot is no longer right."
There are essentially two main possible causes:
1. White mould caused by persistently damp soil
Very often, it is a fine, cotton-like layer of mould. Tiny fungi colonise the top layer of soil, especially where the growing medium contains plenty of organic material, such as compost, bark pieces or fibres. This is common in many shop-bought potting mixes.
The fungi generally remain on the surface rather than directly invading the roots. Even so, they send an unmistakable message: the soil is staying wet for too long, the roots cannot breathe properly and oxygen is lacking. This can lead to:
- Root rot, as the roots are left sitting in permanently wet conditions
- Slower growth or a complete halt in growth
- Yellow leaves that become limp or drop prematurely
- Pests such as fungus gnats thriving in the damp environment
There is another factor that is often overlooked: mould spores enter the air indoors. This should not be ignored if there are people with sensitive airways or allergies, or young children, in the home.
2. Limescale and salt deposits from water and fertiliser
At times, the coating is not fungal at all, but a mineral crust. Hard tap water and generous applications of fertiliser gradually leave visible traces. This is especially likely when watering from below by filling the saucer, as dissolved salts travel upwards with the moisture and dry out at the surface.
The result is a dry, crumbly layer resembling dust or plaster. Although it looks less alarming, it still indicates that too many minerals have accumulated in the pot, particularly limescale and fertiliser salts. Over time, this can put the roots under stress and alter the soil environment.
Mould or limescale? How to tell the difference
A few straightforward checks will usually reveal what you are dealing with. No laboratory is needed: your eyes, nose and fingertips are enough.
- Cottony, soft and uneven, combined with a musty smell from the soil: this is very likely fungal mould.
- Dry, crumbly or forming a hard crust, breaking easily between the fingers and with no smell: this is typical of limescale and salt deposits.
- Frequent watering with very hard tap water, together with plenty of liquid fertiliser: this also strongly suggests a mineral coating.
"Mould indicates a moisture problem, while limescale and salts point to a nutrient and water problem – in both cases, the pot is calling for a change of course."
What to do immediately when the soil turns white
It is not worth ignoring the issue. Acting early will often stabilise the plant without difficulty. The longer you leave it, the more likely the roots and leaves are to suffer.
Remove the top layer
Start by tackling the affected soil:
- Use a spoon or small trowel to remove around two centimetres from the top layer of soil.
- Put this soil in the household bin; do not spread it in a balcony planter or reuse it in another houseplant pot.
- Refill with fresh, dry potting soil, leaving roughly two centimetres below the rim so water does not overflow when watering.
Adjust your watering routine
The most important measure comes next: the plant must not end up back in the same permanently wet conditions. A simple finger test provides a useful guide:
- Push a finger around two centimetres into the soil.
- Water only when this layer feels genuinely dry.
- Empty water from the saucer within 30 minutes at the latest.
- Between October and March, water far more sparingly and fertilise less often.
For particularly sensitive plants or recurring problems, switching to filtered or boiled water with lower limescale content may be worthwhile.
Improve air circulation and the growing medium
Wet soil in still air provides ideal conditions for fungi. Several simple steps can help restore a healthier environment in the pot:
- Air the room regularly, especially during winter.
- Do not place the pot directly above a radiator.
- Gently loosen the soil surface from time to time so air can reach the roots.
- For new plants, choose a free-draining growing medium, for example one mixed with perlite, sand or fine expanded clay.
- Include a layer of expanded clay or gravel at the base of the pot to improve drainage.
Natural options: cinnamon, activated charcoal and a vinegar solution
If you do not want to use a chemical fungicide, household remedies may help:
- Sprinkle a thin layer of ground cinnamon over the surface; cinnamon has a mild antifungal effect.
- Work in a small amount of activated charcoal powder, which binds moisture and substances.
- Spray the soil, but not the leaves, with a very heavily diluted solution of clear household vinegar, first testing it on a small area.
If the mould continues to return despite this, a complete fresh start is usually the only solution.
When repotting becomes unavoidable
If the white coating repeatedly returns, the plant is visibly deteriorating or the soil smells permanently musty, simply removing the surface will no longer be enough. In that case, repot it thoroughly:
- Lift the plant from its pot and gently shake off loose soil.
- Cut away black, mushy or foul-smelling roots with clean scissors.
- Clean the pot thoroughly with hot water and a little vinegar, then rinse it well.
- Use fresh, free-draining soil and ensure there is an adequate drainage layer.
"A complete soil change often works like a reset for stressed houseplants – provided future watering is more controlled."
Special case: white coating on succulent leaves
Those who keep many succulents and cacti will also often notice a whitish or bluish hue, but this is usually not a cause for concern. Many succulents naturally produce a fine, waxy protective layer on their leaves. It prevents sun scorch and moisture loss.
This layer should not be wiped away. A soft brush is enough to remove dust carefully. Using a cloth, glass cleaner or harsh products damages this natural barrier. The plants then become more sensitive and lose their characteristic sheen.
How to prevent white coatings permanently
Rather than constantly responding to problems, a few basic rules can prevent a great deal of trouble. Water, growing medium and location are the most important factors.
| Problem | Cause | Effective countermeasure |
|---|---|---|
| Mould on the surface | Permanently wet soil, too little light | Water less often, allow soil to dry, improve ventilation |
| Limescale crust on the soil | Hard tap water, lots of fertiliser | Use softer water, reduce the amount of fertiliser |
| Yellow, limp leaves | Damaged roots, waterlogging | Use a pot with drainage, free-draining soil, check the decorative outer pot |
| Fungus gnats | Damp soil used as a breeding ground | Let the surface dry out; if necessary, apply a layer of sand |
When you observe plants more closely, you soon notice that each one responds differently. Tropical species such as Calathea or ferns prefer more moisture, while cacti and succulents need considerably less. A fixed watering schedule rarely suits every pot in the living room.
Small routines are useful: check every plant once a week, test the soil with a finger and briefly inspect leaves and stems. This makes changes in colour, early signs of mould or limescale marks noticeable before the plant is seriously affected.
One further point is often underestimated: old dead leaves and faded flowers left on the soil provide an additional food source for fungi. Removing them consistently deprives mould of an important starting point and keeps the growing medium tidy.


Comments
No comments yet. Be the first to comment!
Leave a Comment