
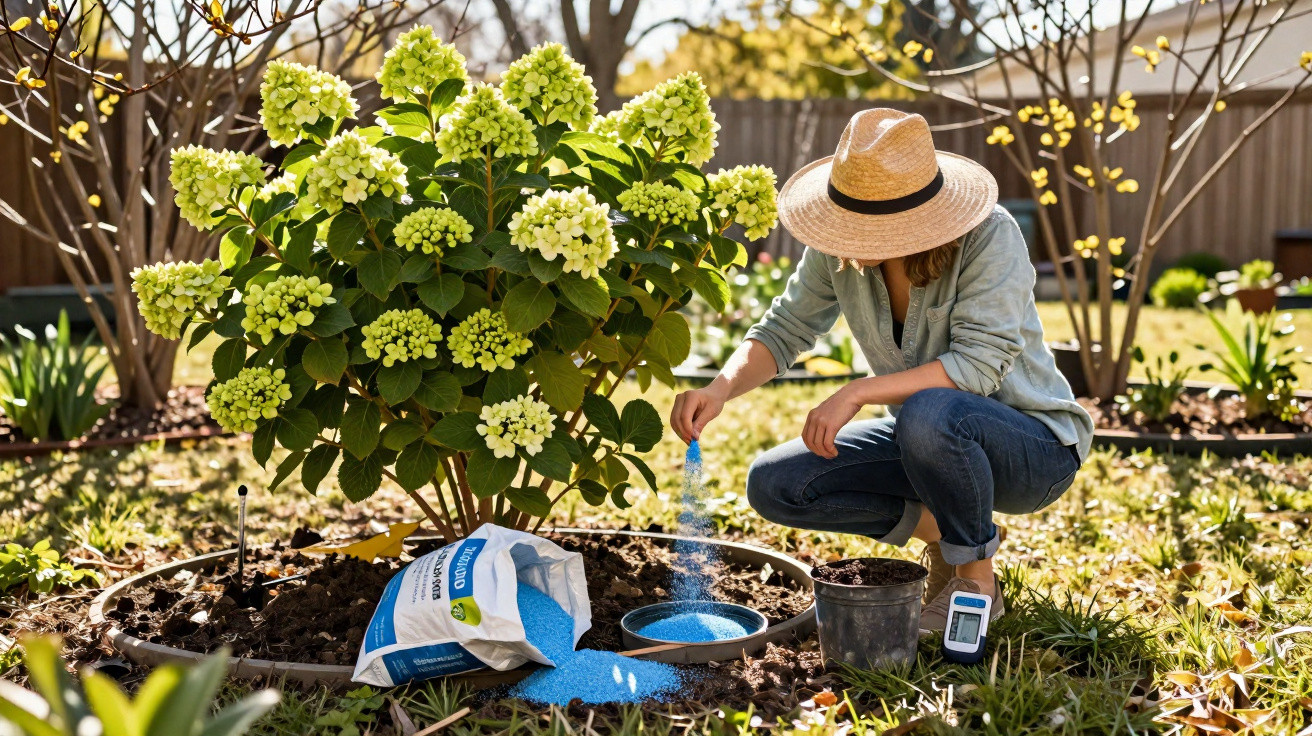
The crucial mistake is often made weeks earlier, in late winter.
Anyone who only turns their attention to hydrangeas in May has already missed the most important period. From late February to early March, it is decided whether the shrub will be covered in colour during summer or produce only a timid few flower heads. During this short window, both the right nutrients and the right type of fertiliser matter.
Why late winter determines your hydrangea flowering
In February, hydrangeas may still look like lifeless skeletons. Yet beneath the bark, vital processes are already under way: the plants are leaving dormancy, sap is beginning to rise, and fresh shoots and flower buds are being prepared.
This is precisely when the roots draw more heavily on nutrients in the soil. If supplies are low, the plant will chiefly produce leaves rather than flowers. It effectively “saves” itself through abundant greenery to generate enough energy, while the floral display suffers.
“Feeding your hydrangeas purposefully before March lays the foundations for abundant flower heads rather than dense foliage alone.”
Many amateur gardeners are then puzzled in July: the shrub has grown well, looks dense and vigorous, yet has sparse flowers or none at all. In the vast majority of cases, this is not caused by disease but by unsuitable or missing fertiliser during late winter.
Gentle nourishment: which fertiliser hydrangeas really benefit from
Hydrangeas are plants that favour bog-garden conditions and prefer humus-rich, slightly acidic soil. Harsh, highly concentrated fertilisers often do more harm than good. A mild, organic source of nutrients is particularly reliable.
Mature compost as a natural hydrangea booster
Well-rotted, finely sieved compost provides the ideal foundation. It works like a long-term buffet: never too strong, yet rich in nutrients that remain available over time. Applied in late winter, it can set a genuine “flowering engine” in motion.
Proceed as follows:
- Spread 7–10 centimetres of mature compost around the shrub.
- Cover an area with a radius of around 40–50 centimetres from the stem.
- Do not press compost directly against the shoots; leaving a small gap protects the bark.
With every rainfall and watering, nutrients and organic matter gradually move down into the root zone. The hydrangea receives a gentle, consistent supply for weeks, which is ideal for building strong flower buds.
Specialist hydrangea fertiliser: what the label should tell you
If you do not have your own compost, choose an organic or organo-mineral specialist fertiliser for hydrangeas. The key is a balanced formulation that does not place too much emphasis on nitrogen-driven leaf growth.
Typical suitable NPK ratios include:
| Nutrient ratio | Characteristic |
|---|---|
| NPK 7‑4‑5 | Balanced, slightly flower-promoting, with a moderate nitrogen content |
| NPK 8‑3‑9 | Somewhat higher potassium content, supporting flower stability and winter hardiness |
Slow release is essential. The pack will usually state “slow-release fertiliser” or “nutrient release over several weeks”. These products release their effect in a controlled way without overwhelming the plant.
“For hydrangeas, less but regularly is better than one heavy application of fertiliser.”
Many experts caution against the temptation to scatter fertiliser generously. Too much fertiliser often produces the opposite of the desired result in hydrangeas: lots of leaf growth, soft shoots and hardly any flower buds.
How to fertilise hydrangeas correctly: applying the nutrient boost
Whether you use compost or specialist fertiliser, how it is applied also determines success. Simply tipping a handful of fertiliser at the base of the stem is not merely ineffective; it can even damage the plant.
Creating the ideal fertiliser ring around the shrub
Hydrangea roots spread in a ring around the shrub, often extending further than the canopy itself. That is exactly where the fertiliser belongs.
For effective application:
- Distribute the nutrients in a ring around the shrub rather than pressing them against the stem.
- Work them lightly into the top layer of soil, only a few centimetres deep.
- Water thoroughly afterwards so the nutrients reach the root zone.
For hydrangeas planted in beds, one application in late February or early March is usually enough. Container-grown hydrangeas are different: their limited amount of compost is depleted more quickly, so a second, lighter feed in early summer is worthwhile.
The most common hydrangea fertilising mistakes
The same issues recur year after year in gardens. Avoiding them saves frustration and results in more flowers.
- Too much nitrogen: General-purpose fertilisers with a high N content encourage leaves but produce few flowers.
- Wrong timing: Fertilising only in May misses the crucial window for bud formation.
- Too close to the stem: Concentrated fertiliser placed directly against the bark can harm roots and shoots.
- Completely exhausted container compost: Older potted plants occasionally need fresh compost, not fertiliser alone.
More flowers, less frustration: how soil affects colour
Alongside nutrient supply, soil reaction also plays a role, particularly for blue varieties. They retain their intense blue only in slightly acidic soil with sufficient aluminium; otherwise, they turn pink.
When fertilising hydrangeas, it is therefore worth monitoring the pH value as well. Horn shavings, bark humus and leaf compost gently acidify the soil. Strongly limy fertilisers and hard tap water raise the value and can eventually lead to yellowing leaves.
An occasional check with a simple soil test from a garden centre will show which way things are heading. If the value is well above 7, traditional mophead hydrangeas often no longer thrive and respond with lacklustre flowering and pale leaves.
Practical tips for busy everyday gardeners
Not everyone wants to be standing in the garden with a bucket and rake in February. A few straightforward routines can keep hydrangea care organised without causing stress.
- Remember a fixed date: make late February “Hydrangea Day”.
- Start your own compost heap in autumn – it is worth its weight in gold.
- Keep specialist fertiliser within easy reach of your watering equipment.
- Make a quick check in spring: if the buds are already showing green, it is high time to act.
Those who follow the same routine each year soon notice an improvement in flowering. Many gardeners report that even old, “tired” hydrangeas carry noticeably more flower heads again after one or two years of consistent late-winter fertilising.
There is one further point that many people underestimate: pruning and fertilising work together. Anyone who cuts mophead hydrangeas back drastically into old wood in spring often removes the flower buds formed in the previous year. Even the best nutrient application cannot rescue the situation then. Carefully removing dried flower heads and providing a targeted nutrient boost in late winter, by contrast, complement one another perfectly.

Comments
No comments yet. Be the first to comment!
Leave a Comment