
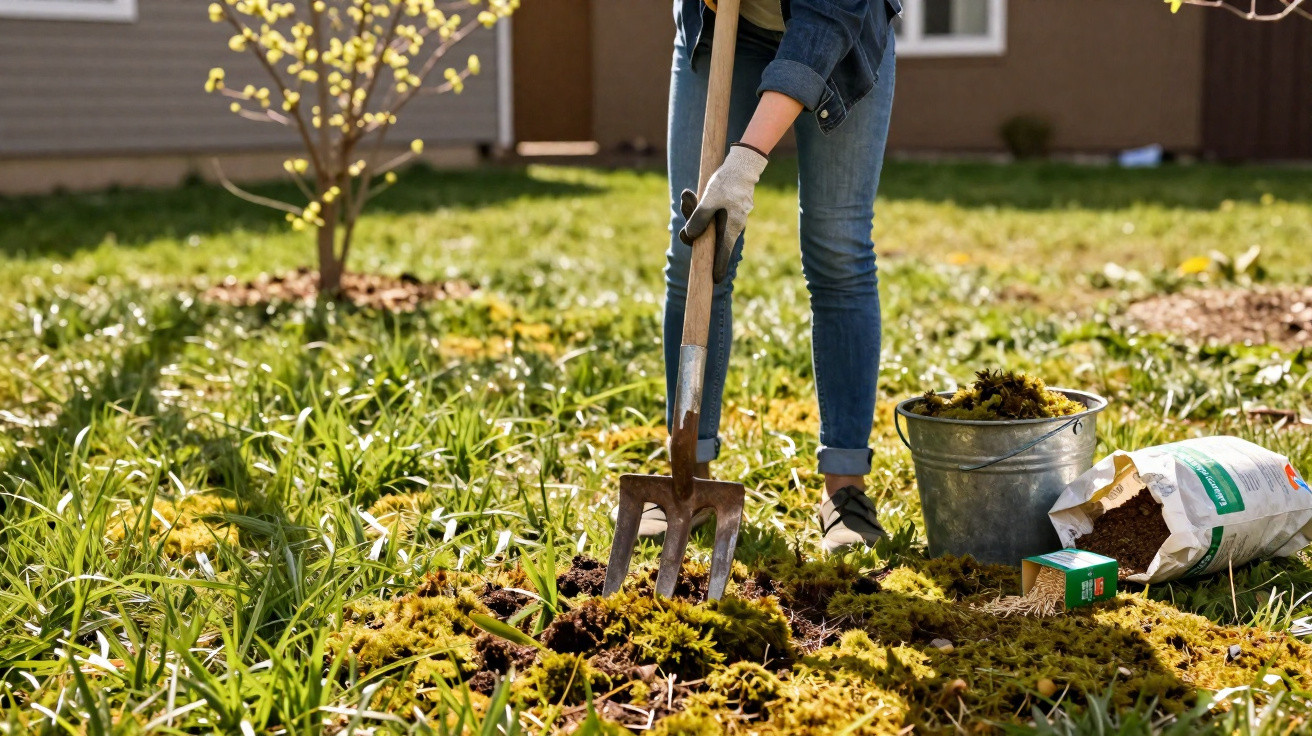
Many garden owners are alarmed in spring by yellow patches, puddles and thick cushions of moss in the lawn. The instinctive response is often to buy an “anti-moss” treatment straight away. Yet March is precisely the time to tackle the cause without chemicals, using three straightforward steps that revitalise the soil and make the lawn stronger for the long term.
Why is there so much moss? Your lawn is calling for help
When moss starts to dominate, grass usually does not need a miracle product: it lacks air and soil structure. Following a wet winter, the ground is often compacted. Rain, foot traffic, children playing and perhaps a heavy lawn mower all compress the soil. Water can then barely drain away, puddles linger and the grass effectively suffocates.
Garden professionals therefore regard moss not as the real enemy, but as a warning sign. The soil is tired, poorly aerated and overly wet. March is an especially good time for a quick assessment:
- Do puddles form quickly on the lawn after rain?
- Does the ground feel hard and compact beneath your feet?
- Does moss grow chiefly in shaded corners or beneath shrubs?
If your answer is “yes” to several of these questions, the issue lies in the soil rather than in the grass itself. Simple soil care will achieve far more than spreading a chemical treatment.
Moss often simply indicates that the soil is too wet, too compacted and too shady – improve the ground beneath it and the lawn will become permanently stronger.
Tip 1: Aerate the lawn thoroughly in March – use a fork rather than chemicals
Aeration is the most important step. For small to medium-sized lawns, a sturdy metal garden fork is all that is needed. The task is straightforward, requires very little equipment and can be completed on a dry afternoon.
How to aerate the soil properly
- Push the fork tines around 8–10 centimetres into the soil.
- Ease the handle slightly backwards until the ground lifts a little and fine cracks appear.
- Pull out the fork, move forward one step – roughly 15 centimetres – and repeat.
This pattern is entirely sufficient. Focus on troublesome spots where water collects or the lawn feels particularly hard. The holes create air channels, allowing water to drain more quickly while oxygen reaches the roots.
For very large lawns, it may be worth hiring a lawn aerator, which many DIY shops rent out in spring. The principle is the same: perforate the soil so that it can “breathe” again.
Tip 2: Work in a thin layer of soil – an understated boost for a dense lawn
Immediately after aeration, the lawn may look somewhat hole-ridden. This is exactly when to take the second step: apply a thin, nutrient-rich layer of material and work it into the holes. Gardeners call this “topdressing”.
A proven mix
A blend of three ingredients is ideal:
- fine, crumbly garden soil or screened topsoil
- coarse sand, such as builder’s sand or river sand, but not play sand
- mature, screened compost or leaf mould
Use roughly equal quantities of each component. If you do not have everything to hand, coarse sand alone can also be used; it will already improve drainage.
Applying the layer correctly
- Spread the soil mixture thinly, to a depth of one to two centimetres, over the perforated area.
- Use a stiff outdoor broom or the reverse side of a rake.
- Brush the material firmly into the holes and across the grass surface until almost none remains loose on top.
You will not see the results at once, but the effect is considerable. Sand improves drainage, while soil and compost add structure, nutrients and micro-organisms. The lawn develops deeper roots, thickens up and gradually crowds out moss naturally.
A thin layer of sand, soil and compost fills the aeration holes, improves drainage and feeds every individual grass root.
Tip 3: Rake out moss, mow higher – and be prepared to accept a few bare-looking days
Before the first cut of spring, give the lawn a kind of seasonal treatment with a rake. It can look drastic initially, but it restores the lawn’s condition over time.
Remove moss and thatch thoroughly
Take a sturdy iron rake or a scarifying rake and pull it vigorously across the lawn lengthways and crossways. This loosens:
- old, dead grass, or lawn thatch
- cushions of moss that shade the soil
- loose leaves and winter debris
Anything you rake out should go on the compost heap or into the garden-waste bin. The lawn may look alarmingly sparse for a while, with some patches appearing almost bare. This is normal and even desirable, as light, air and water can now reach the grass roots directly.
The first cut: start gently and avoid mowing too low
For the first mow of the year, set the cutting height noticeably higher than in summer. Around 4–5 centimetres is a useful guide. Cutting too short weakens the grass, stresses the plants and gives moss an opportunity to return.
Importantly, wait until the ground has dried and temperatures have risen slightly and remained stable. In mild areas, this may be as early as late February; in cooler locations, it is more likely to be mid- to late March. Do not work on frozen or completely waterlogged ground, as walking over it will compact it further.
After vigorous raking and a careful first cut, the lawn briefly looks thin – but it will then grow back much denser.
The best time to act – and how long the benefits last
Depending on the area, the ideal period runs from late February to late March. The soil should no longer be frozen, but should still feel cool and moist. One dry afternoon is enough to carry out all three steps in sequence: aerate, topdress lightly with a soil-and-sand mix, rake out the lawn and mow a little later.
By scheduling this treatment once a year, you give your lawn a lasting advantage. Many amateur gardeners report that the proportion of moss decreases noticeably after just one season. Some moss will generally remain in heavily shaded places; there, it effectively acts as a green carpet and can even be useful where a dense lawn has little prospect of thriving.
Useful additions: overseeding, using shaded areas and avoiding watering mistakes
Where larger bare patches remain after raking, targeted overseeding is worthwhile. Special overseeding mixtures germinate quickly and close gaps before weeds move in. Work the seed lightly into the soil, roll it or tread it down, then keep it evenly moist during the first few weeks.
In areas that remain permanently shaded, such as beneath large trees, it is worth taking an honest view: do you really want to force a lawn to grow there? More resilient alternatives are often better suited, including shade-tolerant ground cover or a deliberately accepted carpet of moss.
Watering habits also determine whether moss or lawn prevails. Brief daily sprinkling in summer encourages shallow roots and soft, wet soil. Less frequent but thorough watering is better. It encourages roots to grow deeper and cope more effectively with dry spells, without turning the soil into a permanently soggy area.
Why these three March lawn tips achieve more than any anti-moss treatment
Chemical or iron-based moss killers may destroy the green cushions, but they do nothing to resolve the underlying issue: compacted, wet soil and weakened grass. Moss soon returns if the conditions remain unchanged.
The combination of aeration, a thin soil layer and vigorous raking addresses the problem where it begins. The lawn gains air, nourishment and room to grow. Repeating this each year gradually creates a robust, dense carpet that keeps moss under control by itself – without specialist products from the shop shelf.




Comments
No comments yet. Be the first to comment!
Leave a Comment