
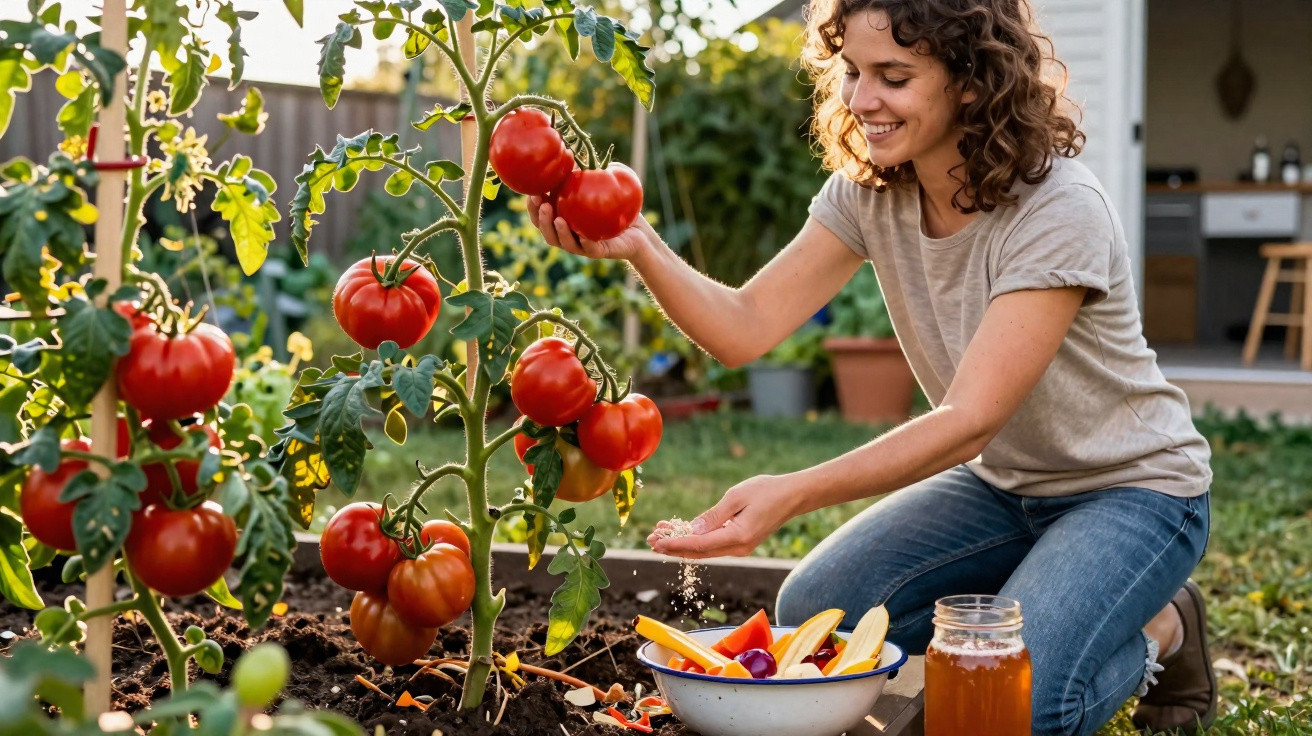
The answer is often sitting in the compost bin.
Anyone with a vegetable patch or balcony planters will know the situation: the tomato plant grows vigorously, its foliage is dense and its stems look healthy – but ripe fruit is in short supply. Before reaching for specialist fertiliser from the garden centre, it is often enough to use two leftover materials that arise in many homes anyway and cost virtually nothing.
Why many tomato plants produce leaves rather than fruit
Tomatoes are among the hungriest vegetable plants in the garden. Giving them only water and a little sunshine will usually lead to disappointment. A plant expected to carry several kilograms of fruit requires substantial quantities of nutrients.
Four elements are particularly important:
- Potassium – supports flower formation, fruit set and flavour
- Magnesium – essential for photosynthesis and the plant’s overall metabolism
- Nitrogen – promotes growth and foliage production
- Phosphorus – strengthens roots and encourages flowering
When potassium is lacking, fruits remain small, bland and more prone to disease. Too much nitrogen, on the other hand, causes foliage to surge – the plant looks impressive but produces very few flowers. This is where many amateur gardeners get caught out, as conventional garden fertilisers are often heavily nitrogen-based.
“Anyone feeding tomatoes only with nitrogen-rich fertiliser will grow lush greenery – but hardly any red fruit.”
A well-balanced natural fertiliser should therefore provide a solid base supply in spring, followed by targeted additions of potassium and calcium as the plant enters its fruiting stage.
Free tomato fertiliser from the kitchen: using banana peels correctly
Banana peels have long been considered an insider tip among gardeners. They are rich in potassium and also contain magnesium, phosphorus and a little calcium – precisely the combination fruiting tomato plants appreciate.
Option 1: Bury banana peels directly
The simplest approach is to work them straight into the soil:
- Cut the peel into small pieces, around 1–2 cm long.
- Make a shallow trench at the side of the tomato stem.
- Place the pieces at a depth of 5–8 cm.
- Cover them with soil and water lightly.
At this depth, the peels break down quickly without smelling or attracting pests. Their nutrients become available to the roots after a few weeks. For plants grown in containers, use only very small amounts to prevent mould and fungus gnats.
Option 2: Liquid fertiliser made from banana peels
Those wanting more control can make a simple liquid feed from the peels:
- Roughly chop one or two peels.
- Put them into a bucket or large jar.
- Fill with water and leave for 24–72 hours.
- Strain the liquid and dilute it with water at a ratio of 1:3.
- Water directly around the root area, rather than over the foliage.
This “banana brew” is gentler than commercial tomato fertiliser, yet it supplies the plants with potassium regularly without overloading the soil. Applying it once every two weeks during the peak season is entirely sufficient.
“What appears to be kitchen waste becomes a liquid nutrient cocktail that gives tomato plants noticeably greater fruiting power.”
A second free wonder: wood ash for better flavour and firm fruit
Anyone using a fireplace or stove fuelled with untreated wood also produces a valuable fertiliser: finely sieved wood ash. It contains plenty of potassium, calcium and phosphorus – the classic “fruit mix” for tomatoes.
Wood ash is alkaline, so it should be applied deliberately and sparingly. Used at the right rate, it supports:
- reliable fruit set
- firm flesh
- a higher sugar content
- fewer problems with the typical blossom end rot (“black bottom”)
How to use wood ash safely on tomato plants
Important rules for handling ash include:
- Use ash only from untreated, natural wood.
- Do not use coal briquettes, painted timber or glued wood.
- Always sieve the ash to remove nails, leftover embers and pieces of wood.
In practice, the period from mid-July to early August has proved effective, right in the middle of the main fruiting season. Experienced gardeners then scatter roughly one tablespoon of fine ash (20–30 grams) around each plant. Important: do not allow ash to fall onto leaves or stems, as it can scorch them.
Afterwards, work it in lightly and water thoroughly so that the salts distribute through the soil. Around two weeks later, a second small application of ash can follow if dry weather continues. Nothing more is needed.
“Wood ash is a powerful helper – in a homeopathic dose. Those who overdo it damage the soil.”
The right foundation: even the best trick achieves little without base fertilisation
Banana peels and ash work like a turbo boost. For that boost to work, the engine – in other words, the soil – must first have a sound basic supply.
Experienced gardeners therefore prepare their tomato-growing spots when planting:
- Work compost or well-rotted manure into the planting hole as a base fertiliser.
- Add a little horn shavings or horn meal if necessary, for a long-lasting nitrogen supply.
- Use loose, deep soil so roots can grow downwards.
From June onwards, add a mild organic supplement every two weeks, such as diluted nettle feed. Once the first fruits have set, the emphasis shifts towards potassium: this is when banana peels, comfrey feed or wood ash come into play.
Avoiding common mistakes with natural tomato fertilisers
Natural remedies also depend on using the correct amount. Three pitfalls are particularly common in gardens.
| Mistake | Consequence | Better approach |
|---|---|---|
| Too much banana peel in a confined area | Mould, odour, fungus gnats | Use only small pieces, bury them shallowly and apply sparingly |
| Large quantities of wood ash | Soil becomes too alkaline, nutrient lock-up | Use no more than one tablespoon per plant, at most twice per season |
| Nitrogen fertiliser used into late summer | Lots of foliage, late ripening, greater susceptibility to disease | Switch to potassium-rich feeds once fruit has set |
What the nutrients do – and why tomatoes are so “greedy”
Tomatoes originally come from warmer regions with long growing seasons. They are programmed to produce as much biomass and fruit as possible within a few months. This genetic “full-throttle strategy” explains their high nutrient demand.
Potassium has a key role in this process. It regulates the plant’s water balance, supports the transport of sugars into the fruits and strengthens tissue. A tomato plant supplied well with potassium produces not only more fruit, but usually tastier fruit too.
Calcium helps build cell walls. A deficiency often appears as the dreaded blossom end rot: the underside of the fruit turns black and becomes inedible. Ash from untreated wood provides precisely this calcium in a small but effective amount.
Practical examples for everyday tomato growing
Anyone looking to turn tomatoes from a leafy monster into a harvesting machine can follow a straightforward pattern:
- When planting: work compost and a small amount of horn shavings deep into the planting hole.
- Until the first flowers appear: water lightly with diluted nettle feed every two weeks.
- From the first small fruits onwards: every two to three weeks, bury pieces of banana peel or water with banana liquid fertiliser.
- From mid-July to early August: apply one tablespoon of sieved wood ash per plant once, then at most once more after two weeks.
Regularly removing side shoots and ensuring the plants are well aired will further support fruit set. The initially attractive but purely green tomato plant can then visibly become a plant carrying far more trusses and ripening fruits within just a few weeks.
Natural fertilisers made from kitchen and stove leftovers are no replacement for good soil preparation, but they specifically fill the gaps tomatoes most often have. Understanding this simple principle not only saves money on specialist products, but also delivers noticeably more flavour and yield from every plant.

Comments
No comments yet. Be the first to comment!
Leave a Comment