
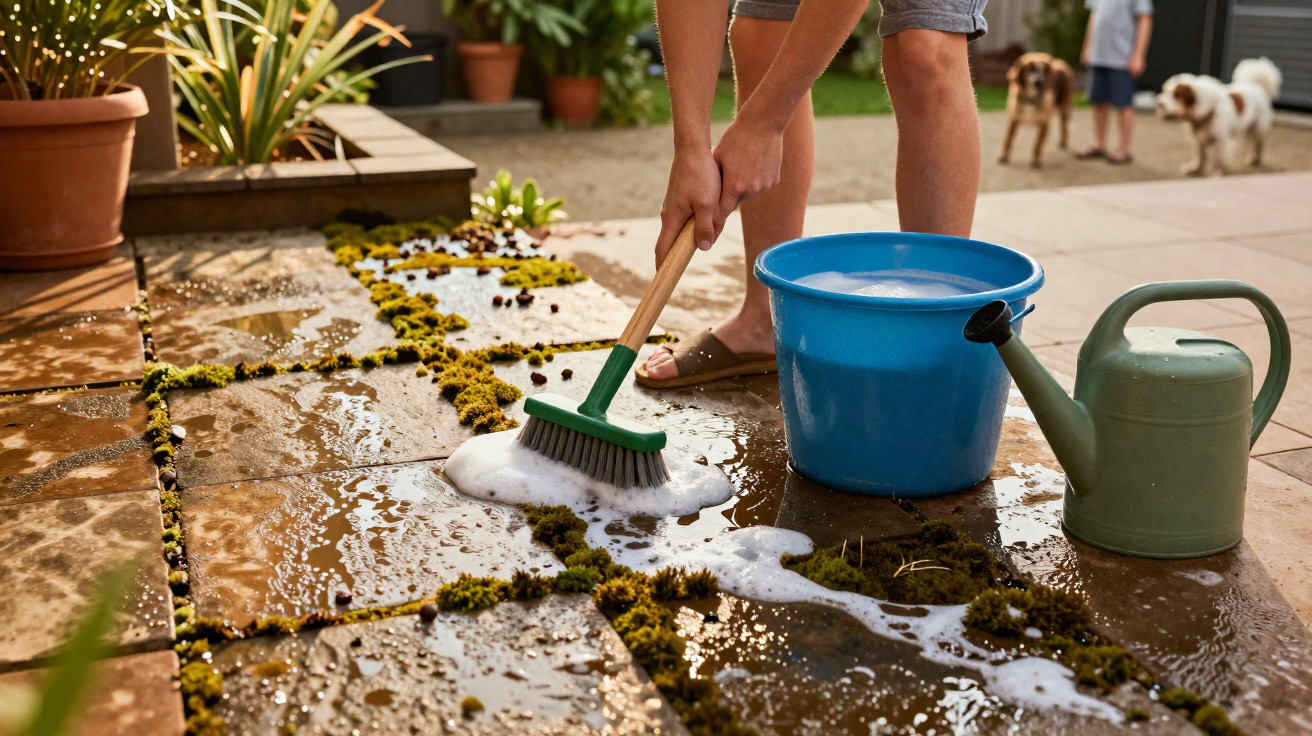
When stepping onto the patio in spring, many people face the same problem: slippery green growth, damp joints and uncertain footing. The automatic response is often to fetch the pressure washer from the shed, only to find a few weeks later that the surface looks much the same again. Yet a gentler, remarkably effective option may already be sitting in the kitchen cupboard.
Why moss on patios is more than a cosmetic issue
Moss can look charming, even rather romantic, on natural stone or weathered timber. On paths, steps and patio surfaces, however, it can quickly become hazardous. Its soft cushions absorb water and create a slippery layer, particularly after rain or in shaded areas.
“Moss significantly increases the risk of falls – especially for children, older people and anyone walking around in wet shoes.”
There is another issue that is frequently overlooked: moisture. Moss holds water against the surface like a sponge, with several possible consequences:
- Stone slabs may crack or develop fine fractures when frost arrives in winter.
- Timber decking weathers more rapidly, swells and can start to rot.
- Jointing material can loosen, leaving the surface uneven and unstable.
If green growth is tackled only half-heartedly, the problem returns year after year – and is often worse than before.
Why a pressure washer is usually the wrong tool
Many homeowners regard a pressure washer as the ultimate answer. High-pressure water blasts away the dirt, which appears logical at first. In reality, though, the machine can create further problems.
Damage to the surface and only partial results
A powerful water jet removes more than moss: it can also damage the surface itself. Natural stone may become roughened, concrete slabs can turn porous, and softer timber may splinter. The joints are particularly vulnerable, as pressure washing can wash away sand, grit or cement-based material.
There is a further drawback. Moss does not have conventional roots; instead, it spreads through spores and tiny plant fragments lodged deep in microscopic cracks and joints. While the water jet clears the visible growth, countless spores remain behind. As a result, the green coating can return within a few weeks – often sooner than expected.
“A pressure washer produces a quick visual improvement, but it addresses the underlying moss problem only on the surface.”
The overlooked solution: washing-up liquid instead of harsh chemicals
Frustrated homeowners often turn to aggressive moss killers from DIY shops. Such products frequently contain biocides that affect not only moss, but also soil organisms, insects and nearby flowerbeds. The same result can be achieved with a far milder product: ordinary washing-up liquid.
How washing-up liquid works against moss
Washing-up liquid contains surfactants. These substances break down grease and grime, while also attacking the moss’s waxy protective layer. That is precisely what makes them useful here:
- The surfactant solution penetrates the moss cushions.
- The plants’ protective wax layer breaks down.
- The moss dries out and the spores lose their viability.
This approach reaches not only the visible growth but also spores deep within joints and pores. It therefore lowers the likelihood of the surface turning green again shortly afterwards.
Step-by-step: making a patio moss-free with washing-up liquid
The method is straightforward, although a few details improve the outcome. Choose a dry day with no rain forecast.
1. Prepare the right mixture
For an effective treatment, all that is needed is a bucket of warm water and some washing-up liquid. Use the following as a guide:
| Amount of water | Washing-up liquid |
|---|---|
| 10 litres of warm water | approx. 6–9 tablespoons (biodegradable) |
Where sensitive plants are close by, choose a biodegradable washing-up liquid without bleach or strongly perfumed additives where possible.
2. Apply the solution and leave it to work
Pour the mixture generously over moss-covered areas, or spread it with a watering can. The surface should be thoroughly wet, but not left standing in water.
Then allow time for the solution to work. Depending on how thick the moss is, several hours of contact time can be beneficial. During this period, the soapy mixture breaks down the moss’s protective layer and gradually dries it out. After a while, the growth will turn brownish or grey, indicating that the plants have died.
3. Sweep away the moss and rinse
Once the moss appears dry and brittle, use a broom. A stiff plastic-bristled brush or natural-bristle brush is ideal. Metal bristles should be avoided, as they may scratch stone and timber.
Use firm strokes to dislodge the dry remains from the surface and the joints. Any residue can usually be removed easily with a little additional water and brushing.
Finally, rinse the area with clean water, using either a watering can or garden hose. The aim is to dilute remaining washing-up liquid so that lawns and beds are not harmed.
“The result is a clean surface achieved with an inexpensive product that is already found in almost every home.”
How long will the patio remain moss-free?
New moss growth can never be prevented completely, as spores arrive on the wind and with rain. However, the washing-up liquid method significantly reduces the number of spores in joints and pores. Many surfaces consequently remain clean for an entire season, especially when they receive sufficient sunlight.
In shaded corners that stay damp, moss can reappear more quickly. In these spots, a regular maintenance treatment in spring and autumn using a mild washing-up liquid solution helps remove new growth at an early stage.
Further ways to prevent moss on patios and paths
Anyone wanting longer-lasting results can take a few additional steps:
- Remove leaves and dirt regularly: Organic material retains moisture and provides an ideal growing base for moss.
- Repair the joints: Fill loose joints with suitable sand or jointing mortar so that less moisture can collect in them.
- Improve air and light: Where possible, thin out dense hedges or screening that completely shade the surface.
- Check the slope: Standing water encourages moss. Provide a slight run-off where feasible.
For timber decking in particular, regular cleaning with mild products and occasional oiling are also worthwhile, as this helps stop water penetrating the boards for prolonged periods.
What to consider around pets, children and flowerbeds
Washing-up liquid is among the less harmful cleaning products, but several points should still be kept in mind:
- Do not allow pets to walk across the wet surface during the contact period.
- Keep young children away until the area has been rinsed and dried.
- Around sensitive perennials or herb beds, avoid letting the solution run directly into the beds.
For extra caution, select an eco-friendly washing-up liquid, rinse the surface thoroughly after treatment and do not deliberately discharge the wastewater into the garden.
When professional help is still worthwhile
Very old, damaged patios with deep cracks and severely weathered joints can sometimes be restored only to a limited extent with household products. If entire slabs are loose, joints are breaking away or water permanently collects in particular places, a professional contractor can help renovate the surface properly.
For most ordinary stone or timber patios, however, using a bucket, washing-up liquid and brush once a year is sufficient – without a noisy pressure washer or aggressive chemicals. This keeps the area safer to walk on, looking well maintained and lasting considerably longer than many people expect.

Comments
No comments yet. Be the first to comment!
Leave a Comment