
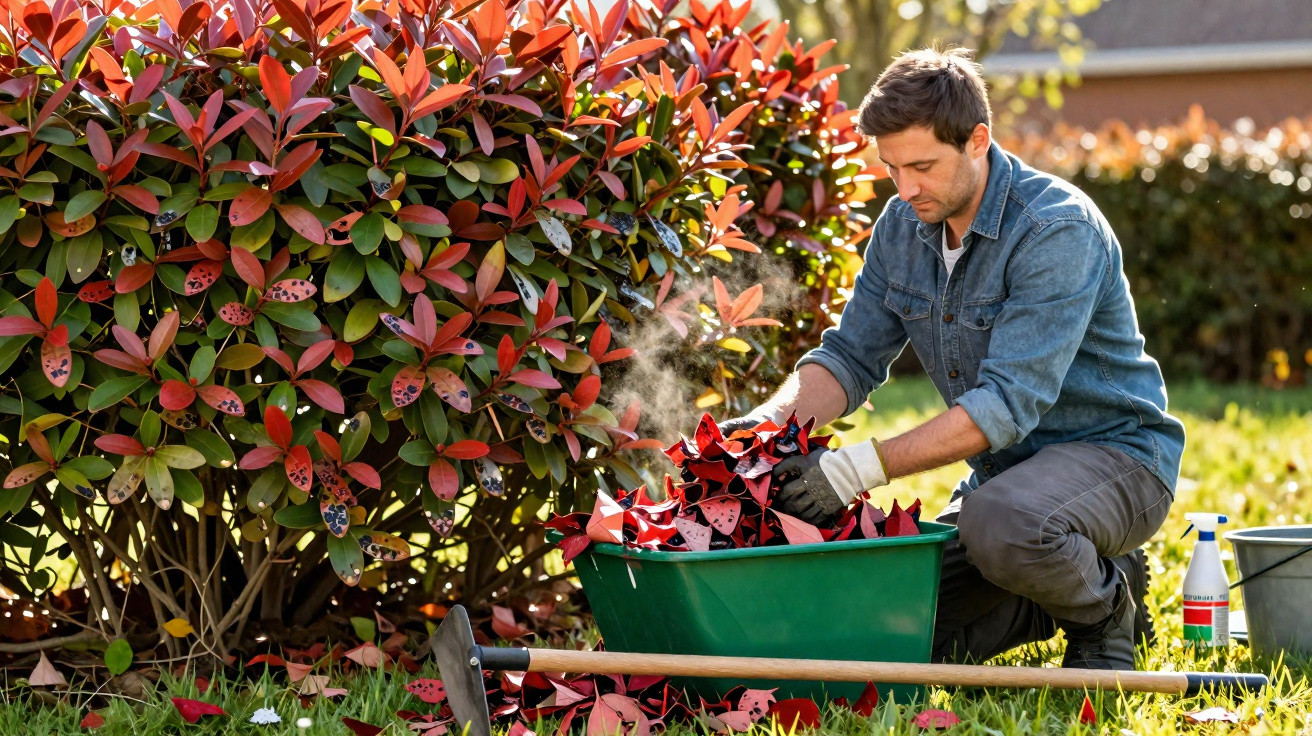
What may initially look like the end of a much-loved hedge is usually a very common fungal disease – and it can be greatly contained with a surprisingly simple, entirely natural measure. The crucial point is to take this step before spring arrives.
When black spots on Photinia are genuinely a warning sign
The popular Photinia × fraseri, particularly the ‘Red Robin’ variety, brings colour through winter with its red new growth. Yet these are precisely the plants favoured by a fungus called Entomosporium maculatum. It causes the notorious black spots on the leaves.
The problem generally starts at the base of the hedge: tiny brown to blackish marks appear first, often bordered with red. Over time, the spots grow larger, their centres become more greyish, the leaf turns yellow and eventually drops.
If you find whole piles of spotted fallen leaves at the foot of the hedge, you are very likely dealing with the classic Photinia leaf spot disease.
It is important to distinguish this from harmless changes. Natural leaf replacement tends to produce evenly yellowing leaves, without sharply defined circular marks. Thick, crusty, jet-black coatings, on the other hand, are more likely to indicate different fungal issues such as sooty mould.
This combination of symptoms strongly suggests the typical Photinia leaf spot disease:
- rounded, clearly visible dark spots
- in some cases, a reddish border around the spots
- substantial leaf drop, particularly in the lower part of the hedge
- a large build-up of diseased leaves on the ground directly beneath the shrubs
Why the fungus surges in spring: the hazardous carpet of leaves
The real culprit is often not in the leaves that are still green, but in the unobtrusive layer of fallen foliage beneath them. During winter, large numbers of diseased leaves collect on the ground, and most fungal spores overwinter inside them.
Experts assume that a considerable proportion of infectious spores is contained in this fallen foliage. If it remains in place all winter, it becomes a genuine reservoir of infection, ready for the first warm rainfall of spring.
The fungus spreads in a remarkably straightforward way: raindrops strike the infected leaves, collect spores and forcefully splash them onto the young, fresh shoots in the lower areas of the shrubs. This is exactly where new infections begin.
The disease does not arrive through the roots; it “jumps” from the ground onto fresh leaves with every splash of rain.
A densely planted hedge, perhaps growing in heavy, damp soil, creates ideal conditions for it. Air circulation is poor, leaves dry only slowly after rain, and in a wet year the issue can escalate dramatically.
The one natural step everyone should take before spring
The most effective way to tackle black spots is remarkably basic and needs no chemicals at all: clear up thoroughly. The key is doing it early enough.
The ideal window is from late February to early March, during a few dry days while the buds have not yet properly started growing. At that point, it is worth carrying out a focused clean-up of the entire hedge.
A step-by-step approach for home gardeners
- Put on protective gloves: leaves and twigs can be sharp, and gloves make the task more comfortable.
- Rake carefully: use a fan rake, working from the trunk outwards, and gather all foliage from beneath the hedge.
- Remove concealed leaves too: pull out by hand any leaves caught in branch forks or trapped within the dense lower growth.
- Bag everything up: place all diseased material in refuse sacks and take it for local authority disposal.
- Never compost it: spores usually survive perfectly well in a home compost heap and can later find their way back into the beds.
Removing the entire carpet of leaves takes away the fungus’s most important starting point for the new season.
Many gardeners underestimate this measure and turn straight to sprays instead. However, agronomists have pointed out for years that physical measures – sweeping, raking and cutting out affected growth – have a far more lasting effect than reaching immediately for chemicals.
Helpful support: Bordeaux mixture, plant preparations and correct watering
Once the area beneath the hedge has had a thorough “spring clean”, protection can be increased further. A familiar option for home gardeners is Bordeaux mixture, a copper-based fungicide permitted in organic growing. Typical application rates are between 10 and 20 grams per litre of water, although the instructions on the individual product packet should always be followed.
Applying it shortly after removing the foliage can provide additional protection for young buds. Those wishing to garden as naturally as possible can use plant tonics either alongside it or as an alternative. Popular choices include:
- Horsetail decoction (field horsetail): helps strengthen leaf tissue and supports the plant’s natural defences.
- Nettle liquid feed: supplies nutrients and encourages overall growth, which benefits weakened plants.
Proper watering is at least as important: Photinia should only be watered at ground level, directly around the roots. Using a sprinkler to “rain” over the whole hedge in spring prolongs the period of leaf wetness every time – a gift to any fungus.
Never spray over the foliage when the hedge is already struggling with leaf spot.
Light, air and pruning: making the hedge less susceptible
As well as clearing fallen leaves, it is worth taking a critical look at the structure of the whole hedge. Photinia is frequently planted very close together because gardeners want an opaque screen as quickly as possible. Over time, this develops into a dense thicket with hardly any air movement.
A light, selective prune in the lower section can work wonders. Remove several older branches completely at the base and shorten others slightly. The aim is to let light and air back into the middle of the hedge, allowing the leaves to dry more quickly after rain.
Useful rules of thumb for care:
- thin out heavily tangled areas in late winter
- cut diseased, badly affected shoots back to healthy wood
- do not leave prunings behind; dispose of them
- allow sufficient space between shrubs when planting a new hedge
How serious is the Photinia fungus – and when should you act?
The fungus often appears more alarming than it is in many cases. A few spots and light leaf loss in the lower area do not automatically mean the hedge is beyond saving. It becomes serious when large sections of the canopy are repeatedly stripped of foliage over several years. The plant then becomes progressively weaker and more susceptible to frost damage or other diseases.
Anyone who responds to a severe outbreak in the first year can often quickly break the cycle of overwintering and reinfection. The risk rises markedly after especially wet years with heavy rainfall, so careful inspection is worthwhile as early as late winter.
Common questions from everyday gardening
Can I dispose of affected leaves in general waste?
Yes, and this is actually the safest method. In general waste or local authority green-waste collections, temperatures are usually high enough to kill fungal spores.
Will cutting it right back to the base help?
Photinia will usually regrow after radical pruning, but this does not resolve the spore problem in the ground. Without thoroughly removing fallen leaves, the new generation of foliage faces the same risk all over again.
Is the disease dangerous to other shrubs?
The fungus is fairly specialised in certain members of the rose family, such as Photinia. Although other fungi can cause similar symptoms, these spots do not generally spread indiscriminately to every garden plant.
So, anyone who loves their hedge does not need to be a professional botanist. Bare ground beneath the shrubs, air moving through the centre of the hedge, and targeted use of a leaf rake, secateurs and – where necessary – a little Bordeaux mixture are often enough to restore Photinia to good condition. Very often, that single clean-up session at the end of February determines whether the hedge produces fresh red growth in spring or begins the season covered in black spots.
Comments
No comments yet. Be the first to comment!
Leave a Comment