
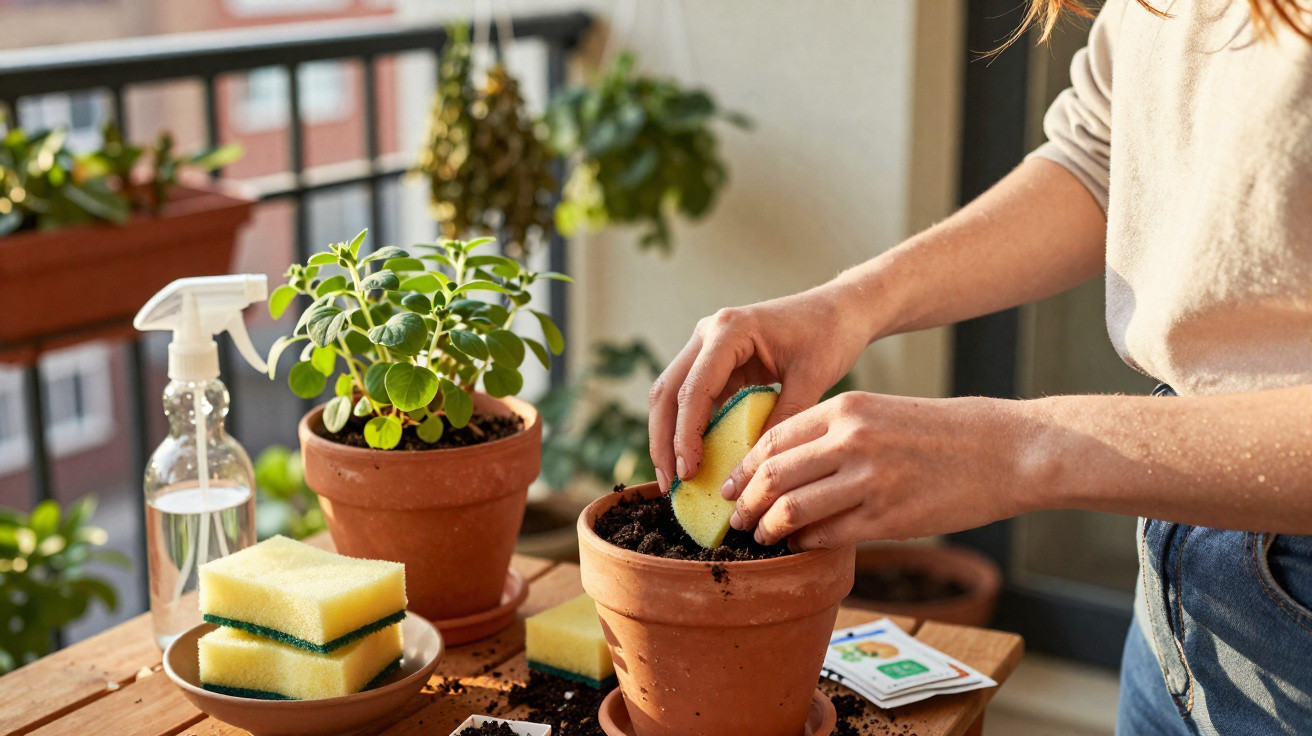
A kitchen sponge usually has a short working life: after a few weeks of scrubbing, it is thrown away. Yet this piece of plastic can be reused surprisingly effectively, particularly in the garden or on the balcony. Anyone who tries the idea once may soon wonder why they spent years binning old sponges.
Why old sponges are suddenly useful in the garden
Gardeners have long used coffee grounds, eggshells and tea leftovers to support their plants. Old sponges may seem less “natural” at first, but they offer a quality that is extremely valuable in the garden: they hold water, release it gradually and provide a little insulation against cold.
A disinfected kitchen sponge becomes a mini water reservoir in a flowerpot and protects delicate roots from drought stress.
This makes them particularly useful for people who cannot water constantly during summer, or whose balcony plants regularly wilt on hot days. Before placing a sponge in a pot, however, it must be cleaned thoroughly.
First step: cleaning used sponges safely
A sponge from the kitchen or bathroom can harbour plenty of bacteria. It should not come into contact with soil and roots in that condition. Fortunately, it can be prepared with very little effort.
Making a sponge suitable for the garden
- Pour boiling water over it: Place the sponge in vigorously boiling water for several minutes. This kills a large proportion of germs.
- Use the microwave: Heat the wet (!) sponge briefly on a high setting. It must be damp, as there is otherwise a risk of fire.
- Soak it in vinegar: Put it into a mixture of water and clear household vinegar. Vinegar works against many bacteria.
Then rinse the sponge thoroughly and allow it to dry completely. If it still smells unpleasant after cleaning or is visibly brittle, it is better to dispose of it after all.
Mini water reservoirs for pots and balcony plants
The most obvious use concerns water management. Sponges absorb watering water and slowly release it back into the compost, making them ideal for pots, balcony planters and small beds.
Sponge in a pot: how the trick works
The simplest approach is to moisten the clean sponge and incorporate it directly into the pot.
- At the base of the plant: Press the soft part of the sponge lightly into the top layer of compost, immediately beside the root area.
- At the bottom of the pot: When repotting, place a sponge in the base of the pot and add compost over it.
- For balcony planters: Lay several sponges next to one another along the bottom of the planter before filling it with compost.
The sponge acts as a small water tank. Once watered, it retains moisture and releases it little by little. This is especially helpful in balcony planters with limited compost, where conditions can become extremely dry.
Anyone going away for the weekend can place several wet sponges in the planters – many plants will cope better with two to three hot days this way.
Some amateur gardeners even use sponges instead of clay pebbles at the base of a pot. This creates an area that stays moist without becoming completely waterlogged, which is particularly useful for thirsty plants such as hydrangeas or tomatoes grown in containers.
Sponges as a germination aid for seeds
A less familiar option is to use sponges as a base for raising young plants. They provide a consistently lightly moist and airy environment – exactly what many seeds need.
A kitchen sponge becomes a mini greenhouse
This method requires only a knife and a shallow tray:
- Cut the sponge into small cubes or strips.
- Moisten the pieces well; they should be damp but not dripping wet.
- Press one seed gently into each piece of sponge.
- Position the pieces close together in a tray and place it somewhere bright and warm.
The even moisture allows the seeds to swell and often germinate more quickly. Once the seedlings are a few centimetres tall, transfer the sponge and plant together into compost. Over time, the sponge either breaks down or remains in the soil as an additional moisture reserve.
| Suitable for sponge propagation | Better sown conventionally in compost |
|---|---|
| Cress, rocket | Carrots |
| Basil, oregano | Parsnips |
| Tomatoes, peppers (started indoors) | Peas, beans outdoors |
An insulating layer against cold and dryness
Sponges can also shield plants from changing temperatures. Their porous material retains a little warmth and protects the surface layer of compost.
How gardeners use a sponge as “mini mulch”
A damp sponge placed on the compost with its soft side facing downwards and held in place with a stone creates a small insulating layer above the root area. It is helpful in two situations:
- Cool spring nights: Sensitive young plants suffer less from sudden temperature drops.
- Hot, dry summers: The upper layer of compost dries out more slowly, leaving roots in a moist area for longer.
A sponge acts like targeted mulch – where a plant is particularly sensitive.
Temperatures can fluctuate sharply, especially in pots standing on stone or concrete surfaces. In these conditions, even a thin insulating layer can noticeably relieve stress on the roots.
Using scents to deter troublesome insects
Alongside water and warmth, a sponge can also be “charged” with scents. Aphids, mosquitoes and ants dislike certain smells.
A natural scent barrier instead of harsh chemicals
Adding a few drops of essential oil to small pieces of sponge can help protect sensitive plants. Suitable options include:
- Mint oil (spearmint or peppermint)
- Lemon oil or lemongrass oil
- Lavender oil around seating areas and roses
Place the small sponges near affected plants or where ants regularly travel. Their scent remains noticeable for several days before fading and needing to be refreshed. For beneficial insects such as bees, this method is considerably gentler than many shop-bought sprays.
What to consider when using sponges in the garden
Although the trick sounds straightforward, there are several points to keep in mind:
- Use clean sponges only: Very dirty or musty examples do not belong near plants.
- Avoid aggressive cleaning-product residues: It is best to discard sponges previously used with harsh cleaners.
- Check them regularly: If mould or unpleasant smells develop, remove the sponge immediately.
- Consider the plastic: Many sponges are made from plastic and rot down very slowly. Anyone wishing to avoid this can choose versions made from natural fibres.
When used sensibly, sponges have a longer life cycle rather than going straight into the general waste bin. This saves resources and money, particularly when numerous plants need to be cared for in a small space.
Which plants benefit most
Not every plant needs a built-in water reserve. Certain groups benefit especially strongly:
- Thirsty balcony plants such as geraniums, petunias and fuchsias.
- Container plants including hydrangeas, tomatoes and peppers, which quickly wilt on hot days.
- Young plants with delicate roots during the propagation stage.
- Herbs on sunny windowsills, growing in small pots.
This method is less suitable for plants that prefer very dry conditions, such as cacti and many succulents. Too much moisture can easily lead to root rot.
How this trick fits into a sustainable everyday routine
Reusing old sponges in the garden fits a trend already under way in many households: throwing away less and repurposing more. Eggshells are added to soil, coffee grounds go around roses or hydrangeas, and glass jam jars become seed containers.
Sponges add another item to that list. They show that even inconspicuous, inexpensive products can still serve a useful purpose when their structure is understood: numerous air pockets, strong absorbency and a slight insulating effect. Each of these qualities can be used deliberately in the garden, without expensive specialist equipment from a DIY shop.
Anyone testing the method step by step will quickly discover where it works best: in pots, on the balcony, in raised beds or in a greenhouse. Eventually, an old sponge may no longer automatically be headed for the bin, but instead make its way to the plants first.
Comments
No comments yet. Be the first to comment!
Leave a Comment