
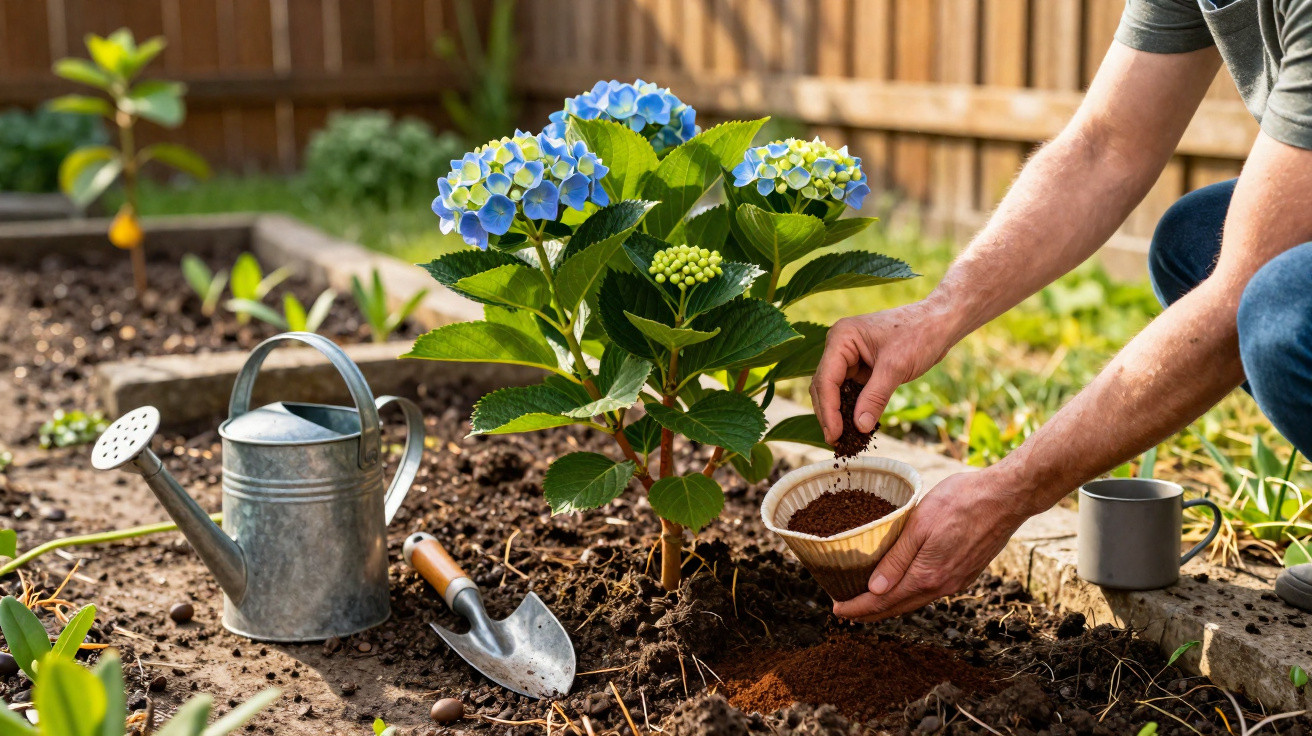
If you want to stand before lavishly flowering hydrangeas in summer, there is no need to spend heavily on specialist fertiliser at the garden centre. What matters is choosing the right moment – along with a natural nutrient boost that is often an overlooked household by-product. March in particular determines whether the shrubs struggle later on or perform at their best.
Why March determines abundant hydrangea blooms
In March, hydrangeas emerge from their winter dormancy. Their buds begin to swell, the first new shoots appear and the roots become active again. At this point, the plant establishes the foundation for the entire gardening year.
Providing hydrangeas with organic fertiliser in a targeted way during March strengthens the shoots and builds the energy reserves needed for abundant flowering.
Hydrangeas are ornamental shrubs with high nutrient requirements. Above all, they need plenty of these three elements:
- Nitrogen (N): promotes strong, deep-green foliage
- Phosphorus (P): supports flower formation and root development
- Potassium (K): reinforces cell structure and resilience
They also require trace elements such as iron, which helps keep foliage healthy and prevents yellowing. Organic fertilisers, including mature compost, well-rotted farmyard manure or a specialist organic fertiliser for hydrangeas, release these nutrients gradually and evenly. They also improve soil structure, which is particularly valuable in heavy, compacted ground.
Hydrangeas thrive especially well in slightly acidic soil. A pH value of between 5 and 6 is considered ideal. Within this range, the roots can absorb nutrients effectively, and for certain varieties the soil reaction can even affect flower colour – producing blue blooms in Hydrangea macrophylla, for example, in more acidic soil.
A surprising kitchen fertiliser: coffee grounds instead of the bin
One natural helper is often carelessly discarded: dried coffee grounds. Many home gardeners swear by them, as their hydrangeas appear noticeably more vigorous and flower more intensely when they are used.
Coffee grounds supply nitrogen in particular and create a slightly acidic soil reaction – both of which noticeably benefit many hydrangea varieties.
The dried residue from a filter coffee machine or bean-to-cup machine provides several advantages:
- Nutrients: chiefly nitrogen, plus smaller quantities of potassium and other minerals
- Soil improvement: the organic matter loosens the soil and encourages soil life and aeration
- Slight acidification: suitable for hydrangea-friendly pH levels
There is also a practical side effect that many gardeners notice: coffee grounds scattered around the shrub can be unattractive to certain pests. Slugs and ants often avoid these areas, giving young shoots additional protection.
How to use coffee grounds correctly: step by step
For this kitchen waste to become an effective fertiliser without putting strain on the roots, correct application is essential:
- Allow the coffee grounds to cool after brewing.
- Spread them thinly over a tray or plate.
- Leave them to dry for at least 24 hours, until they no longer clump together.
- Use only small quantities: around one to two tablespoons per shrub.
- Repeat every four to six weeks – but no more frequently.
Do not apply fresh, damp coffee grounds directly to the soil in large amounts. They can form clumps, prevent adequate aeration and, in extreme cases, become mouldy. Rather than feeding the roots, this weakens them.
The ideal March routine for strong hydrangeas
Giving hydrangeas a clear care routine now is often rewarded in summer with significantly larger and more numerous flower heads. A simple, tried-and-tested approach is as follows:
1. Prepare the soil around the shrub
First, clear the area around the base of the hydrangea. Remove old leaves, dead plant material and any visible weeds carefully. This allows air and water to reach the soil more easily again, while pests lose potential hiding places.
Then gently loosen the top layer of soil. A small hand cultivator is sufficient; there is no need to dig deeply. The important thing is to avoid damaging the roots, so work only near the surface.
2. Work in the main organic fertiliser
The next step is the main nutrient boost. Suitable options include:
- mature, dark compost
- well-rotted manure, such as cow or horse manure, which must be properly aged
- specialist organic hydrangea fertiliser in granular form
Depending on the material, spread a layer 2 to 3 centimetres deep over the root area. Avoid direct contact with the shoots so that nothing is scorched. Next, work it lightly into the loosened soil and water thoroughly. The water releases the nutrients and carries them down to the roots.
3. Use coffee grounds as an addition, not a replacement
Dried coffee grounds supplement this basic feeding programme; they do not replace it. Scatter them in a very fine, thin layer around the shrub, creating a lightly dusted ring a few centimetres away from the stem.
Getting the dosage right is important: applying too much at once can make the soil overly acidic and stress the roots. If you are unsure, start with less than one tablespoon per plant and monitor its response over the following weeks.
Consider the climate zone: do not start equally early everywhere
The ideal timing depends greatly on the region. In milder areas, the March routine can often begin at the start of the month. In colder regions where late frosts are likely, it is worth waiting.
| Region | Recommended starting time |
|---|---|
| Mild locations, wine-growing areas | early March |
| Central Germany, temperate areas | mid-March |
| Higher elevations, the cooler north, the edge of the Alps | late March to early April |
The buds provide useful guidance: as soon as they are clearly swelling and the first green tips become visible, the plant is starting into growth and can use the fertiliser. If severe night frosts are still expected, it is better to delay a little.
What else strengthens hydrangeas – and what harms them
Alongside fertilising in March, several other factors can make a major difference:
- Position: light shade or morning and evening sun are ideal; intense midday sun weakens the plants.
- Consistent moisture: hydrangeas dislike both bone-dry soil and waterlogging.
- Mulch layer: a thin covering of bark mulch or leaves retains moisture and protects soil structure.
Very calcareous soil or irrigation water with a high lime content is unfavourable. The leaves may then turn pale while the veins remain dark green – a sign of nutrient deficiency even though fertiliser has been applied. In such cases, a slightly acidic growing medium and, if necessary, rainwater can help.
Practical everyday examples from the garden
Many home gardeners report that hydrangeas fed solely with mineral fertiliser for years appear substantially stronger after switching to organic care. Their shoots become woody more effectively, the flowers last longer and the plants recover more quickly after dry spells.
A typical situation is an older shrub that flowers only weakly, with shoots that flop over in the first summer rain. When compost and moderate amounts of coffee grounds are applied consistently in March, sturdier stems and larger flower heads often become apparent as early as the second year.
Anyone with many plants in the garden can collect and divide up the coffee grounds: one portion can go to hydrangeas, while the remainder can be used for rhododendrons, blueberries or azaleas – all plants that prefer slightly acidic soil. In this way, kitchen waste becomes a valuable part of a healthy planting system throughout the garden.


Comments
No comments yet. Be the first to comment!
Leave a Comment